Actions Panel is a group of tabs and buttons which can help you to pull the required report, create/edit/duplicate/archive campaigns and their elements, update traffic cost etc.
Much of your work with BeMob panel is tacking place in this section.

¶ Home
Home tab is subdivided into a number of sections.
Some of these sections are used to create campaigns and their elements and pull their reports: Campaigns, Offers, Landings, Flows, Traffic Sources and Affiliate Networks.

👉 The detailed information about these sections is available in our guide.
Other sections are used to pull the corresponding reports: Conversions, Postbacks, Countries, ISP, Devices, OS, Browsers and Errors.

👉 The detailed information about these sections is available in our guide.
¶ BeMob Logo
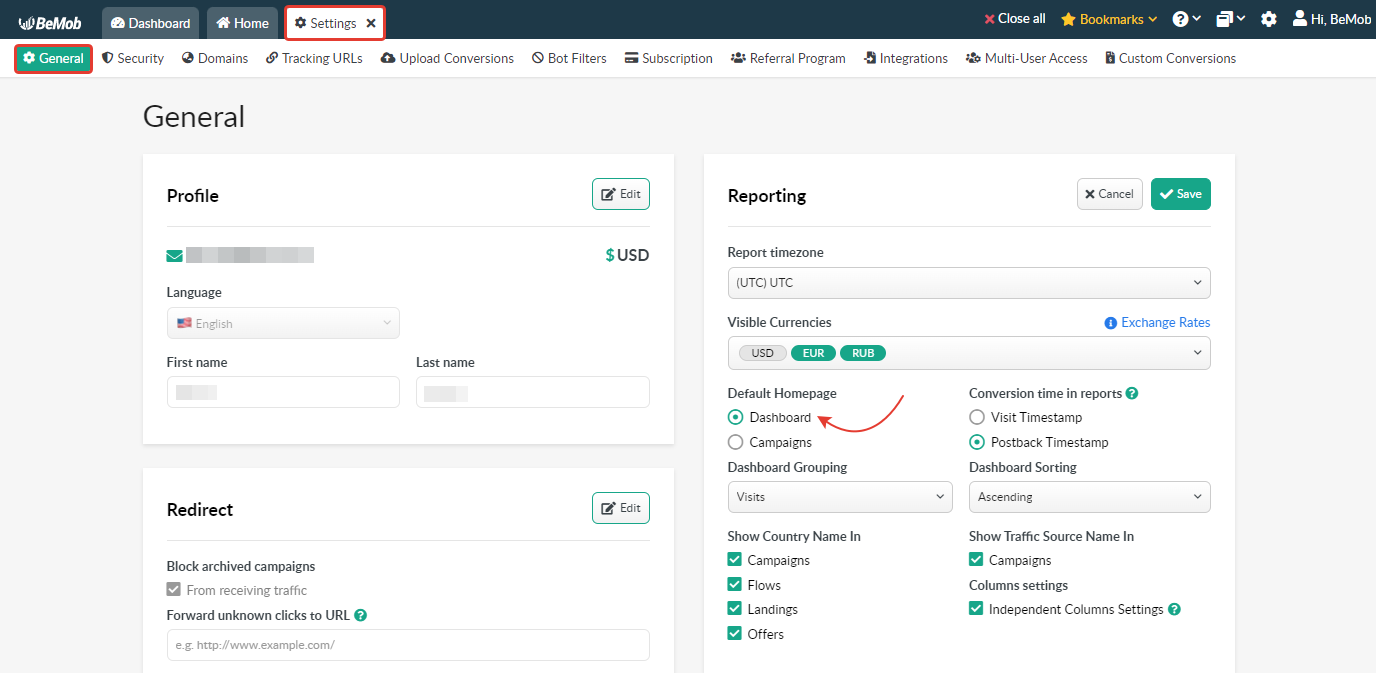
If you click BeMob logo, you will be redirect to either Dashboard or Campaigns section.

It depends on the Default Homepage settings.
¶ Bookmarks
Bookmarks section is used to provide you with the quick access to the most important or frequently viewed reports.

👉 The detailed guide about how to use Bookmarks option is available here.
¶ Question Mark
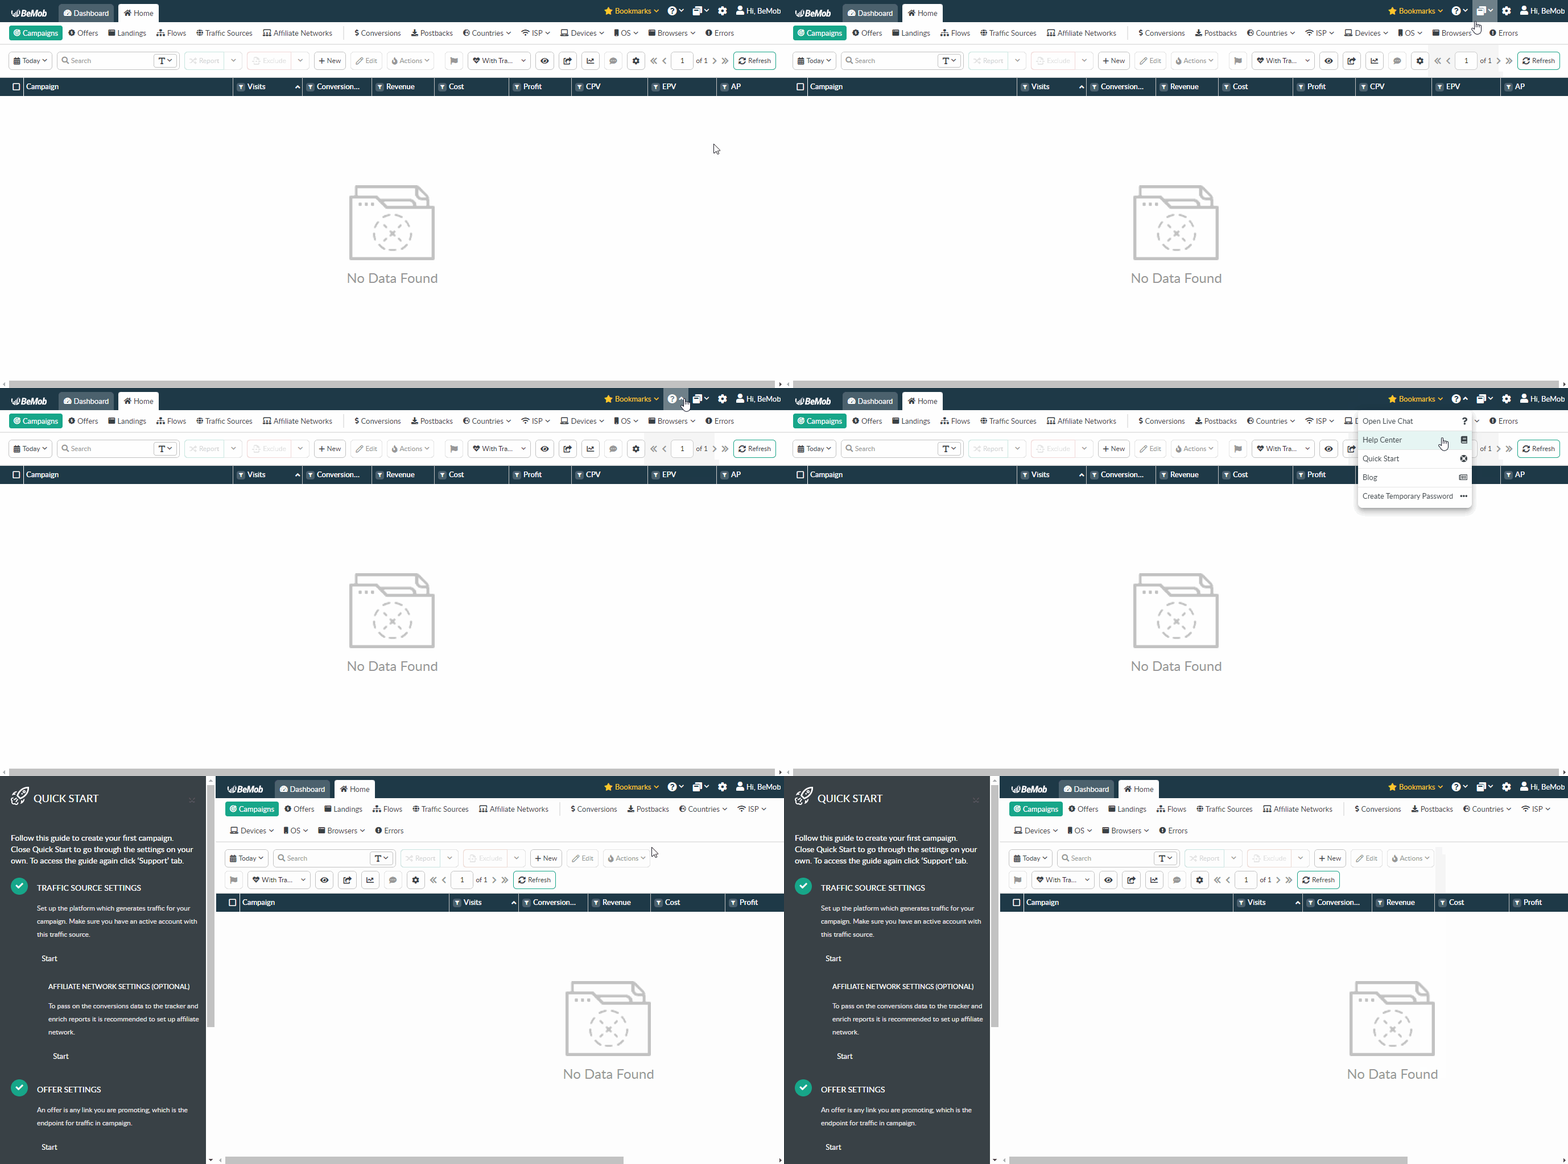
The Question Mark icon hides the following options: Open Live Chat, Help Center, Quick Start, Blog and Create Temporary Password.
¶ Open Live Chat
Open Live Chat button opens Live Chat window.
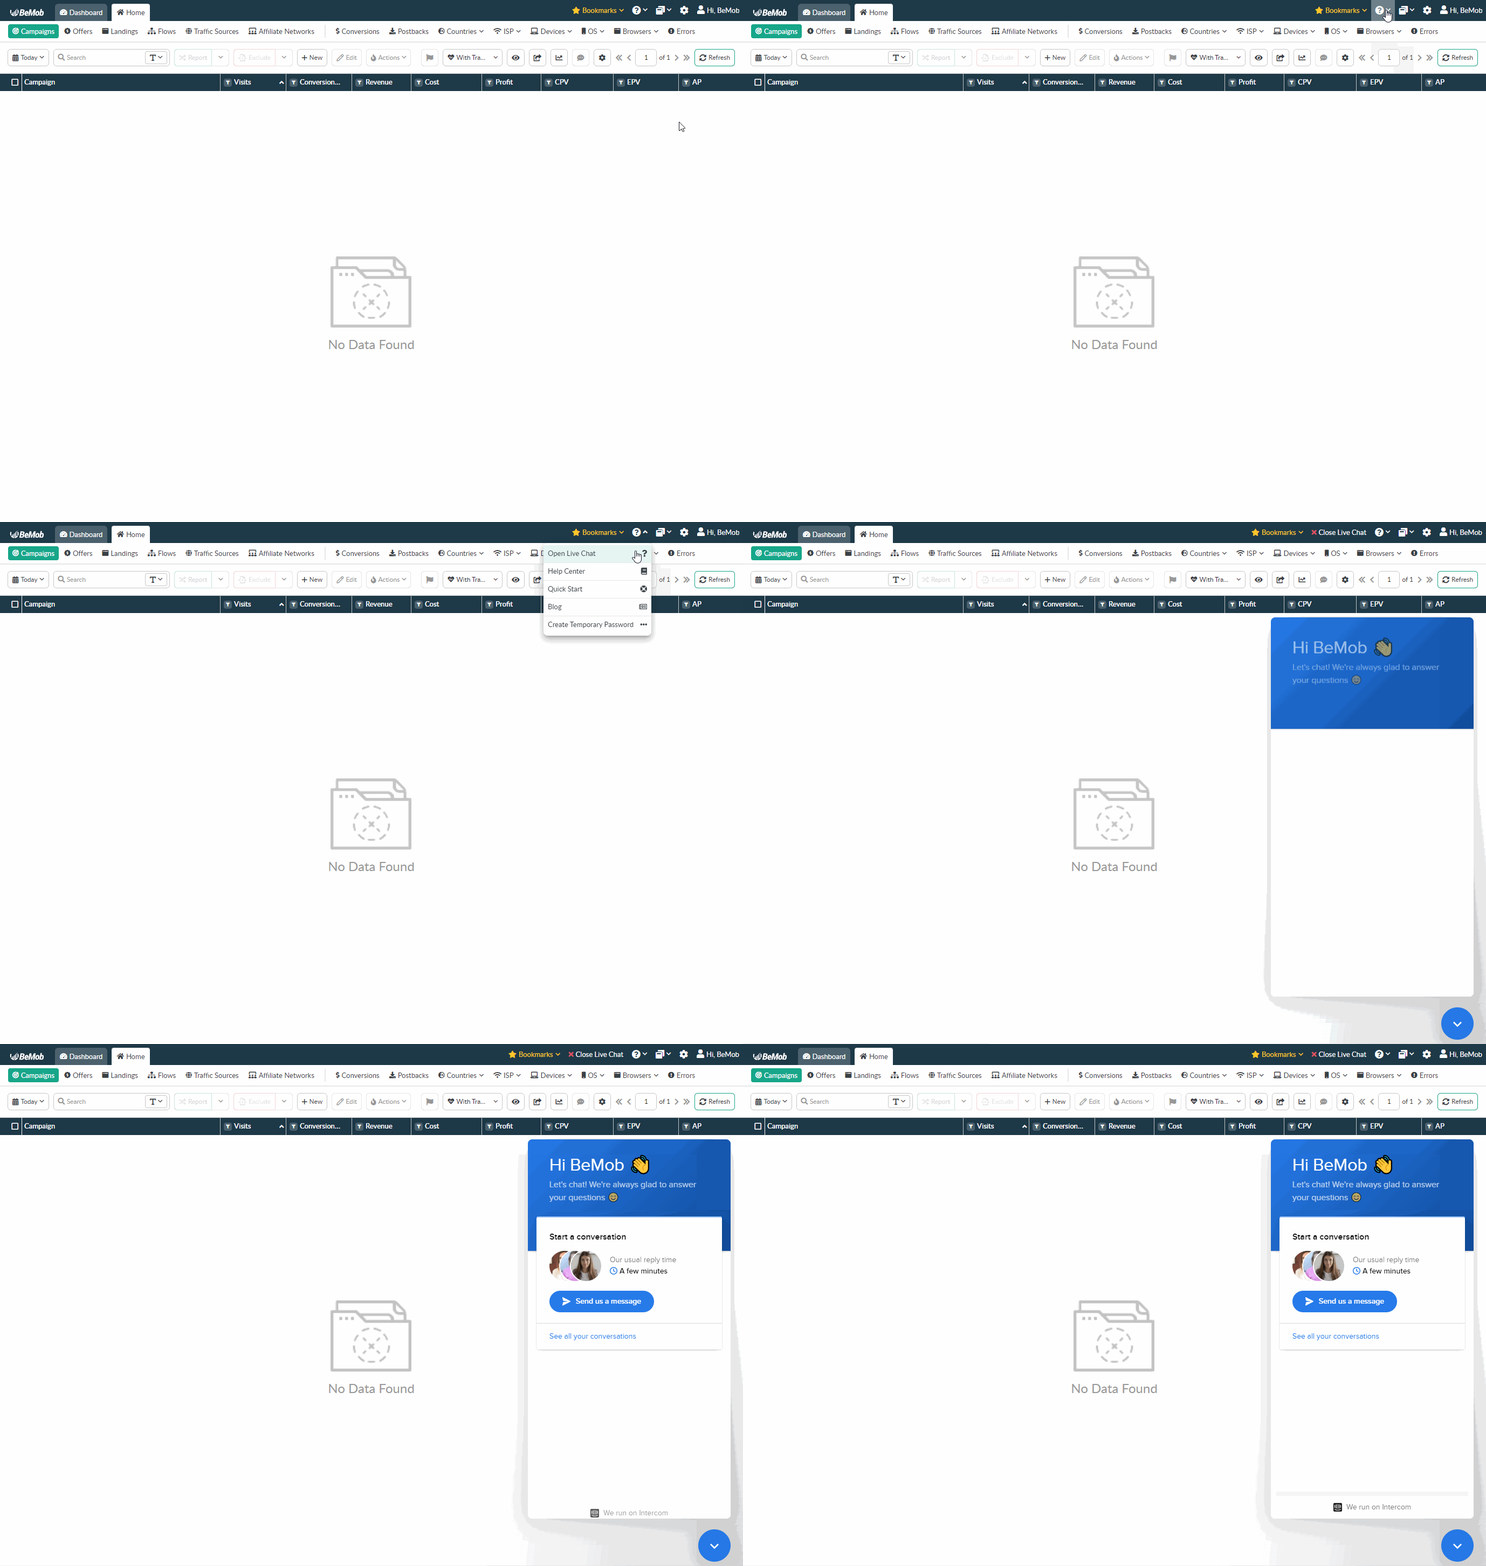
Use Intercom icon to hide/reopen the live chat.
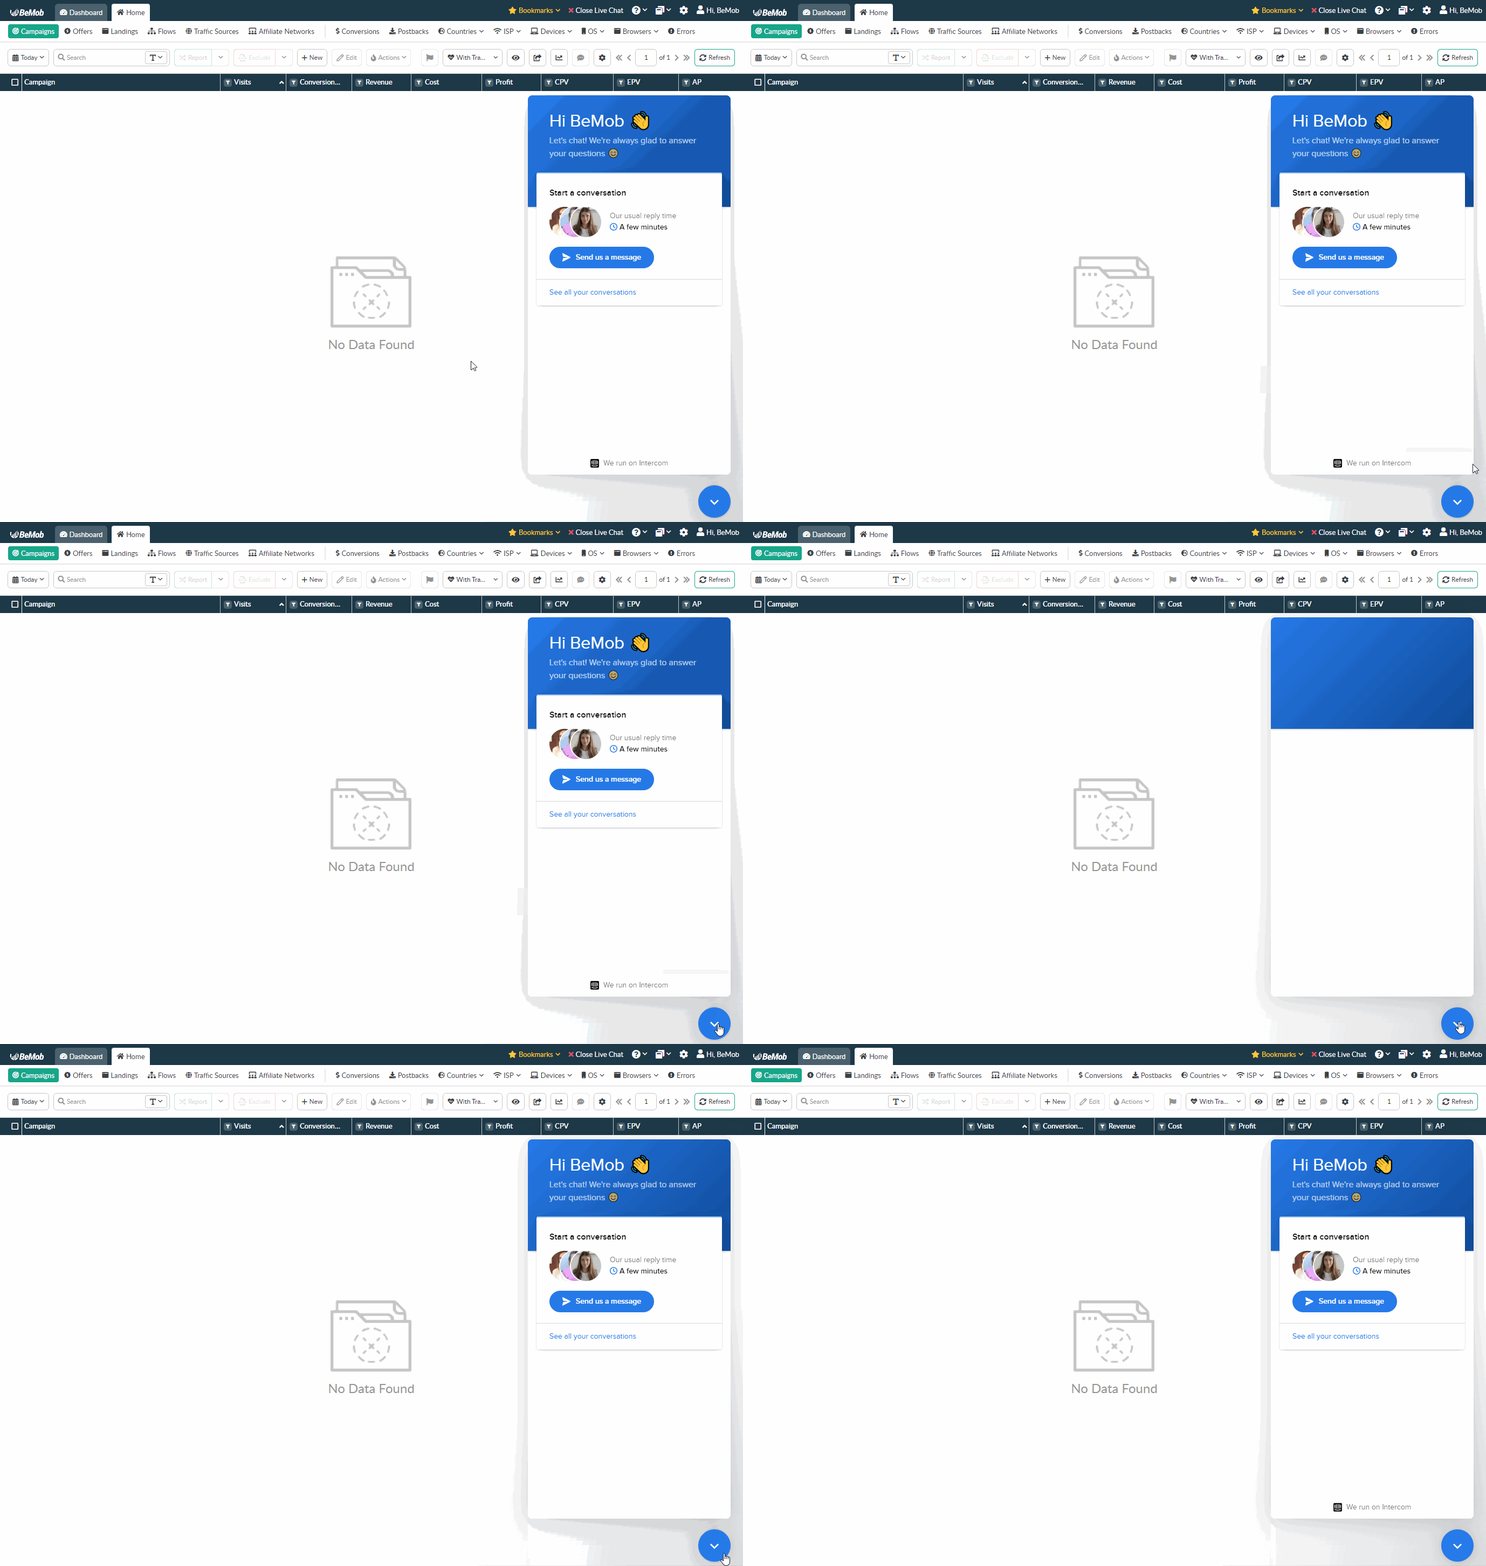
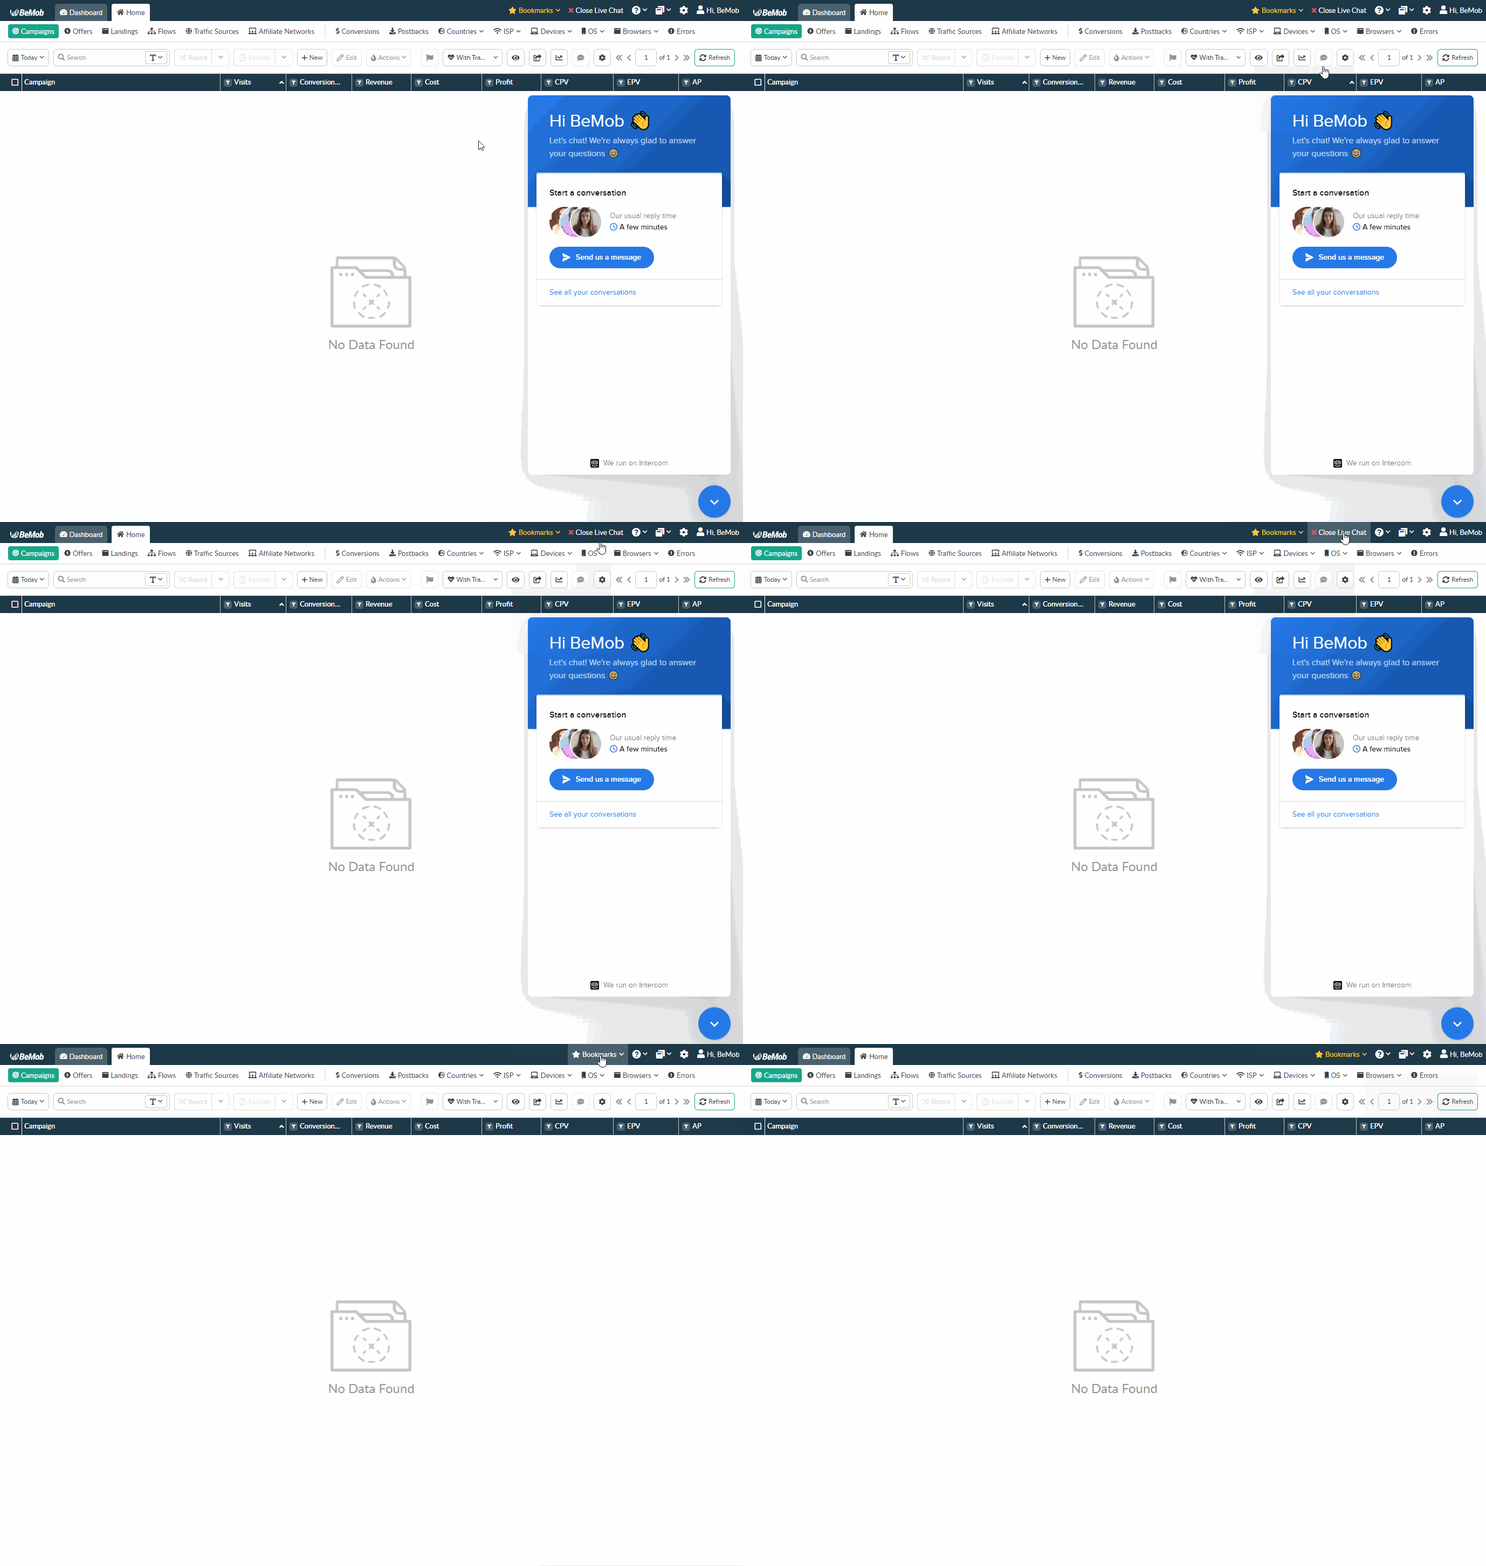
Press Close Live Chat button on the panel to close Live Chat window.
¶ Help Center
Help Center button opens BeMob documentation with the essential guides in a new tab.

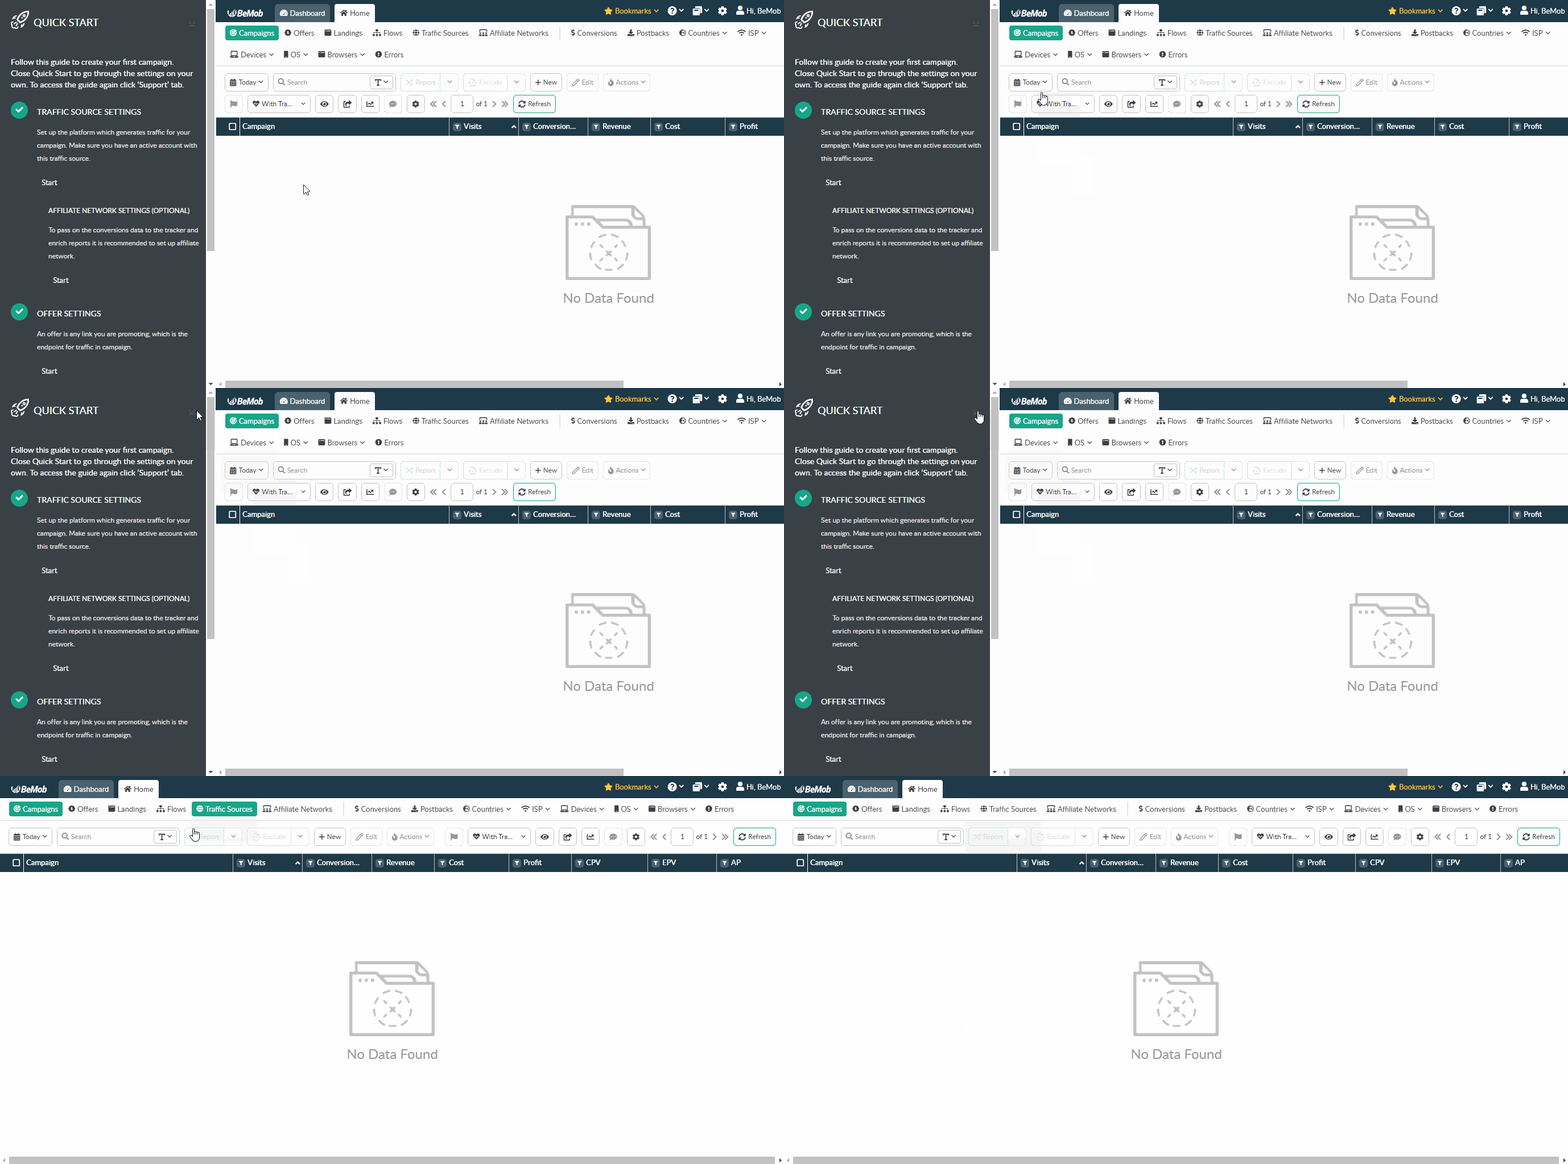
¶ Quick Start
Quick Start button opens Quick Start tour.
This option is aimed to help you with the first campaign settings.
To end Quick Start tour press X button.
Blog button opens BeMob blog with the essential posts in a new tab.

¶ Create Temporary Password
Create Temporary Password button allows you to generate temporary password for BeMob support team.

Please don't share your temporary password with anyone except BeMob support team managers.
Press Copy button to copy your temporary password.

The generated temporary password can be used only once till the period specified in the Temporary password window.

Press Close button to close the Temporary password window.

¶ Folder Icon
Folder icon hides the list of Workspaces available in your BeMob account.

This option allows you to display data of all Workspaces/certain Workspace(s).
Mark the required checkbox(es) and press Apply Changes button.

Click gear icon to be redirected to the Multi-User Access settings.

👉 The detailed information about Workspaces is available in our guide.
¶ Gear Icon
Gear icon opens Settings of your BeMob account.
![]()
To close the Settings press X button.

¶ User Name Icon
If you click the icon with your name, you will be provided with the option to Logout from your BeMob account.

¶ Time and Date Range Selection
To change time and date range of any report, click Calendar icon on the panel.
You can view the statistics data for Today, Tomorrow, Last 3 days, Last 7 days, Last 30 days, This Month, Last Month and custom Date Range.
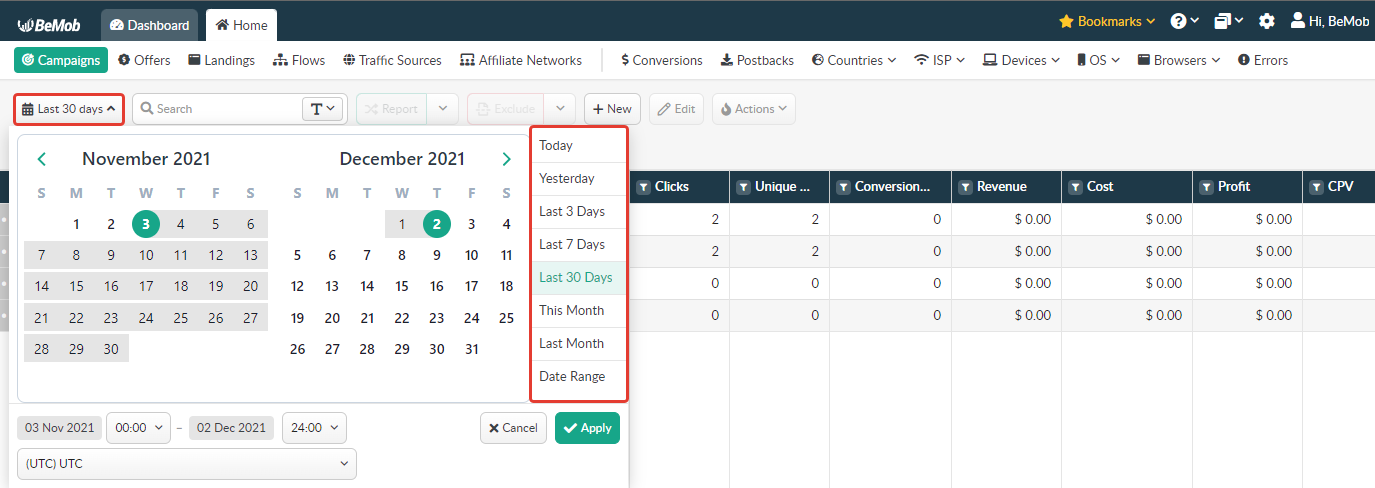
To set custom date and time select Date Range and use Calendar.
Once the desired date and time selected, click on Apply.
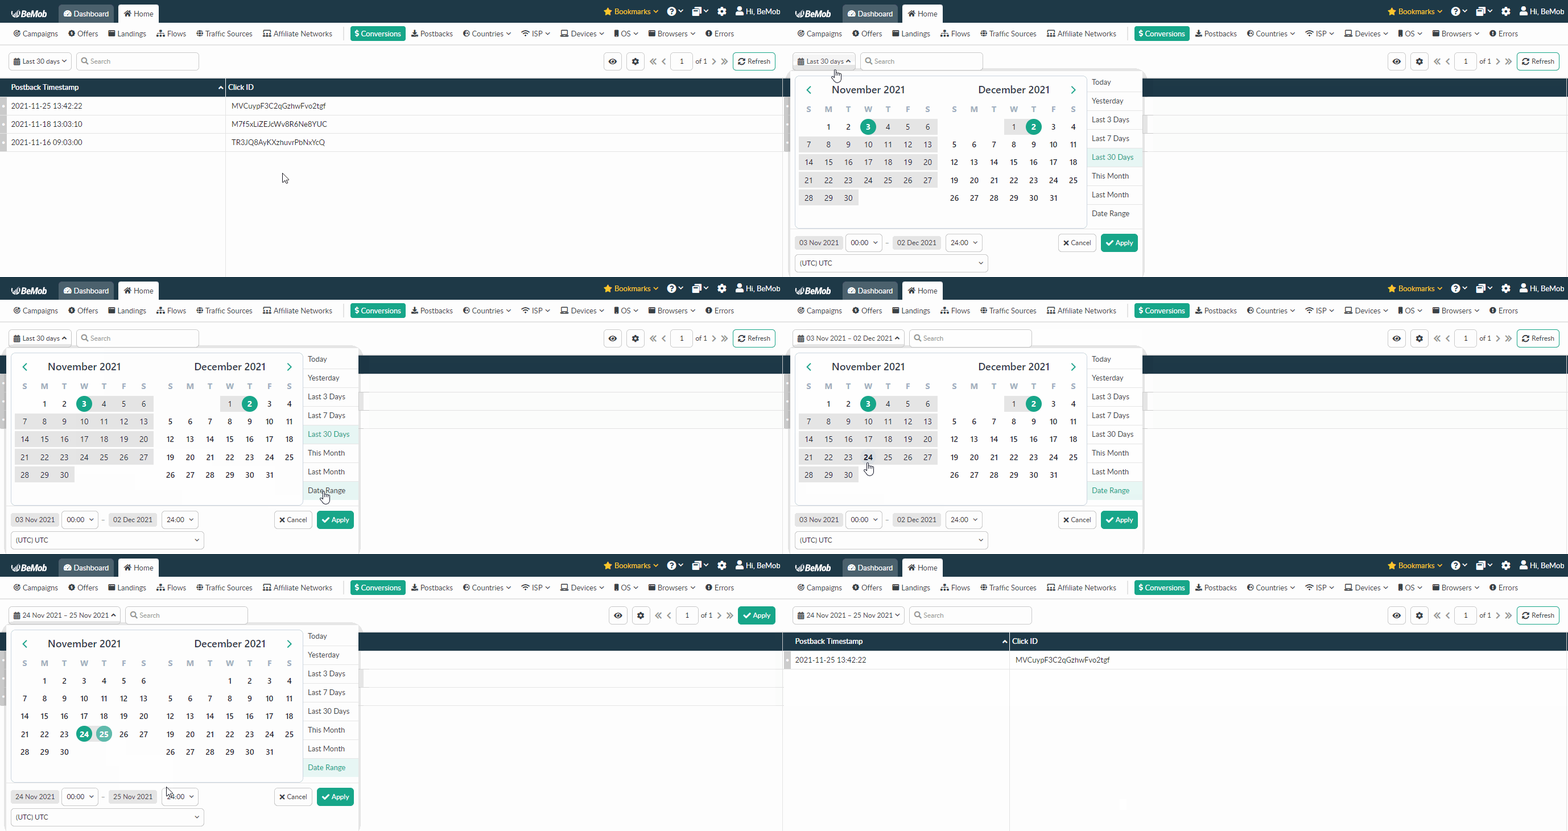
Use time selection to change time range of your report.
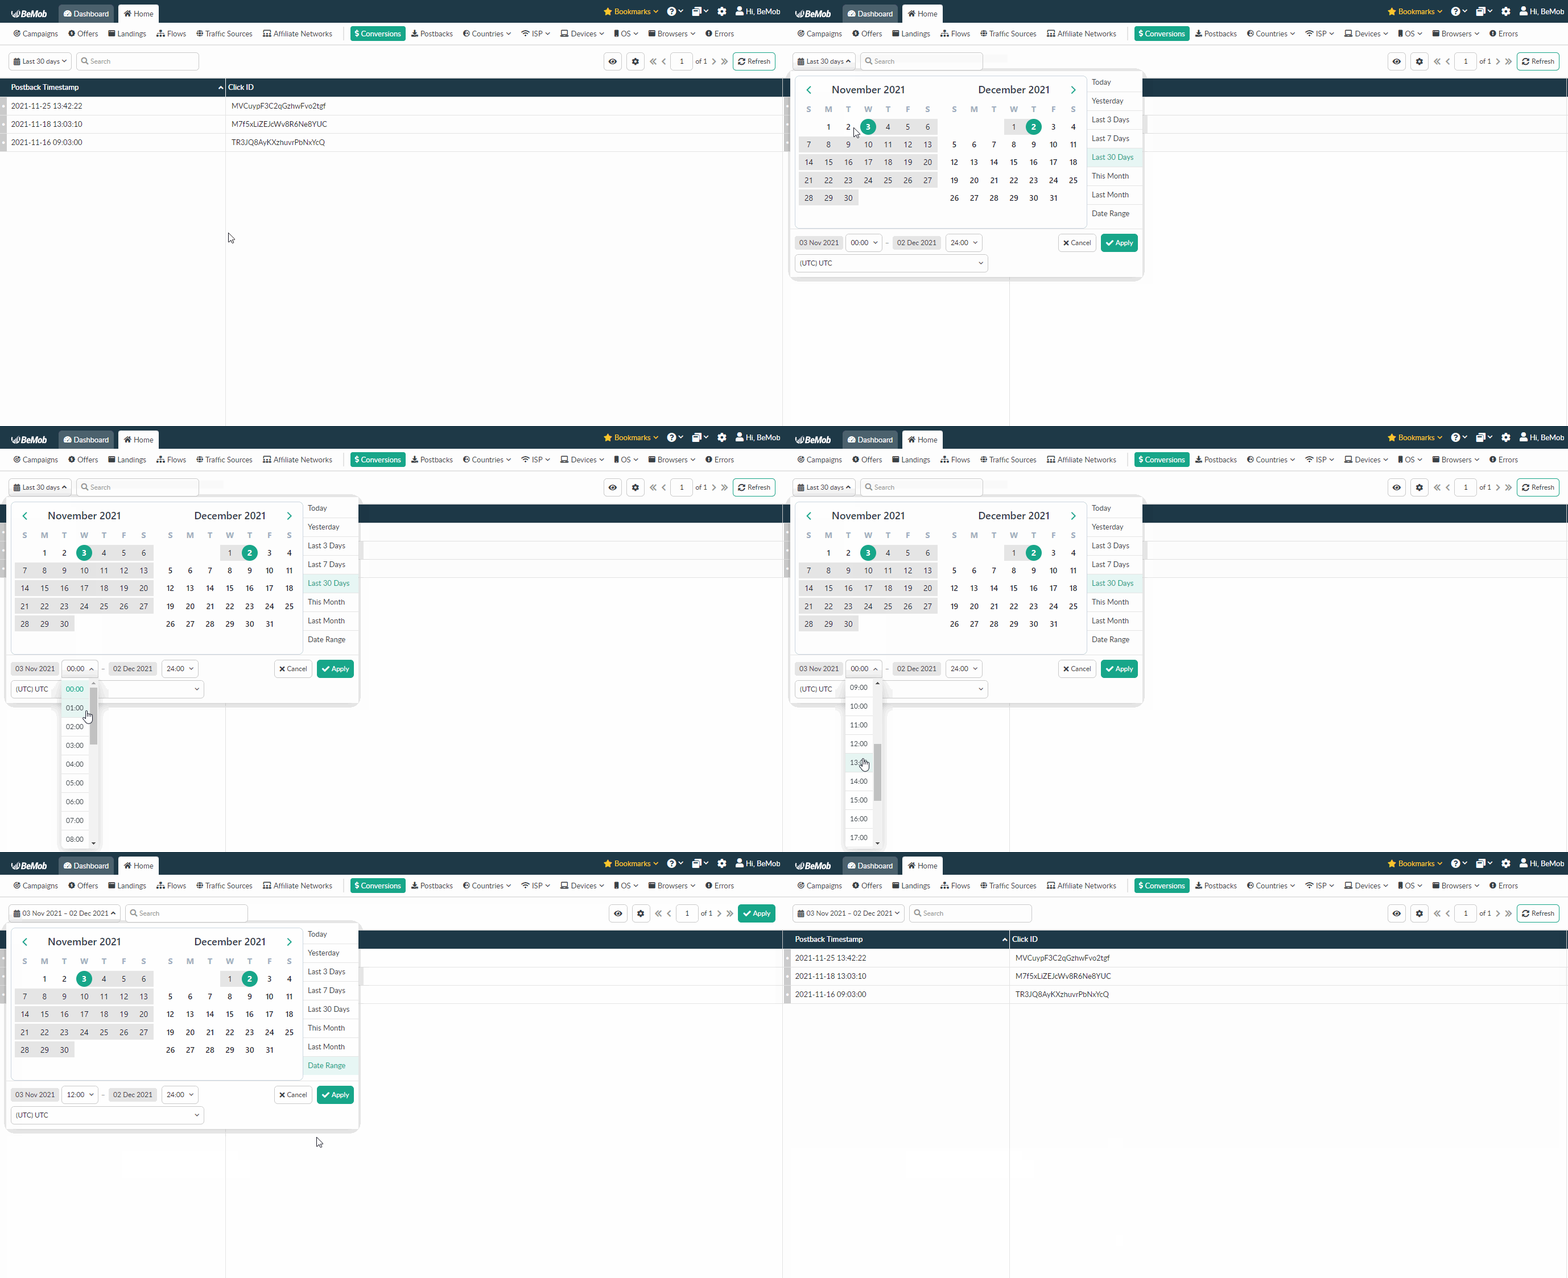
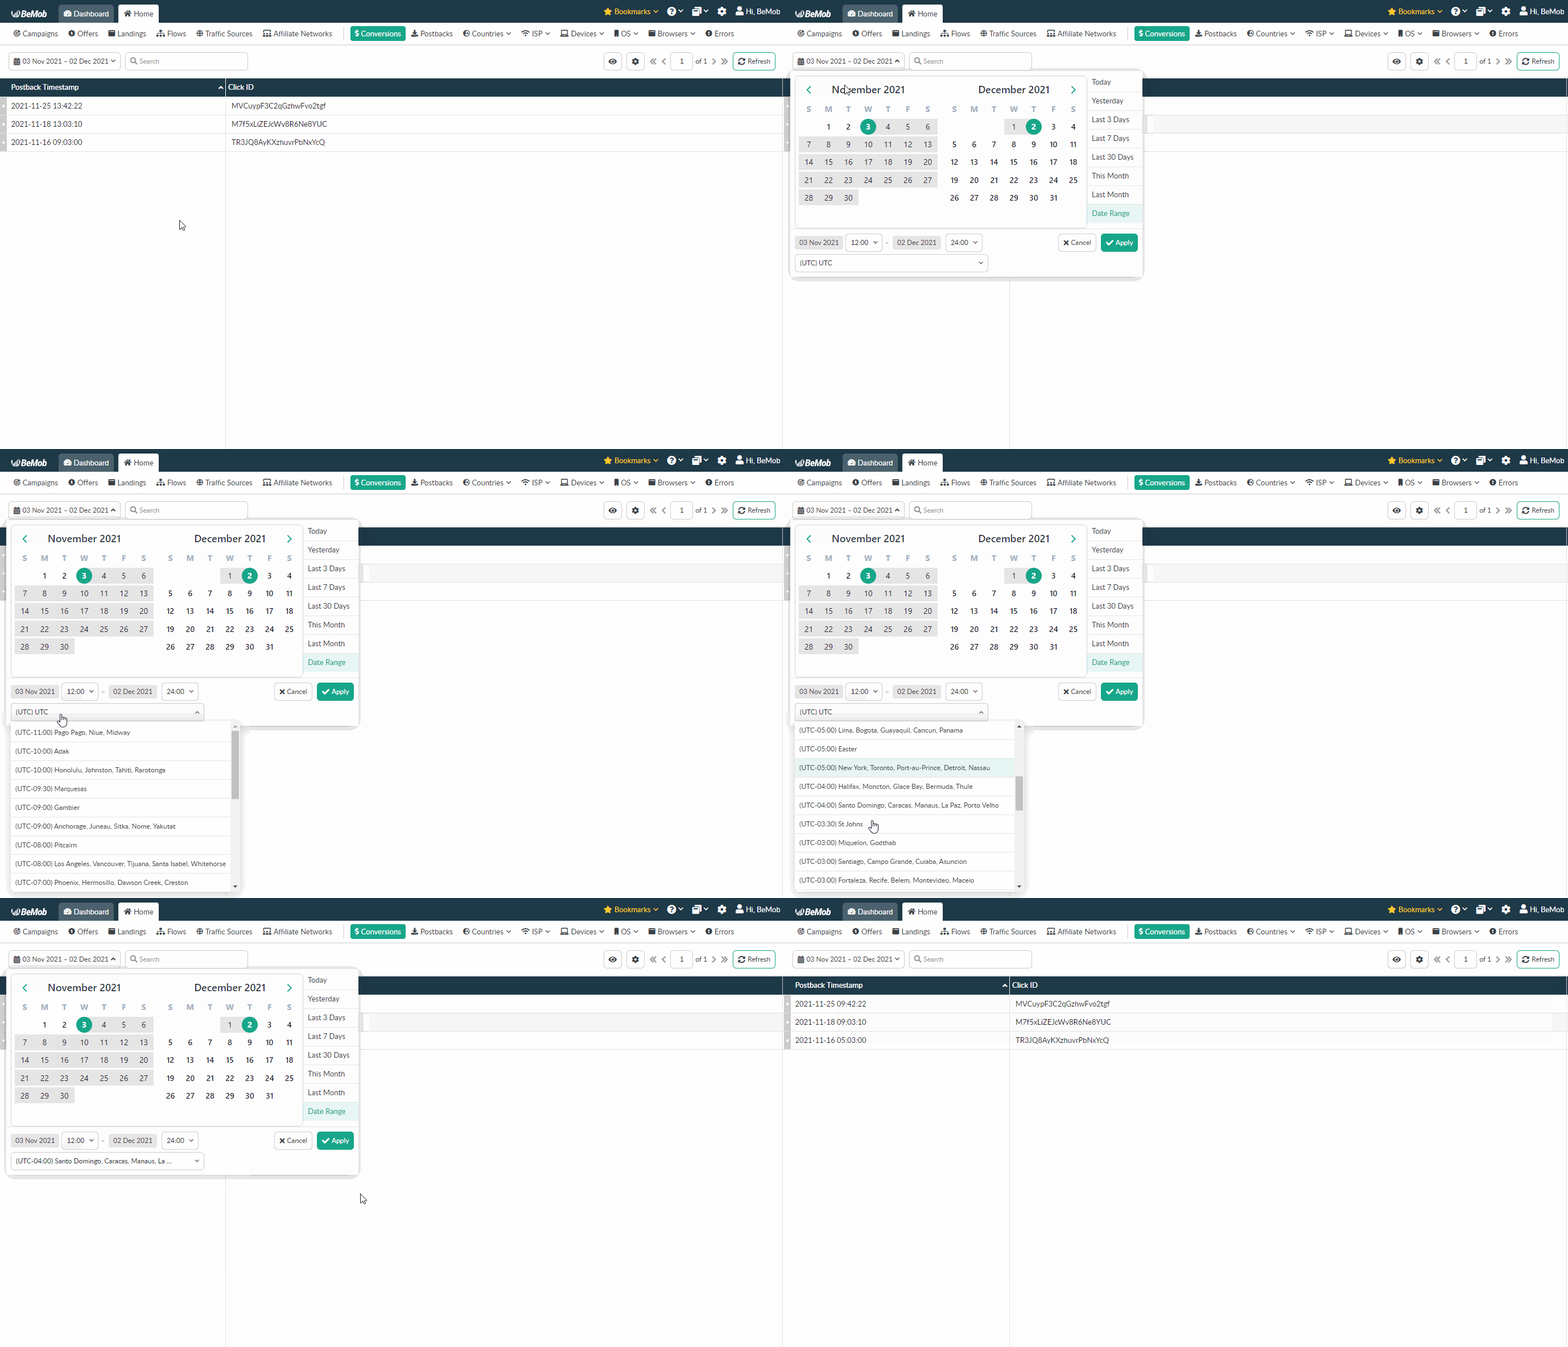
It is also possible to view your reports in different time zones.
The period of time your reports are displayed is limited by data retention period available on your pricing plan.
For instance, if your account is on Basic plan that provides you with 3 months data retention, you are able to access last 3 months data only.
If you try to access older data, you will get the corresponding error.
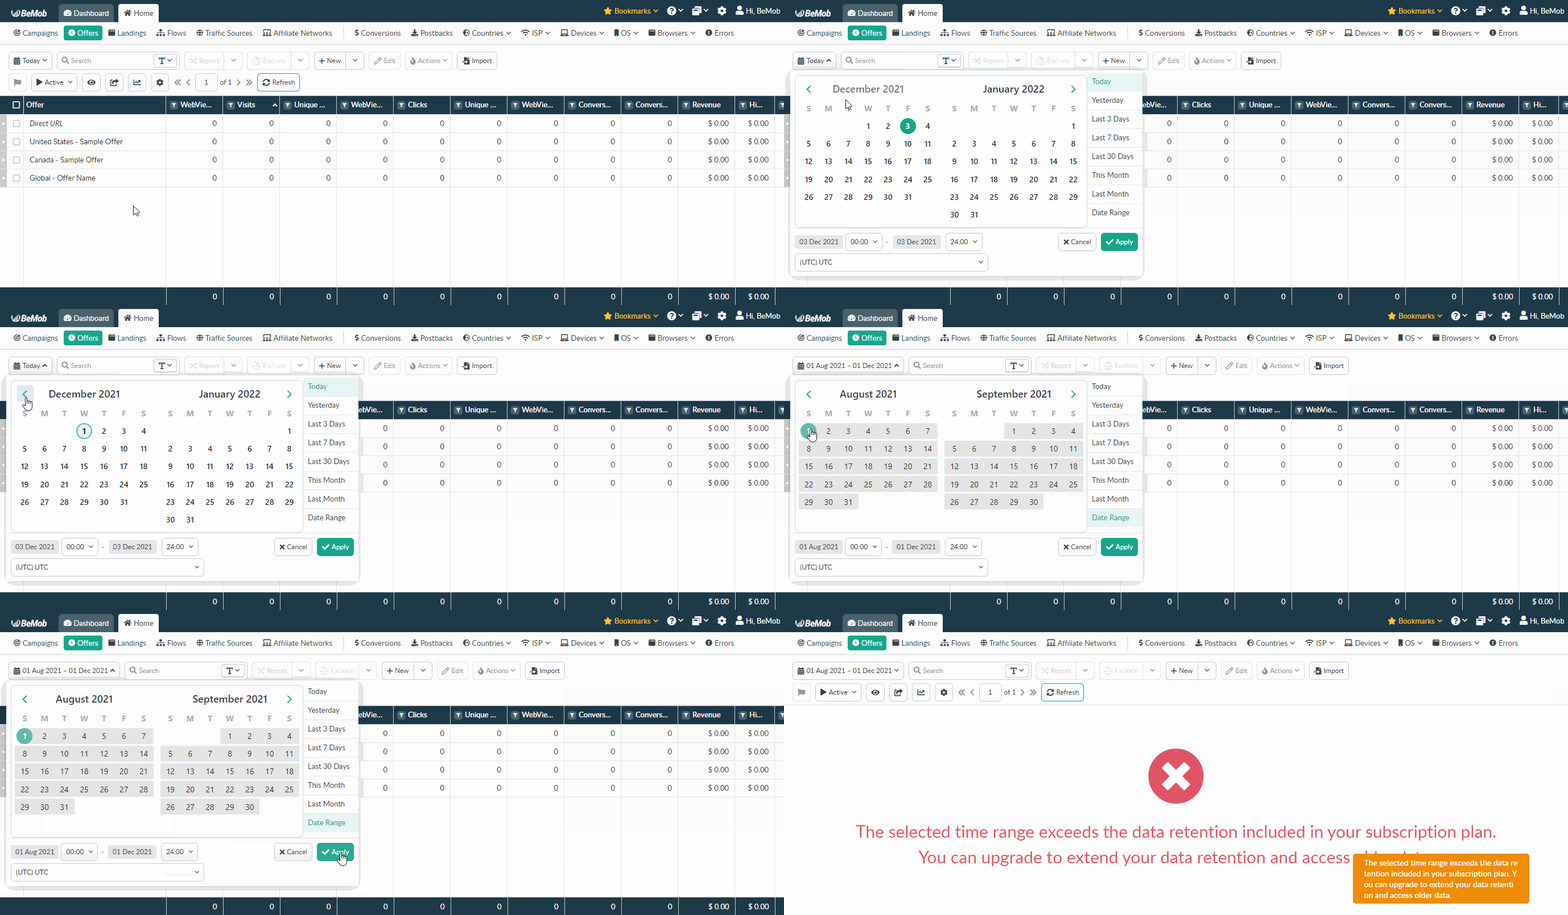
It is required to upgrade your subscription if you want to extend data retention.
¶ Search Bar
Search bar allows to perform search by Text, Tags and Marks.
To view search result by required keyword:
- select Text;
- introduce a word in empty field;
- press Apply button.

To view search result by required tag(s):
- select Tags (AND) or Tags (OR);
- introduce tag(s) name;
- press Apply button.

Tags search works on logical relation AND/OR.
When Tags (AND) is selected, the search is made through campaigns or elements that contain all specified tags.
.gif)
If you select Tags (OR), campaigns or elements with at least one of the specified tags will be displayed.
.gif)
👉 Learn more about tags in the dedicated guide.
To view search result by required mark(s):
- select Marks;
- select the required mark(s) from the list;
- press Apply button.
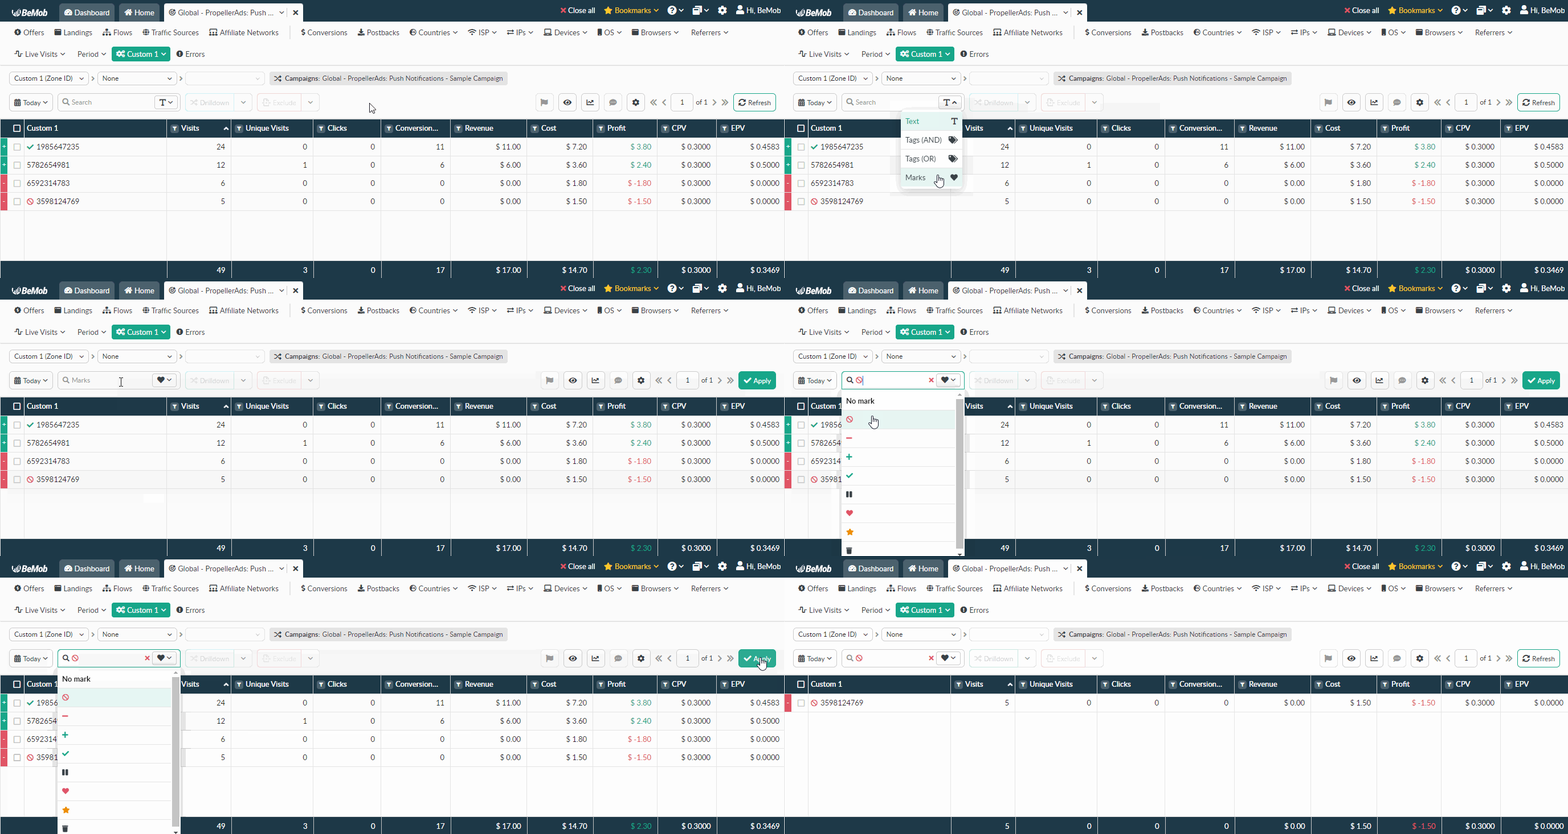
If you want to access to the data that is not marked, you should choose No mark.
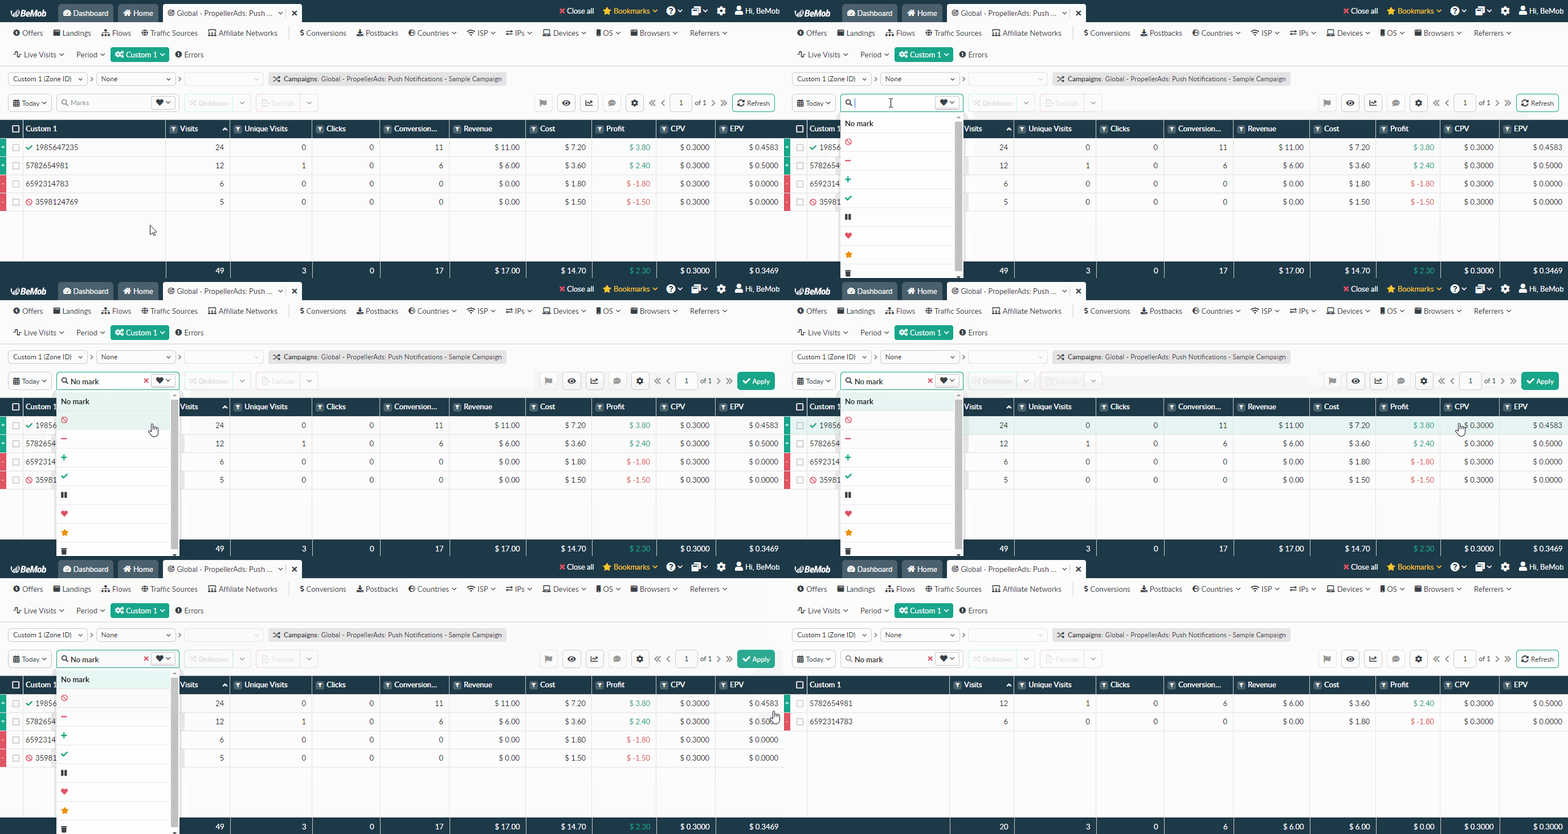
👉 Learn more about marks in the dedicated guide.
¶ Report Button
This button allows to generate report on campaign or campaign item.
To dive in the report it is required to select the required element and click on Report button.

To create a bulk report it is required to select the required elements and click on Report button.

When you are inside the report on campaign or its element, there are three options: Drilldown, Drilldown With New Tab and Report With New Tab.
Drilldown button allows to see the detailed report of the selected data line within the report on selected campaign or its element.

Drilldown With New Tab button allows to see the detailed report of the selected data line within the report on selected campaign or its element in a new tab.

Report With New Tab button allows to see the detailed report of the selected data line within the report on all campaigns or their elements.

¶ Exclude Button
Exclude option allows to remove from the report the elements that are not required at a specific time.
To build the report with excluded items:
- select the elements which you wish to exclude from the report;
- click on Exclude button.

When you are inside the report on campaign or its element, there are three options: Exclude, Exclude With New Tab and Exclude Report With New Tab.
Exclude button allows to see the report without excluded data line within the report on selected campaign or its element.

Exclude With New Tab button allows to see the report without excluded data line within the report on selected campaign or its element in a new tab.

Exclude Report With New Tab button allows to see the report without excluded data line within the report on all campaigns or their elements.
¶ New Button
To create a new campaign or campaign element press New button.
A new window with campaign/campaign element settings will appear.

¶ Edit Button
To edit a campaign or its element press Edit button.
A window with campaign/campaign element settings will appear.

If you want to edit the settings of several campaigns, offers, landing pages in bulk, use Bulk Edit option.
It is required to select the one workspace before using Bulk Edit option.
To edit your campaigns/offers/landing pages in bulk it is required to do the following:
- go to the required tab with campaigns/offers/landing pages;
- select the elements from the list;
- press Bulk Edit button.

👉 The detailed information about Bulk Edit option is available in our guide.
¶ Actions Button
The Actions button hides the following options: Update Cost, Duplicate, Archive, Copy URL and Campaign Links.
To use this button you should select a campaign or its element first.

¶ Update Cost
To update cost for a certain campaign:
- select the required campaign;
- click on Actions;
- press Update Cost button.

👉 The detailed guide about Update Cost option is available here.
¶ Duplicate
To create a duplicate of existing campaign or its elements:
- select the required campaign/campaign element from the list;
- click on Actions;
- press Duplicate button.

¶ Archive
To archive a campaign or its elements:
- select the required campaign from the list;
- click on Actions;
- press Archive button.
To move an element (traffic source, affiliate network, offer, landing page) to archive it is required to check, if this element is not involved in any campaign.

It is possible to move to an archive only 100 campaigns or their elements at once.
To restore a campaign or its elements:
- go to Archived on the panel;
- select the required campaign from the list;
- click on Actions;
- press Restore button;
- go back to Active.

¶ Copy URL
Copy URL option allows you to get Campaign URL without accessing Campaign Links.
To get Campaign URL:
- select the required campaign from the list;
- click on Actions;
- press Copy URL button.

You can also copy offer URL/landing page URL without accessing the settings.
To get offer URL/landing page URL:
- select the required offer/landing page from the list;
- click on Actions;
- press Copy URL button.

¶ Preview
Preview option allows you to open the URL of your campaign, offer or landing page in a new tab.
To preview your campaign/offer/landing page:
- select the required campaign/offer/landing page from the list;
- click on Actions;
- press Preview button.

¶ Campaign Links
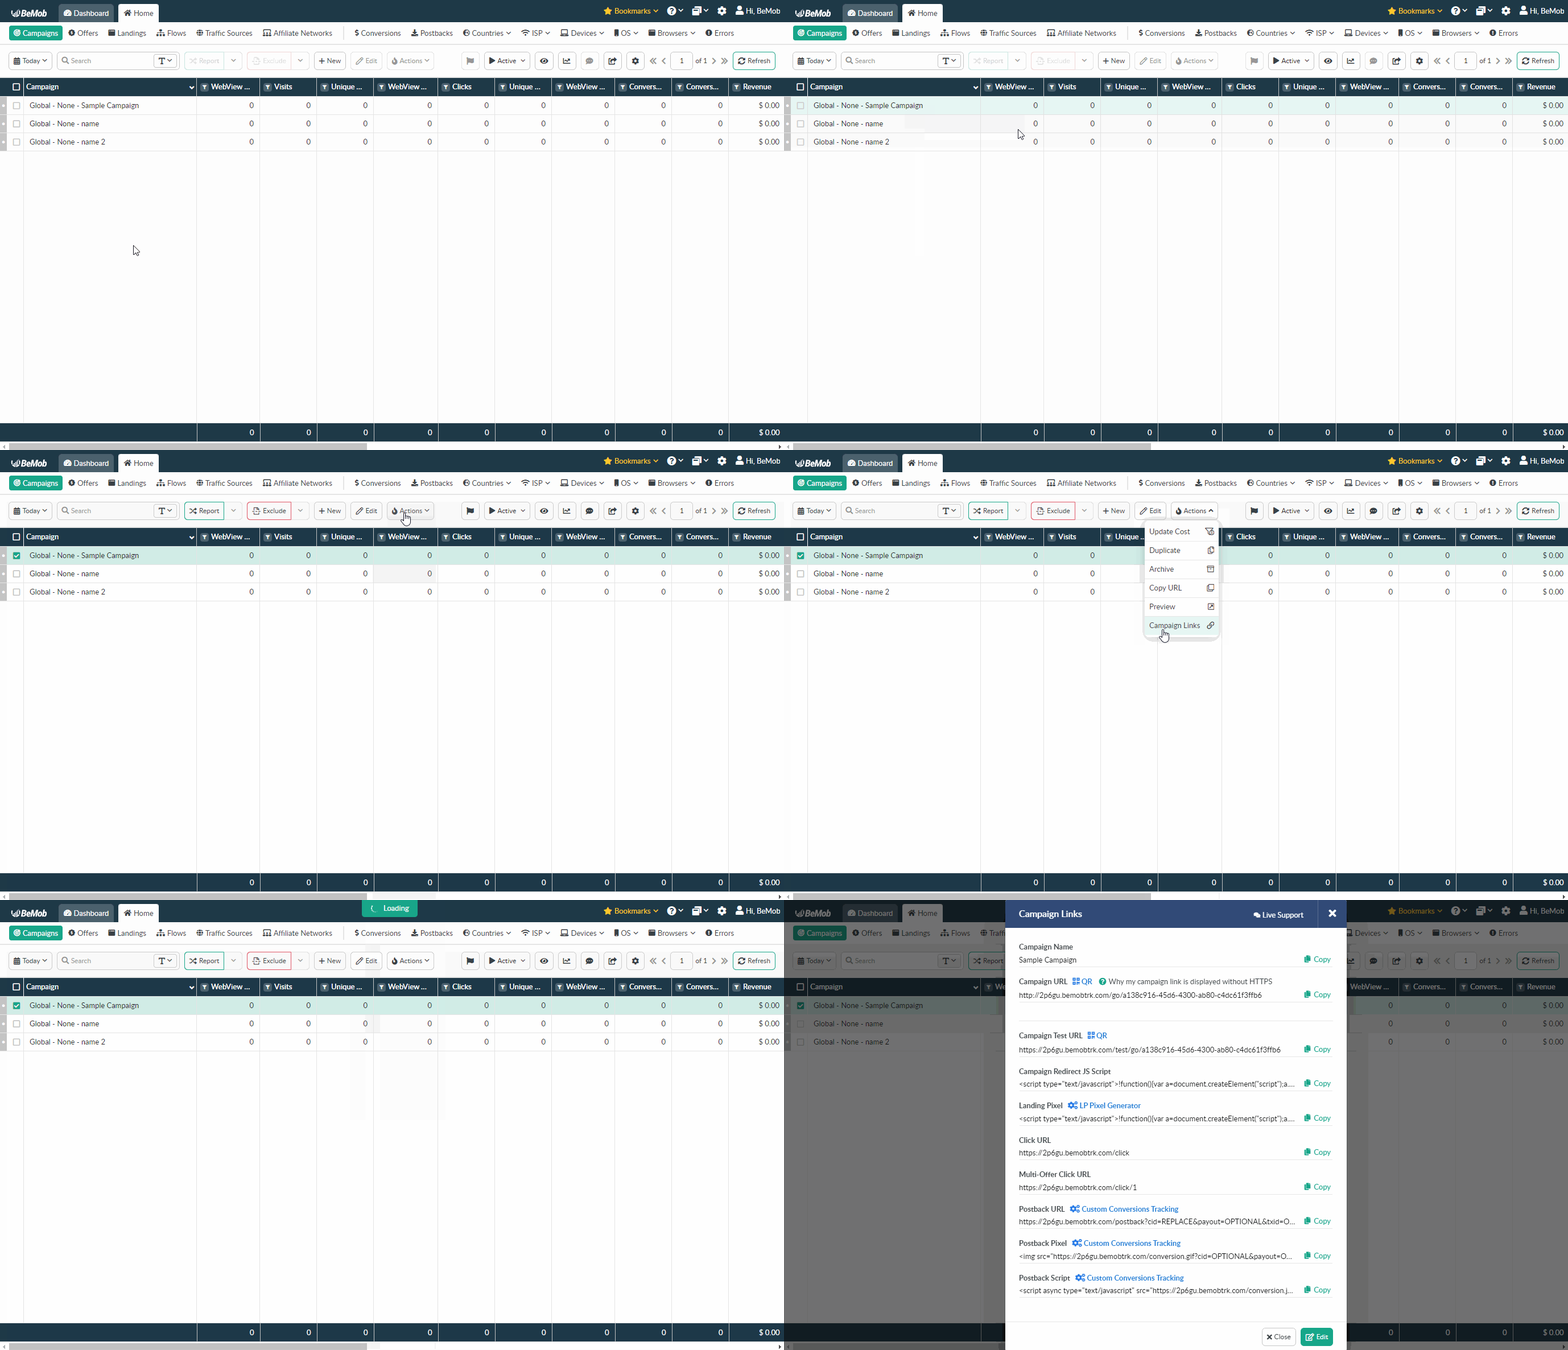
After you create a campaign, the window with Campaign Links appears. To see the window with campaign links again:
- select the required campaign from the list;
- click on Actions;
- press Campaign Links button.
¶ Flag Icon
Flag icon hides Marks option that is used to highlight converted/non-converted data lines, profitable/unprofitable campaigns, converting/non-converting offers, landing pages with the lowest/highest CTR etc.
To mark a specific campaign:
- select the required campaign;
- press 🏴 on the panel;
- select the desired mark from the list.

To mark a specific campaign element:
- select the required campaign element;
- press 🏴 on the panel;
- select the desired mark from the list.

To mark a specific data line:
- select the required data line;
- press 🏴 on the panel;
- select the desired mark from the list.
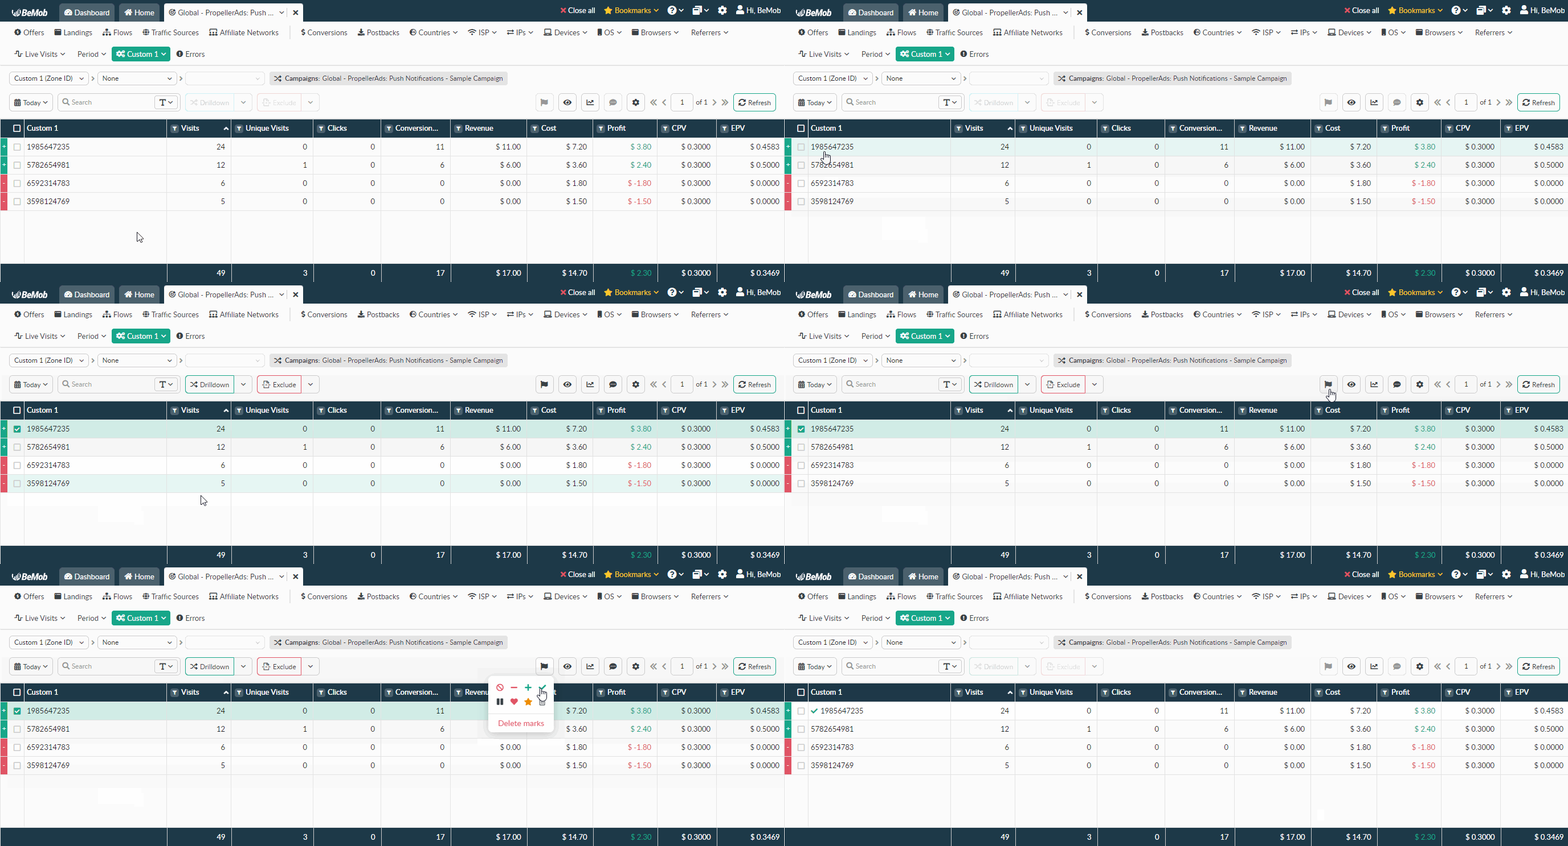
👉 More info about Marks option is available in the dedicated guide.
¶ Status Selection
Status selection allows to sort and display campaigns and their elements by status: Active, Archived, With Traffic and All.

Select Active to see data of active campaigns or their elements.

Select Archived to see data of archived campaigns or their elements.

Select With Traffic to see data of campaigns or their elements with traffic.

Select All to see data of all (active, archived and with traffic) campaigns or their elements.

¶ Eye Icon
Eye icon hides Columns Settings option. These settings are aimed to customize the report view and organize the columns in the most convenient order.
To add a column to a report:
- click eye icon on the panel;
- select the required column from the list;
- press Apply button.
![]()
👉 The detailed guide about Columns Settings option is available here.
¶ Chart
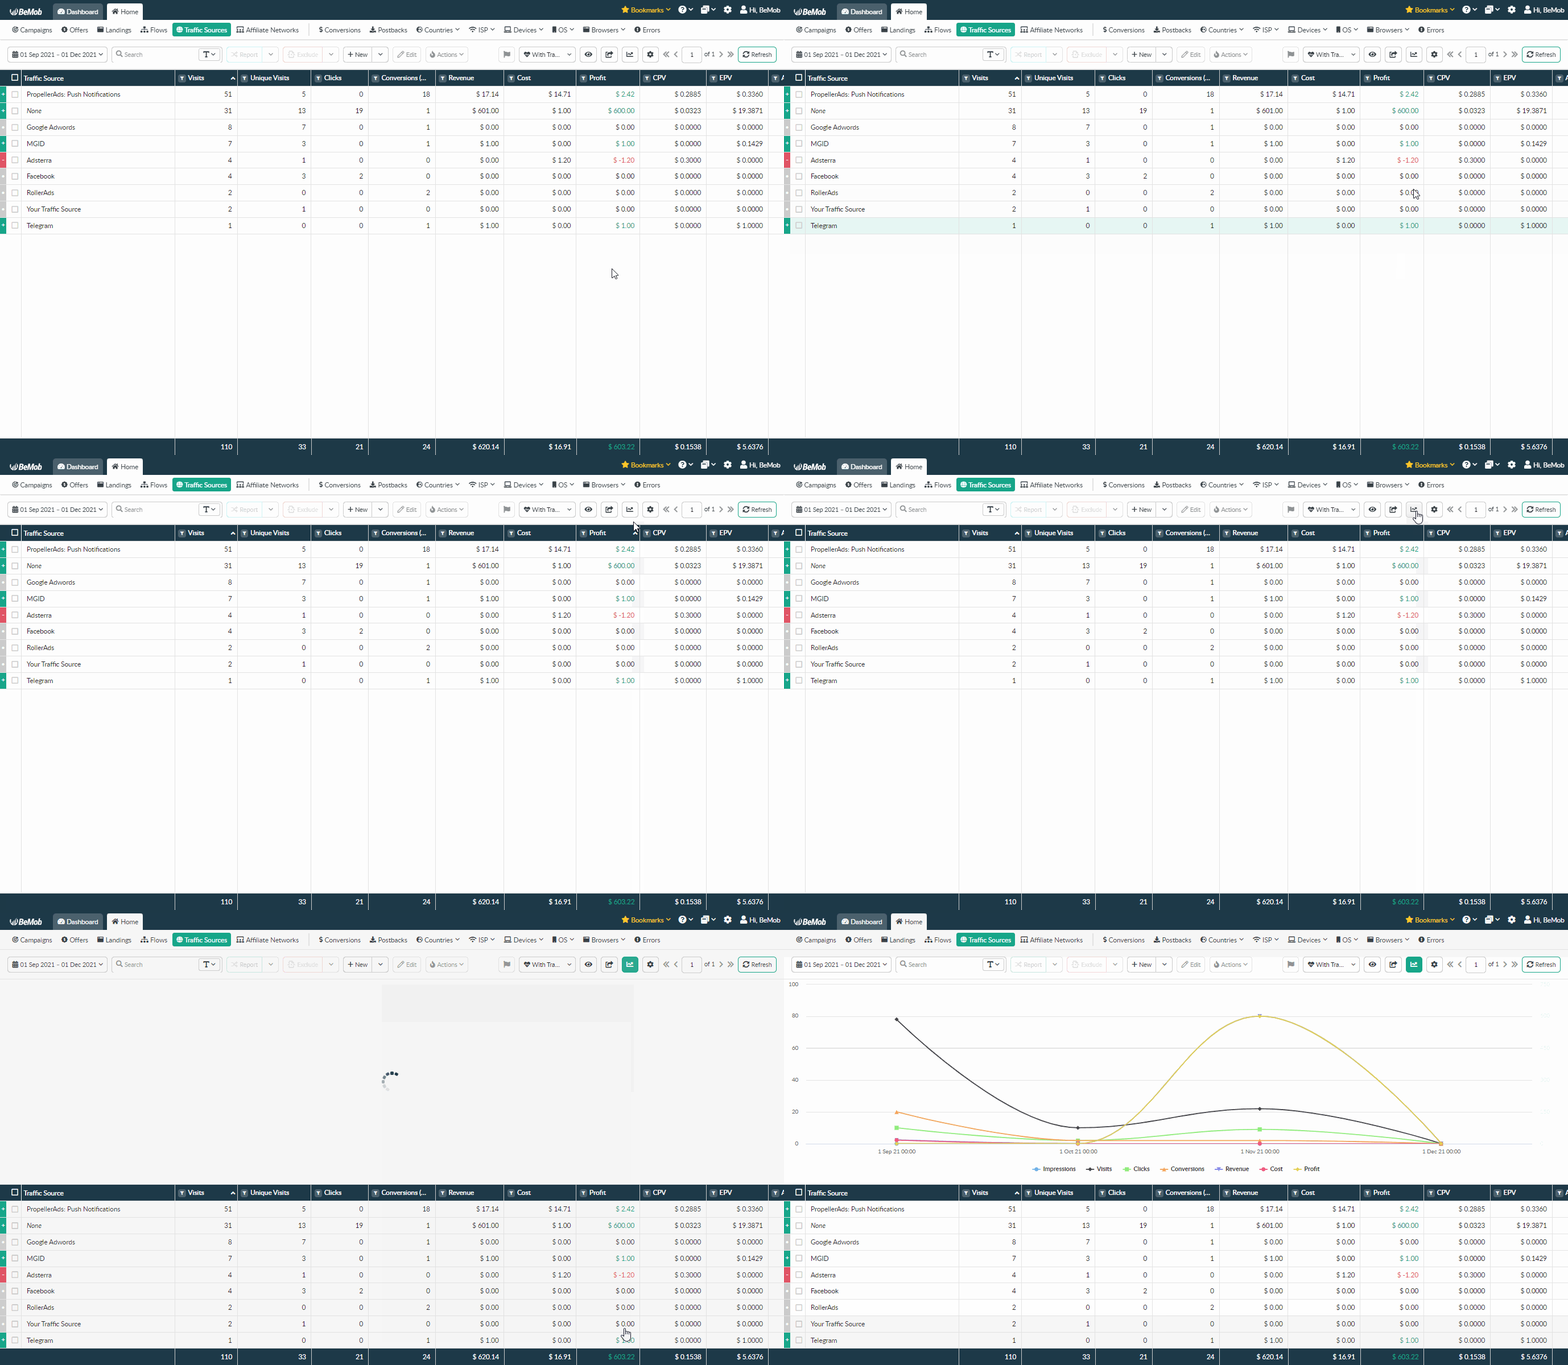
Chart is hidden under the corresponding icon at the top of the panel.
Click this icon to generate chart view of the selected report.
¶ Notes
To organise your work you can add notes about:
- your further work with a certain campaign;
- ideas of optimisation;
- to-do lists;
- and other valuable information without keeping this valuable information in other places.
To add a note you should select a campaign or campaign item and press Notes button.

¶ Gear Icon
The Gear icon hides the following options: Currency selection, Row selection and Export CSV option.

¶ Currency Selection
By default the report is displayed in your account currency.
To see the report in a different currency:
- click on the gear icon;
- click on the currency selection row;
- select the required currency from the list of visible currencies.

If you want to edit the list of visible currencies, you can easily do it in the Reporting Settings.
- go to Settings on the panel.
- access Reporting section of General settings.
- press Edit button and select the required currencies from the list.
- press Save to store the settings.
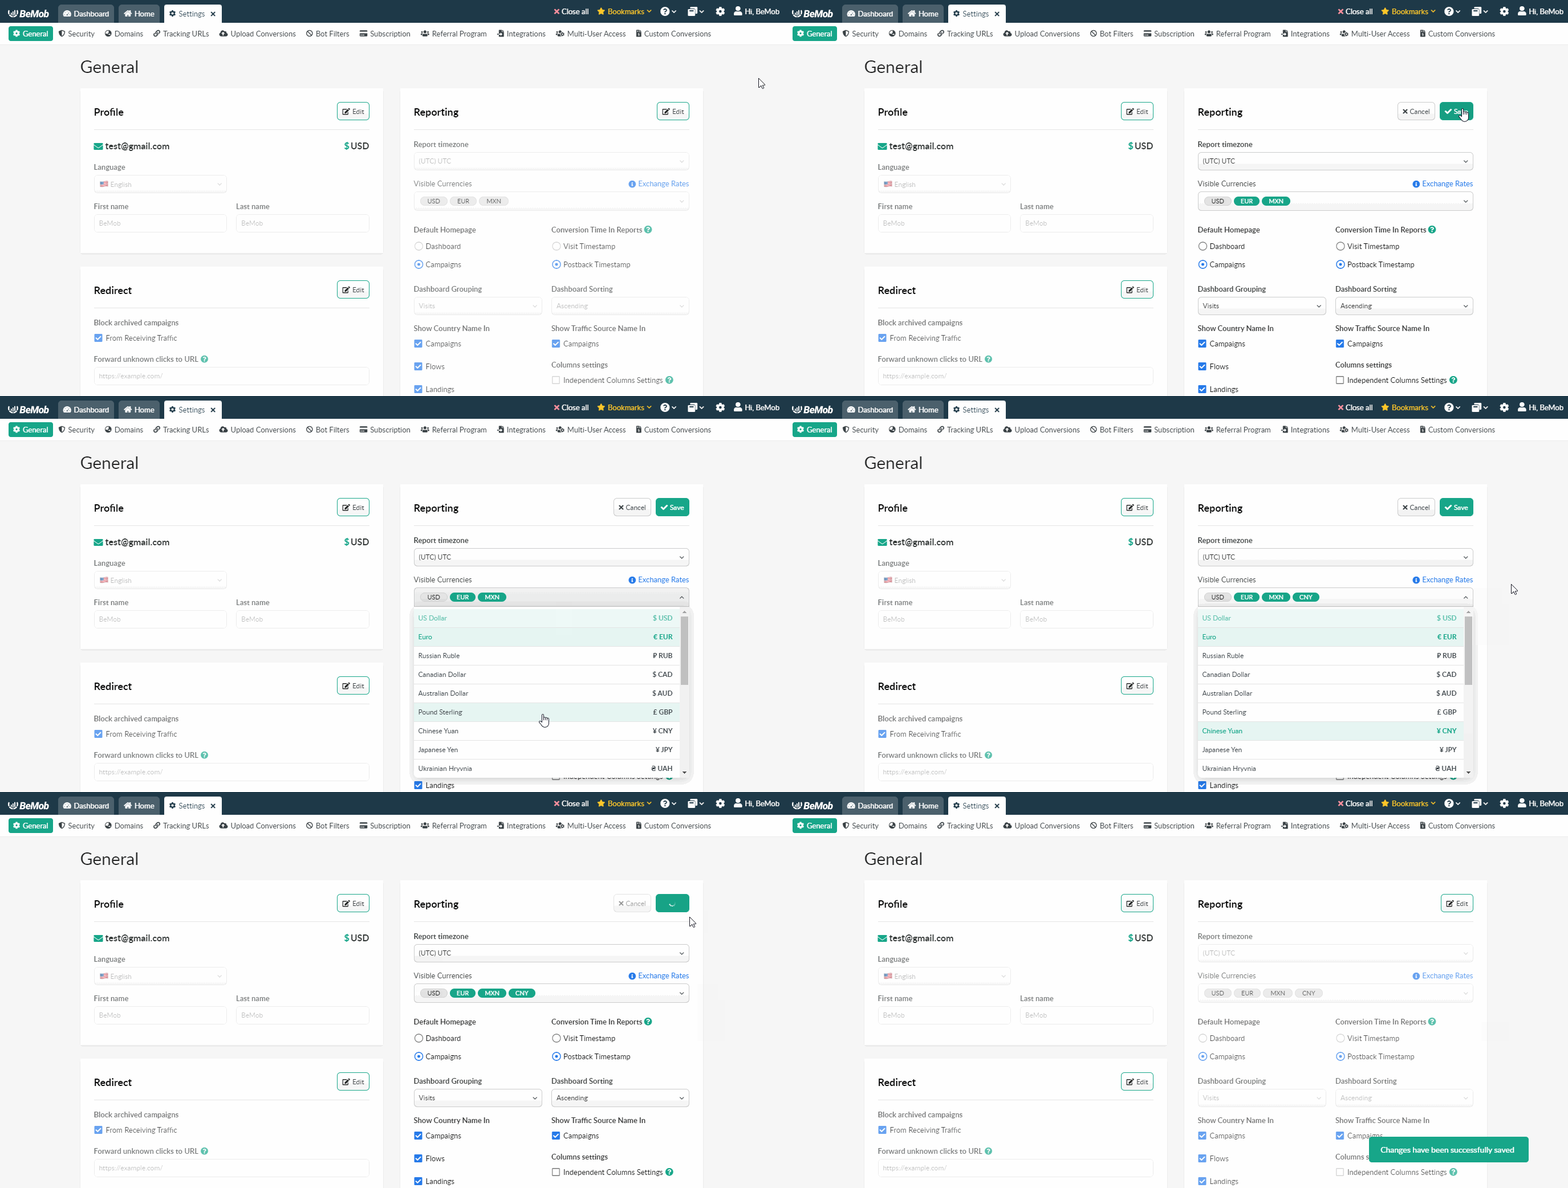
Available currencies: Australian Dollar, Brazilian Real, Canadian Dollar, Chinese Yuan, Euro, Hungarian Forint, Indian Rupee, Indonesian Rupiah, Israeli Sheqel, Japanese Yen, Malaysian Ringgit, Mexican Peso, Philippine Peso, Polish Złoty, Pound Sterling, Russian Ruble, Singapore Dollar, South Korean Won, Thai Baht, Ukrainian Hryvnia, US Dollar, Vietnamese Dong.
👉 More info about currencies settings is available in the dedicated guide.
¶ Row Selection
Row selection allows to select number of visible rows within your current tab.
The available options: 50, 100, 200, 500 and 1000 rows per page.

¶ Export CSV
To export CSV file of your campaigns, reports or other elements:
- click on the gear icon;
- press Export CSV button.
The corresponding CSV file will be downloaded to your device.

¶ Pagination
All your reports are divided into pages with the help of pagination.
You can easily navigate through the pages of generated report using < and >.

If you want to go to the last page, press >>.

If you want to get back to the first page, press <<.

¶ Refresh / Apply Button
Refresh button is used when you want to regenerate your report that includes updated data.

Apply button is used when you are searching text, tag or mark.

If you have any questions or need the assistance with the settings, contact our support team through the live chat or at support@bemob.com