
With the current state of Facebook integration it will be possible to pass the conversions data to your Facebook ad account.
Before you start make sure that you have:
- Active BeMob account.
- Active Business Facebook account.
- A domain verified by Facebook.
- Access to Facebook Conversions API.
💡 The process of implementing Facebook Conversions API on the side of Facebook is described here.
¶ Cost and Availability
The Facebook Integration option should be purchased additionally. It is not included in the subscription by default. The monthly cost is $19.00 regardless of your pricing plan.
To purchase the option access the Subscription section. Select Facebook from the list of integrations and press the Buy button.

¶ BeMob Integration Settings
After the Facebook Integration has been successfully purchased, you should proceed to the integration settings:
- Go to the Settings.
- Access the Integrations section.
- Press Add Integration button.

4. Select Facebook from the list of traffic sources.
5. Click Next button.
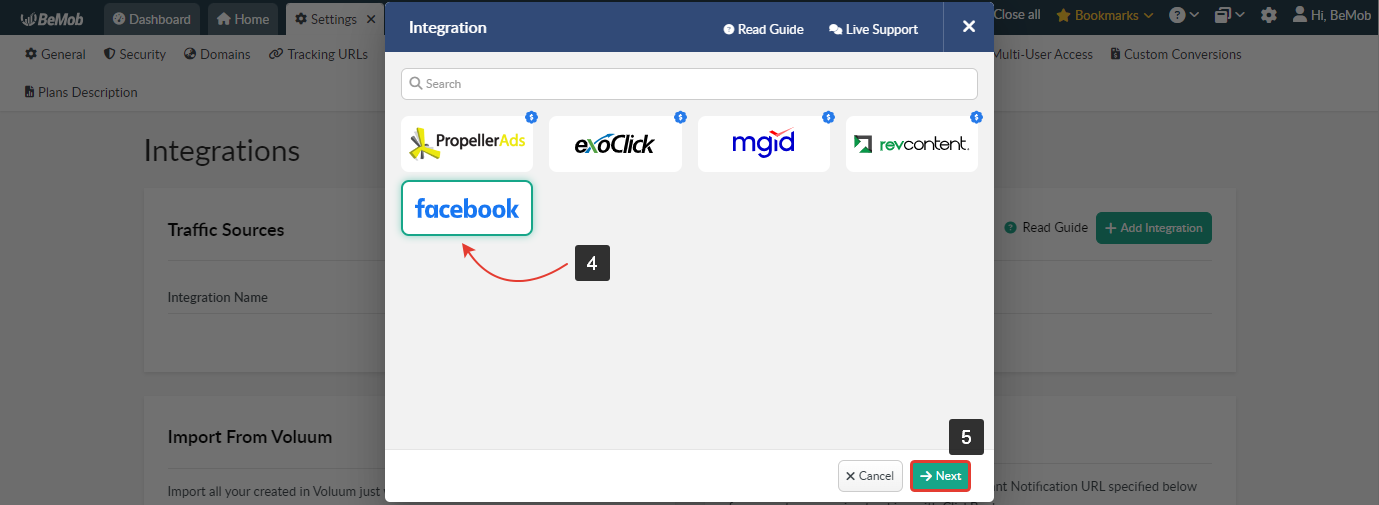
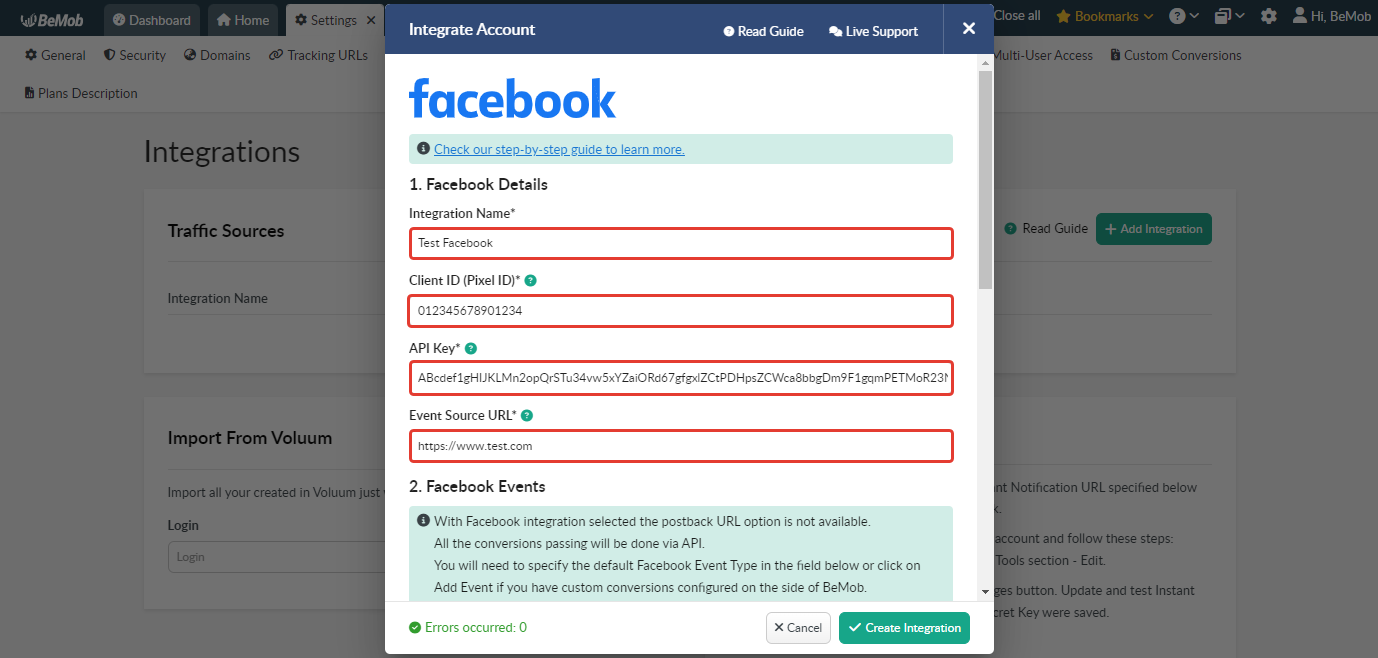
The window with the integration settings will appear. It’s divided into 3 sections: Facebook Details, Facebook Events and Facebook Params.
¶ Facebook Details
This section is dedicated to the main details of integration which should be found on the side of your Facebook account.
- Specify custom Integration Name. The name should not exceed 250 alphanumeric characters.
- Specify Client ID (Pixel ID) from your Facebook account.
- Enter your Facebook API Key.
- Add Event Source URL — a domain URL verified in your Facebook account.
¶ Facebook Events
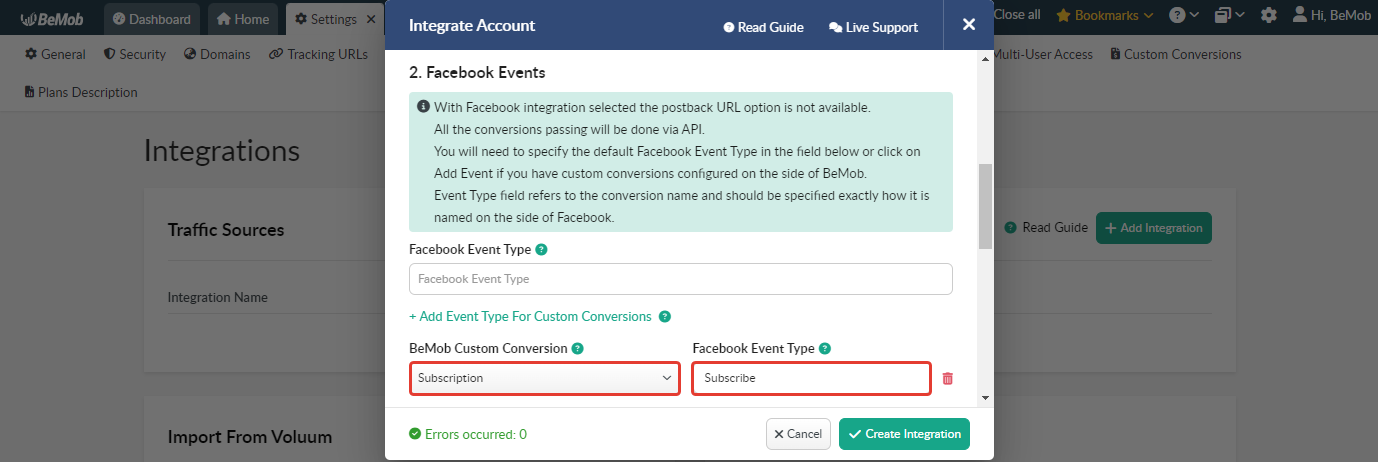
This section is dedicated to the events data (e.g. Purchase, Search, Add to Cart, Subscribe etc.) you wish to track and pass the data on them via API to Facebook.
❗️ It’s obligatory to specify the event name exactly how it is named on the side of Facebook.
The event name (e.g. Purchase, Search, Add to Cart, Subscribe etc.) should be added to the Facebook Event Type field.

In case when you need to pass custom conversions data to Facebook, you should select BeMob Custom Conversion from the list of previously configured events and specify Facebook Event Type that matches this event.
❗️Please make sure that Send Postbacks to Traffic Source checkbox has been marked in the custom event settings beforehand.
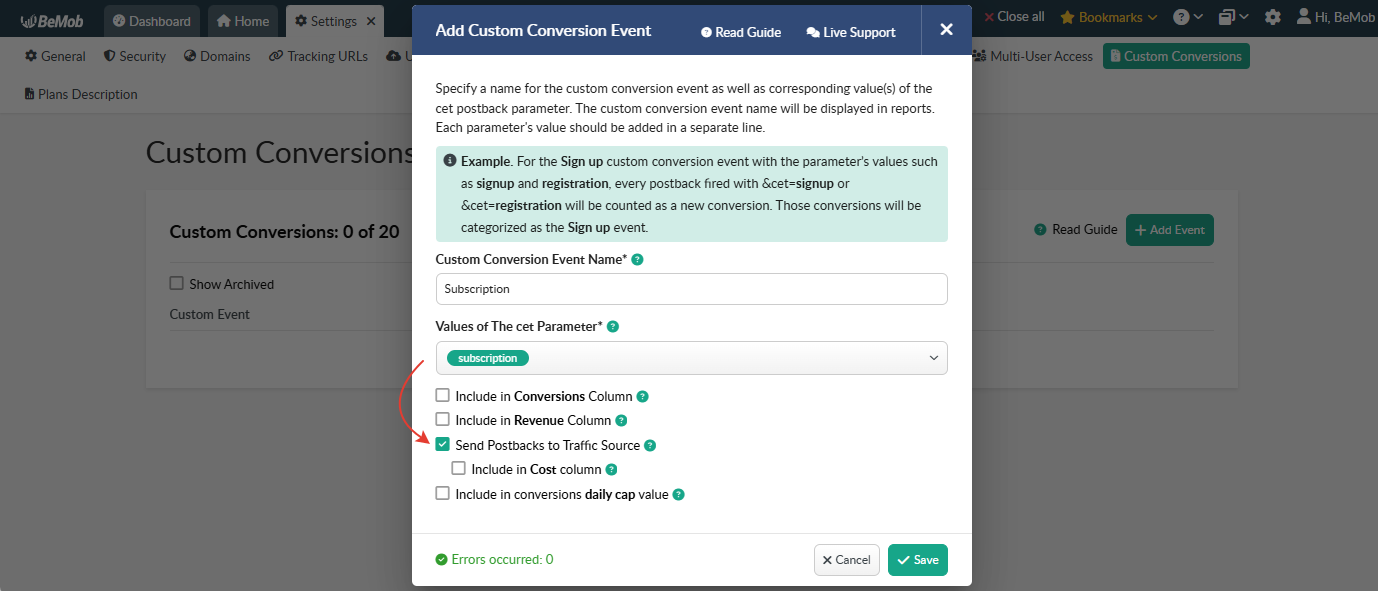
💡 The detailed guide on the Custom Conversions can be found here.
¶ Facebook Params
Facebook requires you to pass the data of at least one of Customer Information Parameters for some event types. In this case you should specify the required value in at least one of the available fields.
💡 The complete list of user_data parameters supported by Facebook is available here.
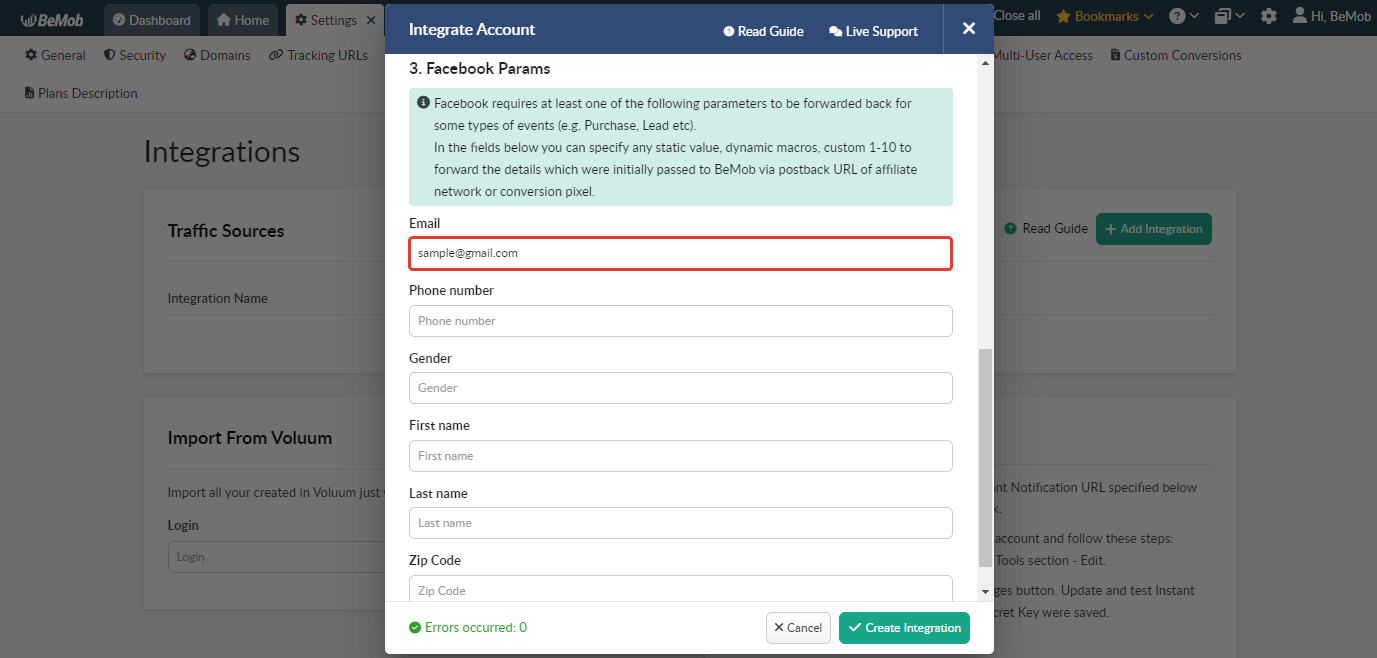
Press Create Integration button to finish the setup.
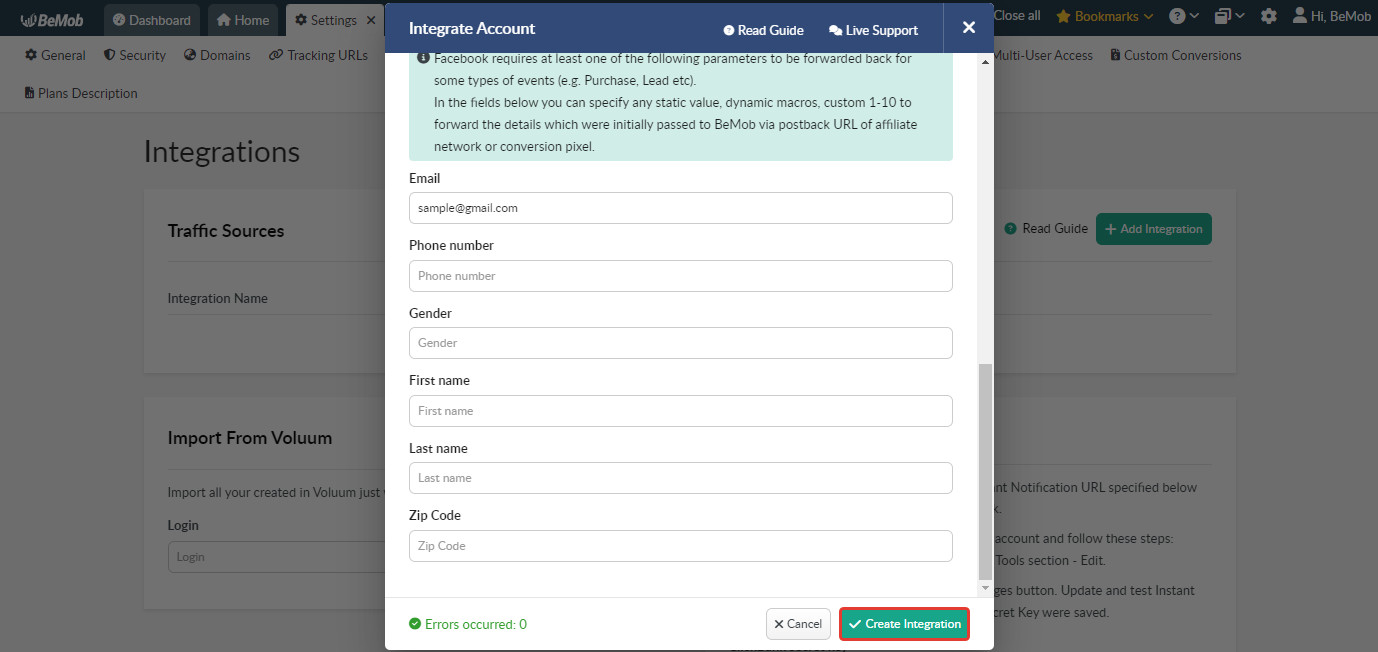
The corresponding record will appear in the Integrations section and integration will be displayed as active.

The integration can be edited or deleted.
If you delete the integrated traffic source, the conversions passing via API for all the associated campaigns will be stopped.

¶ Facebook Settings
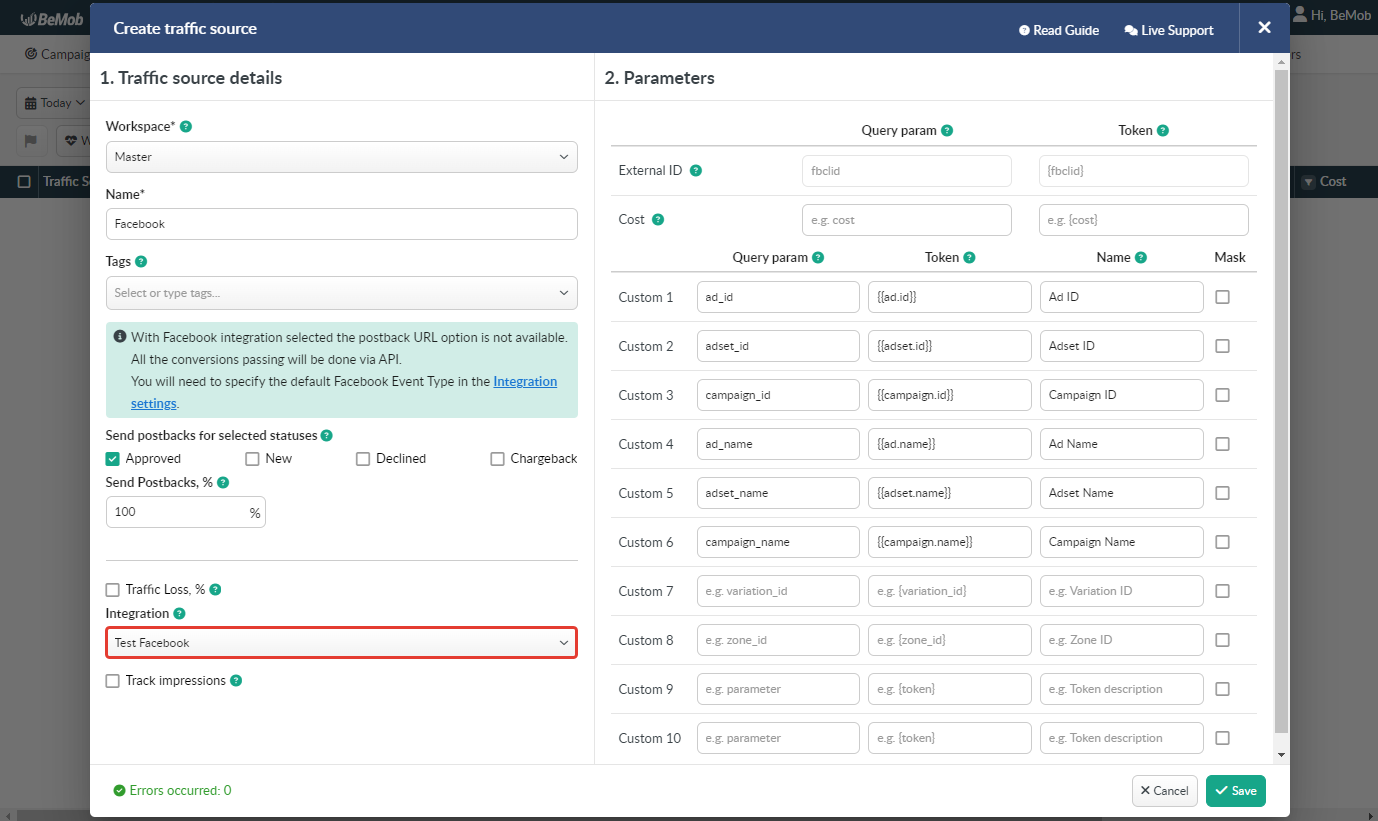
After you successfully created the integration with Facebook on the level of Integration Settings, it is required to select this integration on the level of Facebook traffic source template.
If you have already set up Facebook for your campaigns and wish to configure the conversions passing via API for them, it is required to follow these steps:
- go to Traffic Sources tab;
- select Facebook → Edit;
- choose the corresponding integration;
- save the settings.
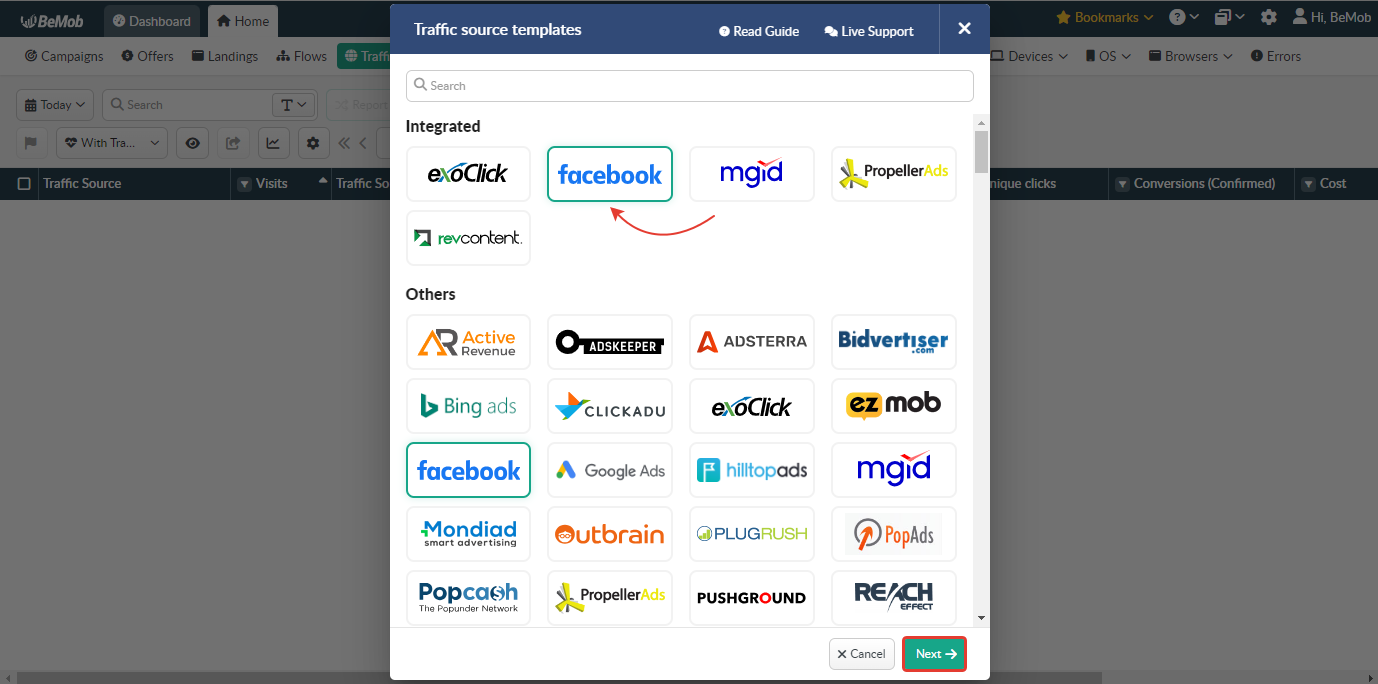
If Facebook has not been previously set up, you will need to go to the Traffic Sources tab and click New From Template button.

Then you should select Facebook → Next and scroll down to select the corresponding integration.
Data of conversions passed to Facebook will be available in the Postbacks report.

¶ BeMob Campaign Settings
Once the integration with Facebook is set, it is required to proceed to a campaign settings in BeMob:
1. Add your affiliate network to BeMob.
This step is required if you are going to promote offers from an affiliate network.
🔗 How to Add Your Affiliate Network From Templates
🔗 Create Custom Affiliate Network
2. Set Postback URL with your affiliate network.
If you are planning to track conversions from your own offer, this step should be skipped. You should use Conversion Pixel instead.
🔗 Postback Settings of Affiliate Network
3. Add your offer to BeMob.
🔗 Offer Settings
4. Add your landing page to BeMob.
It is obligatory to use a landing page to track Facebook campaign with BeMob.
🔗 Landing Page Settings
5. Create a campaign in BeMob.
Your landing page and offer(s) should be added to a campaign settings.
🔗 Campaign Settings
6. Set Landing Page Pixel for no-redirect tracking.
The LP pixel should be set inside the code of your landing page to avoid redirect to BeMob.
🔗 Landing Page Pixel Settings
7. Create a campaign in your Facebook account.
Traffic will be sent to your landing page URL directly.
🔗 Facebook Campaign Settings
If you have any questions or need help with the settings contact our support team via live chat or at support@bemob.com