Once you have a landing page completely set up on your side, it is required to add the landing page link on the side of BeMob.
Adding a landing page URL on the side of BeMob is just a part of complete configuration.
For complete integration it is required to add the BeMob Click URL on your landing page.
Adding BeMob Click URLs is essential for correct clicks tracking and redirecting visitors from the landing to the offer page once they click a button on your landing page.
This will be the second part of the landing page settings.
To create a landing page element in BeMob, follow these steps:
-
In BeMob go to Landings.
-
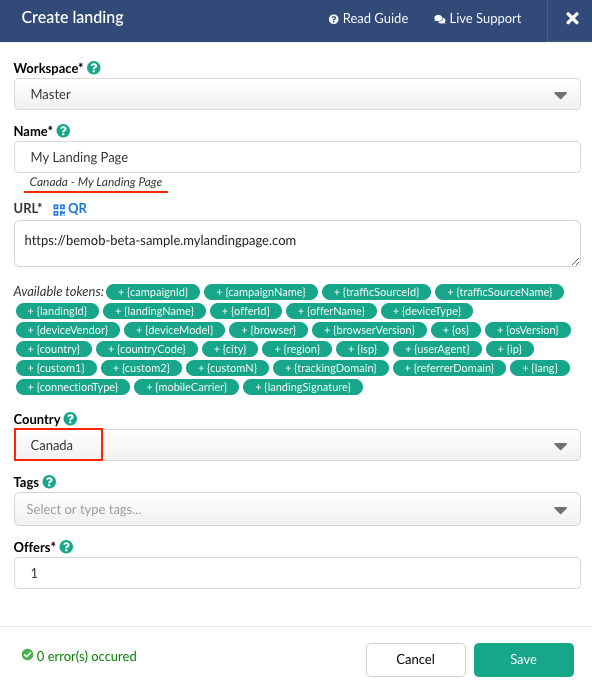
Click the New button, the new landing page form will show up.

Workspace (optional)
Select the Workspace from the drop-down menu that the landing page will be assigned to.
Workspaces help to separate all the working processes into areas. Along with the Users Management this option allows to organize and manage the campaigns and elements smartly.
By default all the elements go to Master WS. Leave the default selection if you have no other preconfigured custom workspaces and move on to other settings.

Name (obligatory)
Specify the Name of landing page. Name structure includes custom name and geo tag.
By default the geo tag is Global.

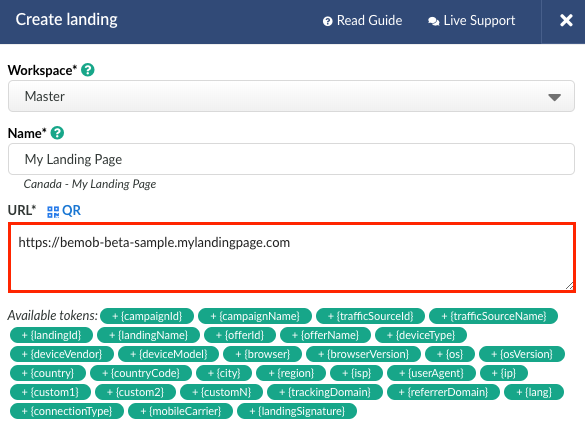
Landing Page URL (obligatory)
Introduce the link of your landing page. This should be a public URL which is used to access the landing page.

QR code (optional)
If you are running campaigns with mobile traffic, you can just press the icon and scan the code with your device to see how this landing page looks on mobile or tablet device.
Available Tokens (optional)
The list of available tokens is required if you are willing to pass the additional information to landing page. Learn more about how to forward the information to landing page in our dedicated guide.
If it is required to pass the additional information to the affiliate network in the offer URL, there is no need to specify these tokens at the end of landing page URL in the first place.
Passing of additional data can be done through specifying these parameters + tokens in the click URL or at the end of offer URL.
Country (optional)
This option allows to organize your reports and make the campaign settings easier.
Selected landing page geo shouldn't conflict with a geo of your campaign.
Example: If your landing page geo is Canada, a campaign geo should be Canada or Global.
Country selection is not affecting the traffic distribution by geo in your campaign. Use Country condition for Built-in Flow or Flow settings.
Tags (optional)
This option is required to group the elements by specific criteria and then perform the search basing on specified value.
Offers Number (obligatory)
The value you specify in the Offers Number field should be equal to the number of CTA buttons for your landing page.
The offers' number can not be changed after the landing page settings are saved.
The following Offers' Number options are available:
- Offers = 1
Example: you have a landing page with 1 call-to-action button.
When a visitor clicks the button, he will be redirected to one and the same offer.
Number of click URLs: add a single click URL on your landing page.
Campaign Settings: specify the required landing page along with one offer in built-in flow settings of campaign or create a flow with 1 landing page + 1 offer.

-
Offers = 1
Example: you have a landing page with several call-to-action buttons.
When a visitor clicks these buttons, he will be redirected to the same offer each time.
Number of click URLs: add the same click URL on each CTA buttons of your landing page.
Campaign Settings: specify the required landing page along with one offer in built-in flow settings of campaign or create a flow with 1 landing page + 1 offer. -
Offers = 1
Example: you have a landing page with single call-to-action button which lead to several offers randomly. This is called offer rotation.
Number of click URLs: add the same click URL on each CTA buttons of your landing page.
Campaign Settings: specify the required landing page and add several offers in built-in flow or flow settings. -
Offers > 1
Example: you have a landing page with several call-to-action buttons which lead to several offers. Each button should lead to dedicated offer.
Number of click URLs: place the multi-offer click URLs under each CTA button on your landing page.
Campaign Settings: specify the required landing page and add several offers in built-in flow or flow settings. Once you select the landing page with more than 1 offer in flow or built-in flow settings, the amount of fields for offers will automatically appear.
Store the landing page settings - press Save.
After you have created a landing page in BeMob it is required to place the click URLs on landing to finish the integration process.
More guides on landing page settings with BeMob:
👉 Understanding Click URLs Settings or How to Track Clicks Data
👉 Adding More Than One Landing Page at once
👉 Passing Dynamic Parameters on a Landing Page
👉 Passing Static Data from a Landing Page to an Affiliate Network
If you have any questions contact support team via live chat or at support@bemob.com