With Custom conversions feature it is possible to track different types of conversions: e.g. registrations, deposits etc. and see the detailed data on them in BeMob reports.
¶ Custom Event Creation
To create a custom event with BeMob:
- Go to Settings on the panel.
- Access Custom Conversions section.

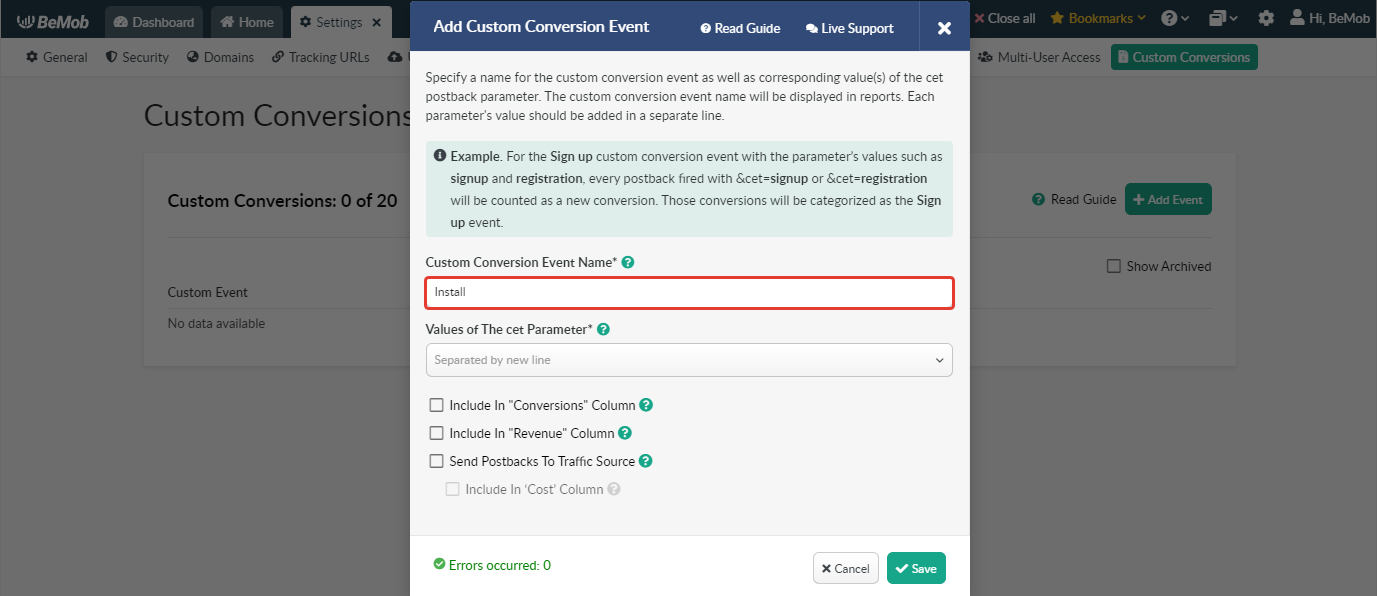
- Click on Add Event button. The window of Custom Conversion Event settings will appear.

It is possible to add up to 20 custom conversion events.
The window of Custom Conversion Event settings consists of the following fields:
- Custom Conversion Event Name
The name you specify in this field will be displayed in BeMob statistics (e.g. Install).
Custom Conversion Event Name should start from a letter and have the max 255 length.
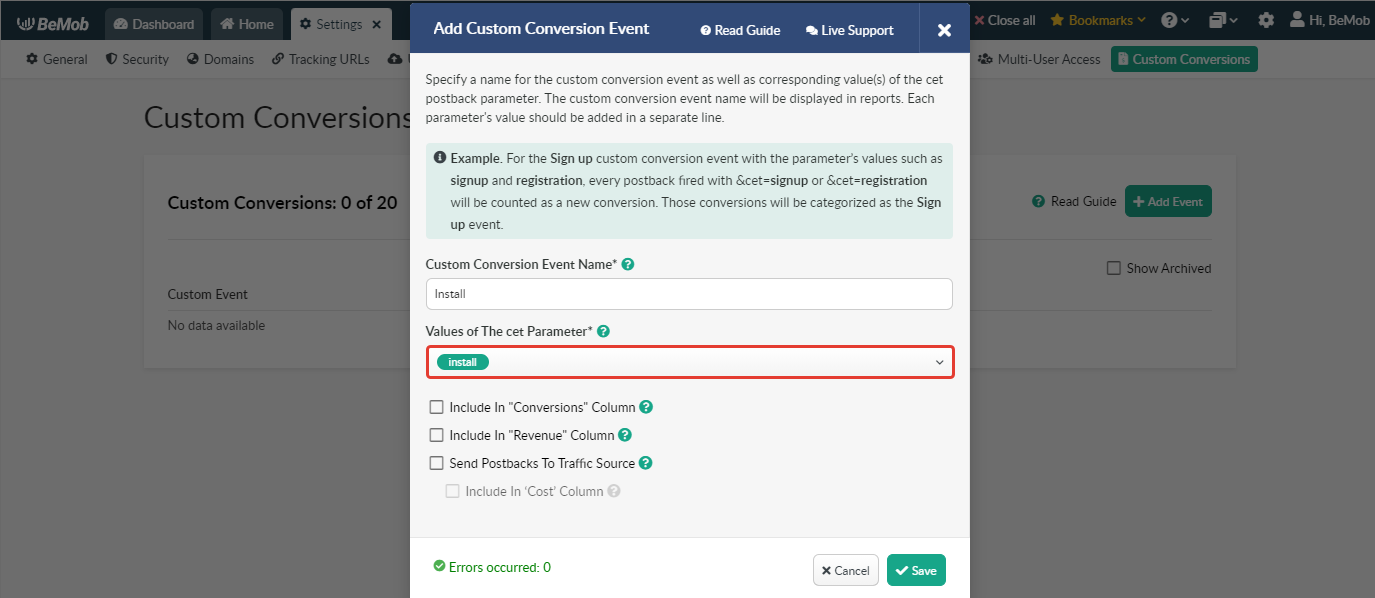
- Values of The cet Parameter
cet is the parameter that is used in Postback URL or Conversion Pixel for passing data of custom conversion value.
e.g. https://yourdomain.com/postback?cet=install&cid={s2}&payout={payout}
Values of The cet Parameter should be a unique value with 255 alpha-numeric characters max and “-”, “_” allowed.
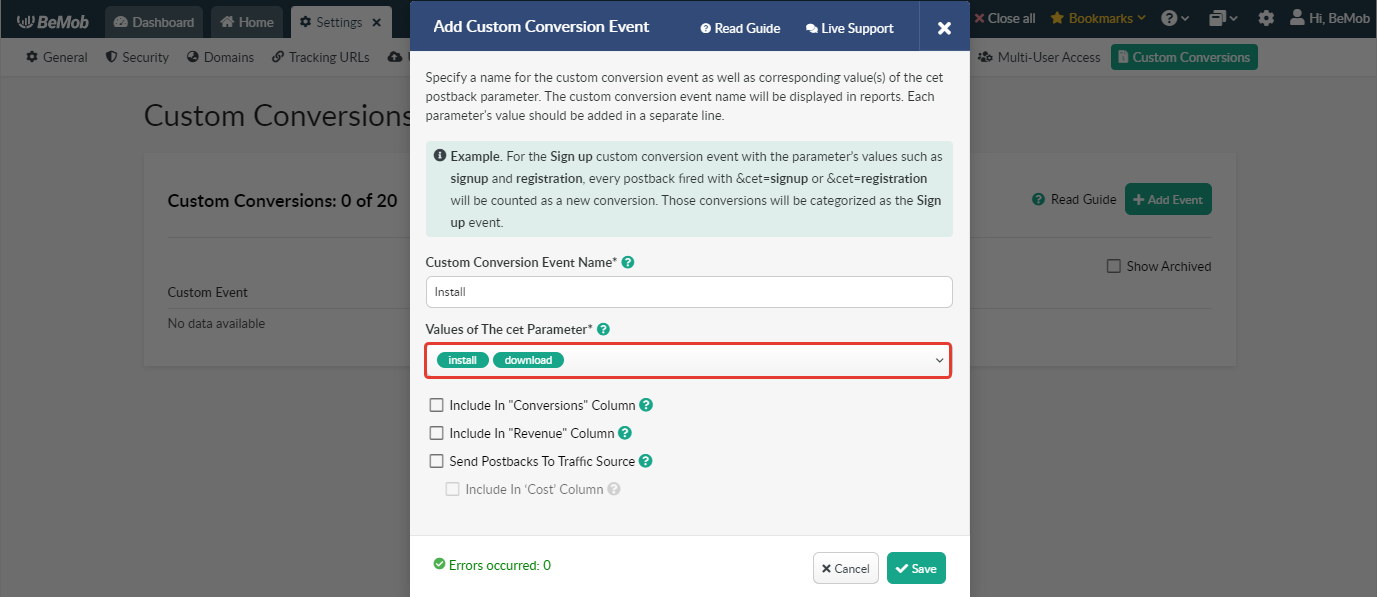
It is possible to specify several values for one custom conversion event.
The following options are available in the Custom Conversion Event settings:
- Include in "Conversions" Column
If this checkbox is marked, custom conversions will be included in the conversion amount and displayed in Conversions (All) column.
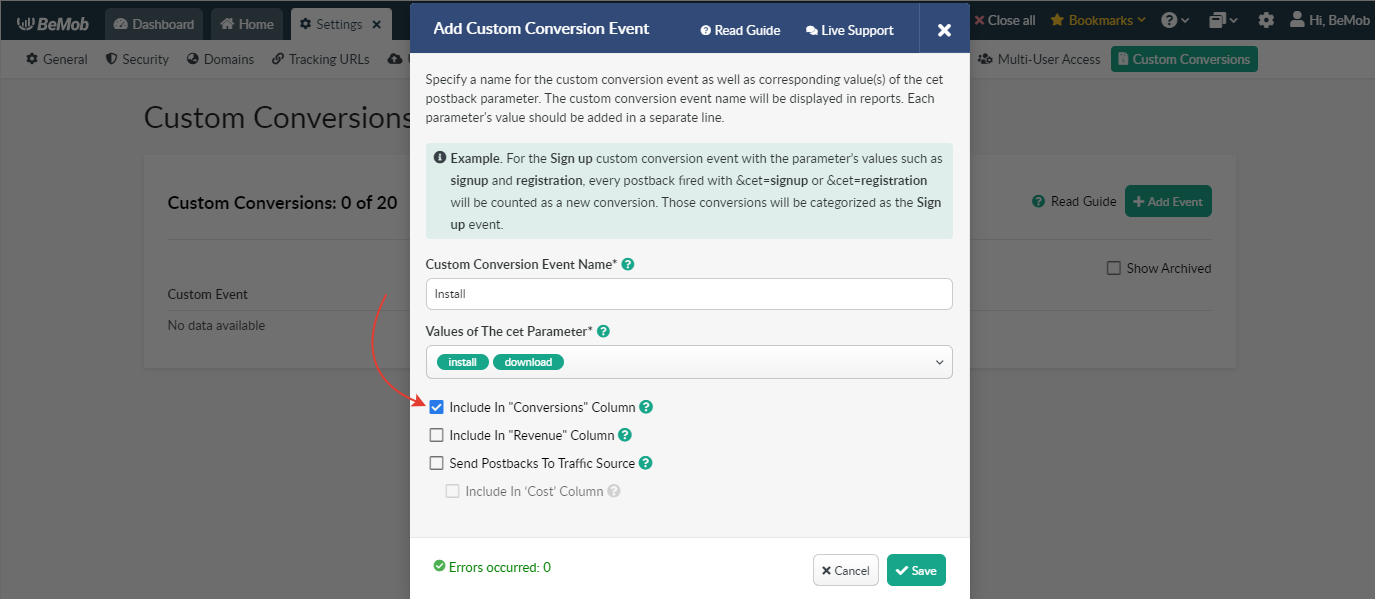
If you select Include in "Conversions" Column option for a certain custom conversion, it will be displayed in Conversions (All) column for all campaigns it has been registered for.

Otherwise custom conversion will be displayed in the corresponding column for custom conversions.

- Include in "Revenue" Column
If this checkbox is marked, custom conversions will be included in the total revenue value and counted as part of total revenue in Revenue column.
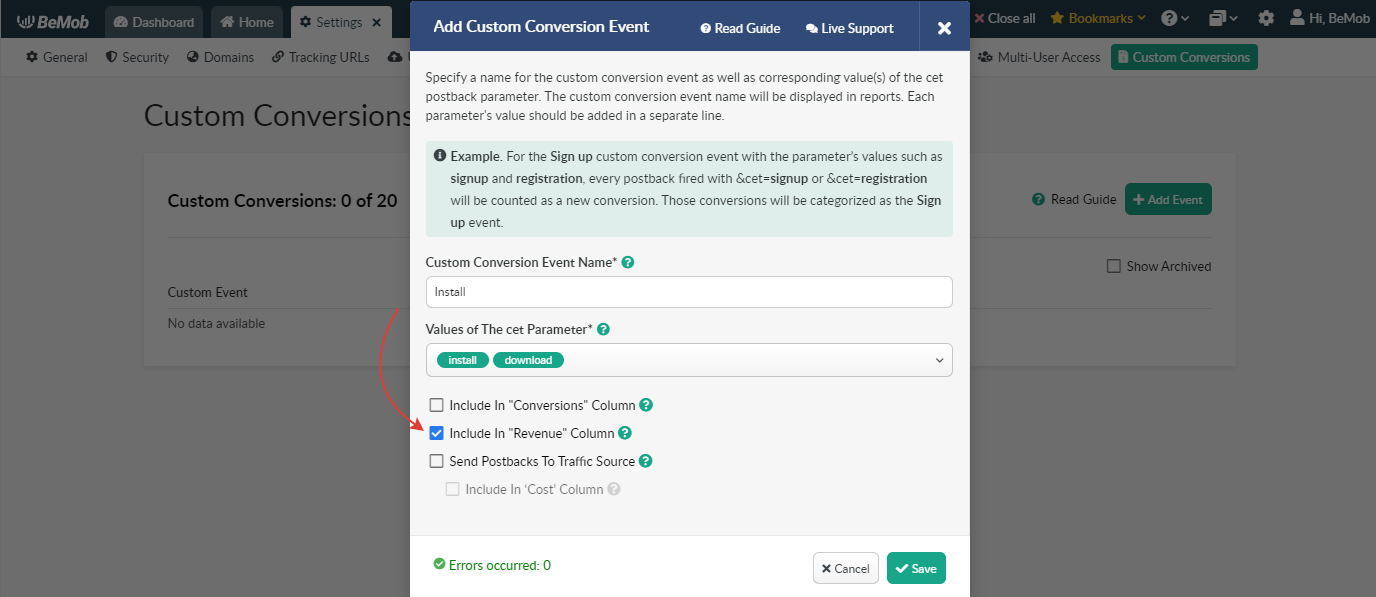
If you select Include in "Revenue" Column option for a certain custom conversion, its revenue data will be displayed in Revenue column for all campaigns it has been registered for.

Otherwise data of custom conversions revenue will be displayed in Event Revenue column.

- Send Postbacks to Traffic Source
If this checkbox is marked, it is possible to send data of custom conversions to the side of your traffic source in Postback URL.
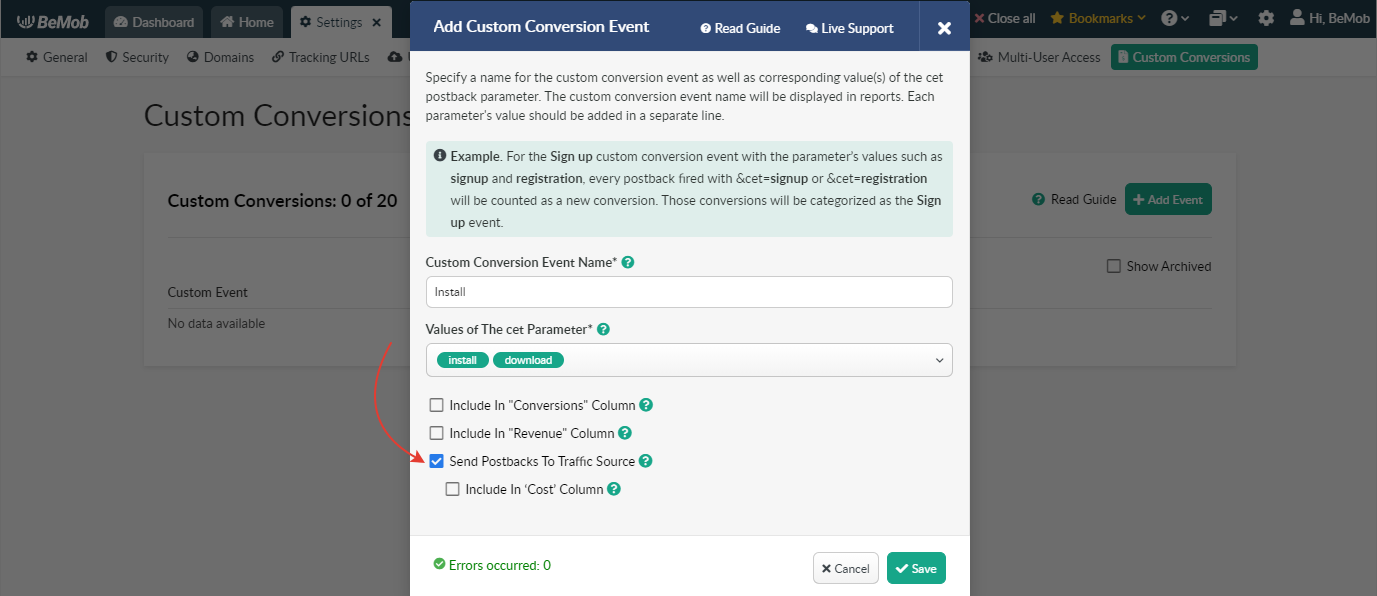
To pass value of custom conversion event to traffic source, it is required to use corresponding parameter in traffic source Postback URL.
e.g. https://www.yourtrafficsource.com/php?clickid={externalId}&payout={payout}&event_type={cet}
where event_type is a parameter supported by your traffic source to accept the data of conversion type;
{cet} is used for passing value of custom conversion event.
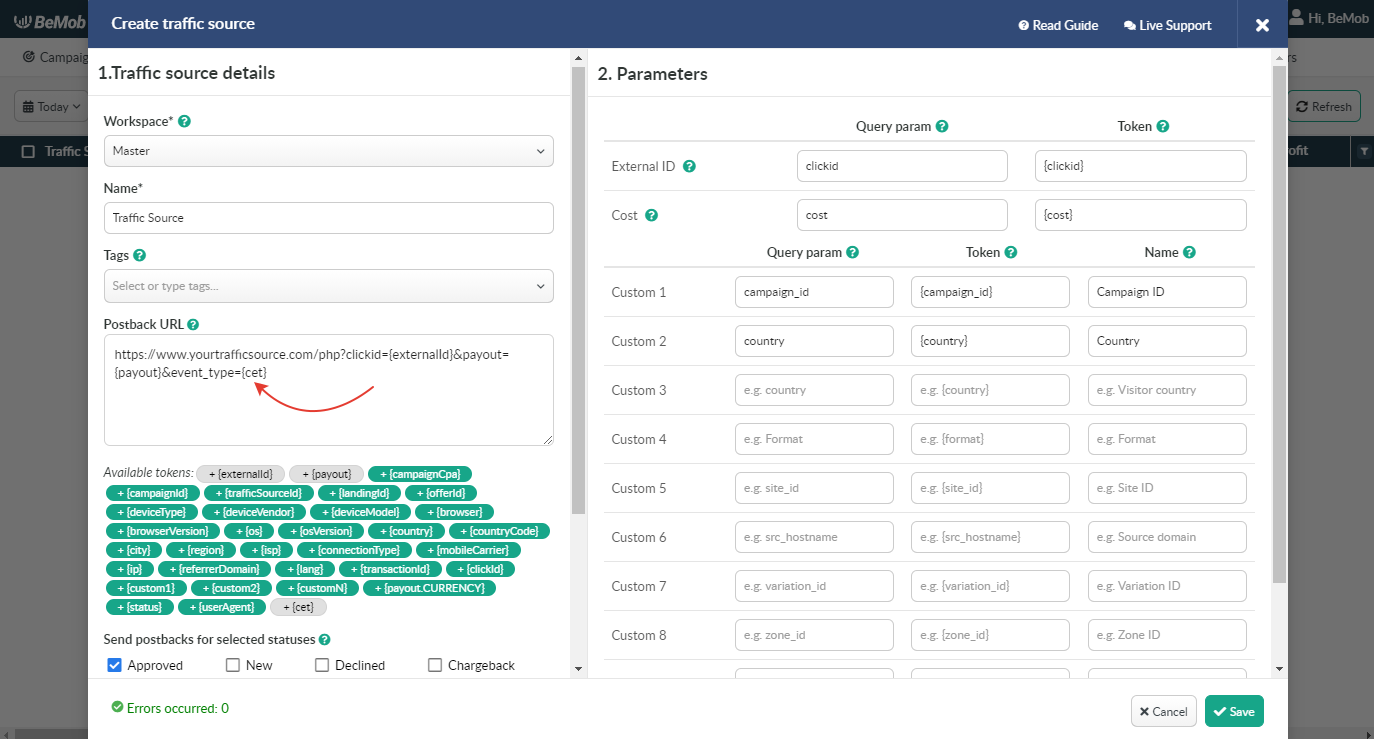
The Postback URL with resolved data will look the following way:
https://www.yourtrafficsource.com/php?clickid=5987456221&payout=1&event_type=install
- Include in "Cost" column
This option is available only if Send Postbacks to Traffic Source is selected.
If Include in Cost column checkbox is marked, cost of custom conversions will be included in the cost value.
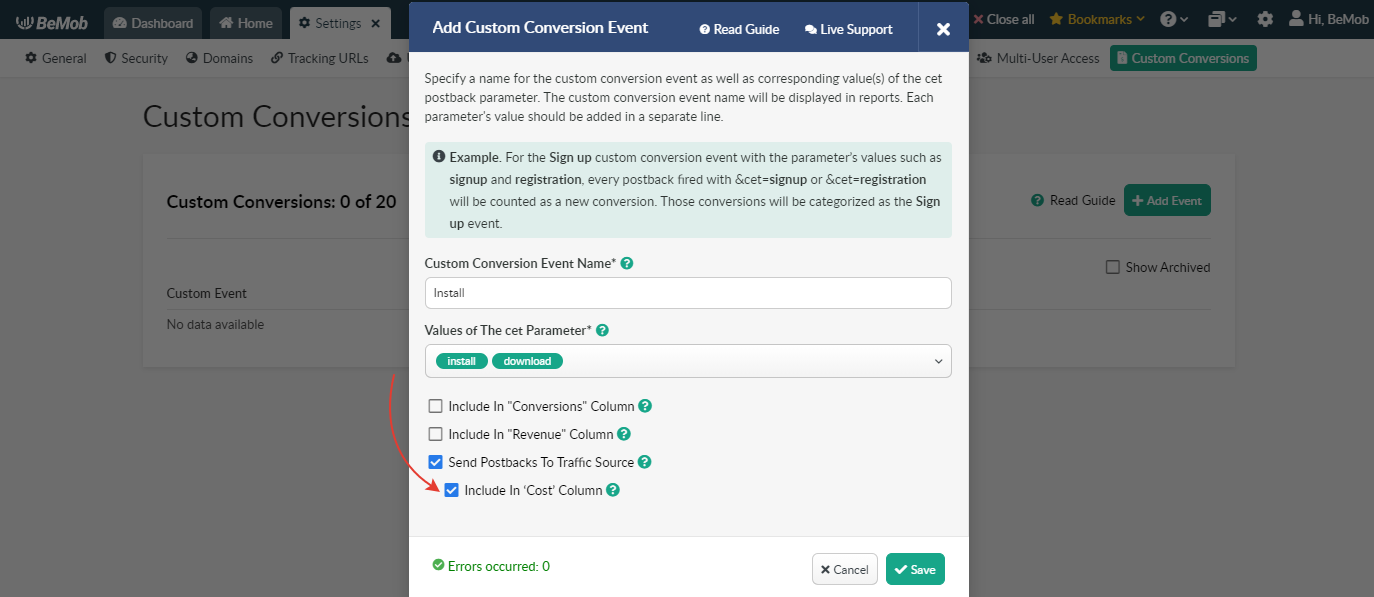
Include in Cost column option should be selected if you are working on CPA basis with your traffic source.
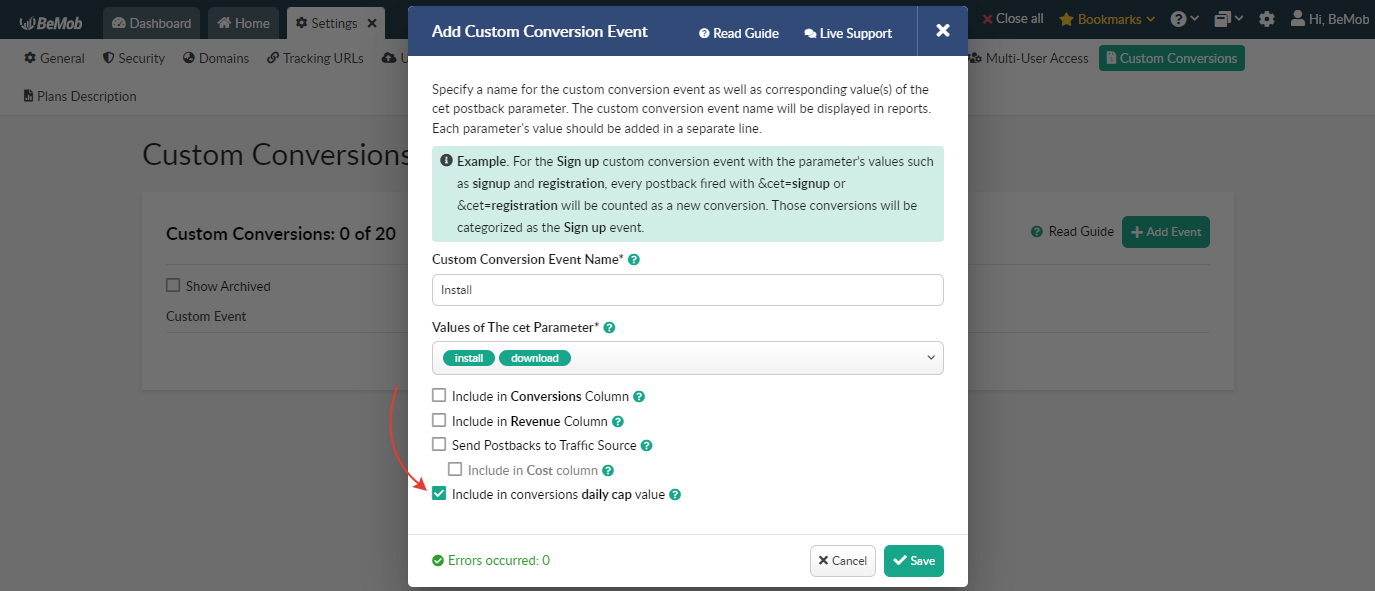
- Include in conversions daily cap value
This option is used when you want custom conversions to be included in a daily cap amount specified on the offer's level.
👉 Learn more about Daily Cap option
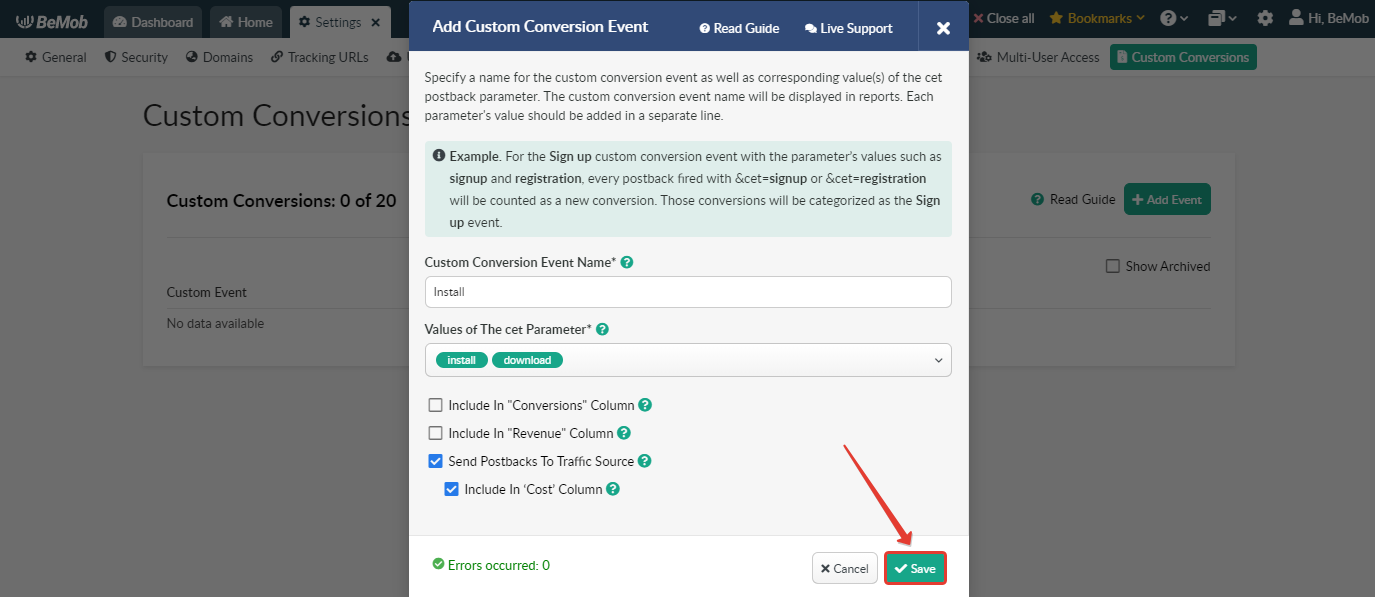
Press Save button to create Custom Conversion Event.
¶ Postback Settings for Custom Conversions Tracking
To track custom conversions it is required to generate the postback link or conversion pixel with cet parameter and corresponding custom conversion value.
It is required to follow these steps:
- access Settings → Custom Conversions section;
- click on Generate links button next to the pre-configured event.

Generate Links window contains the following fields:
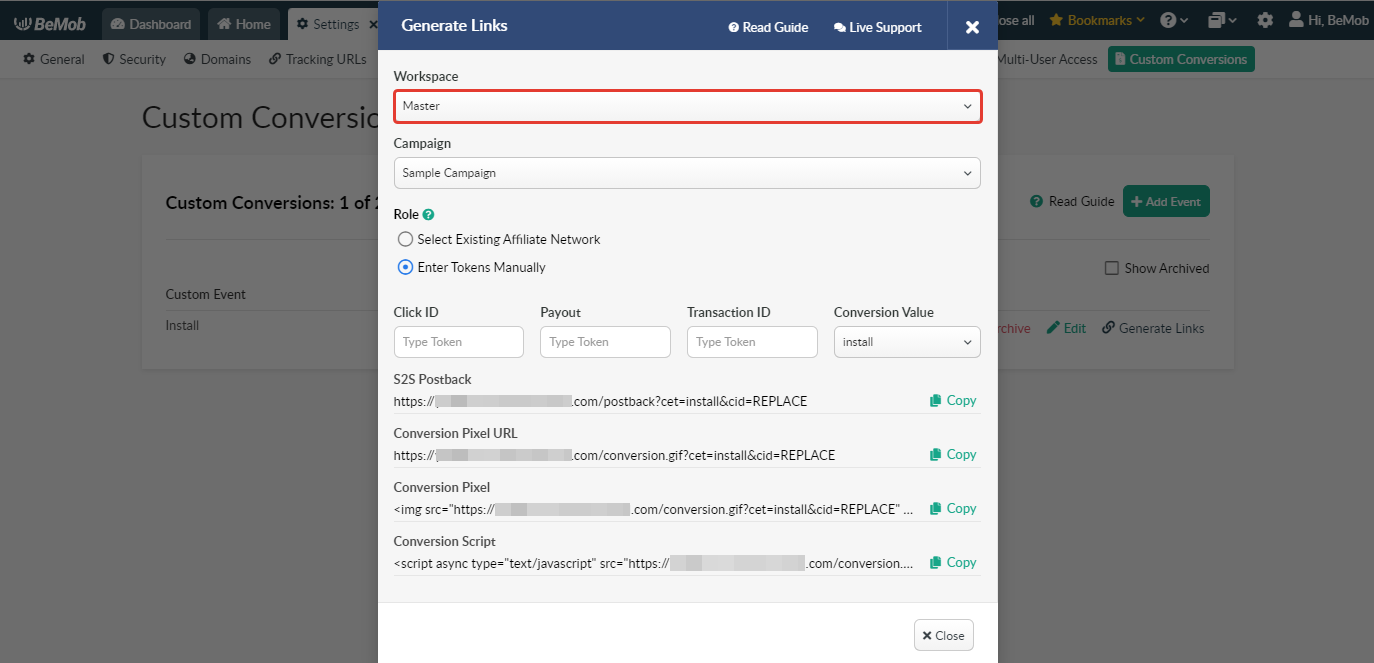
- Workspace
Workspaces help to separate all the working processes into areas. Along with the Users Management this option allows to organize and manage the campaigns and elements smartly.
Learn more in our Workspaces guide.
Select the Workspace from the drop-down list. If you are not working with Workspaces, leave the default Master option.
Workspace selection defines the list of campaigns that will be displayed in campaigns list below.
- Campaign
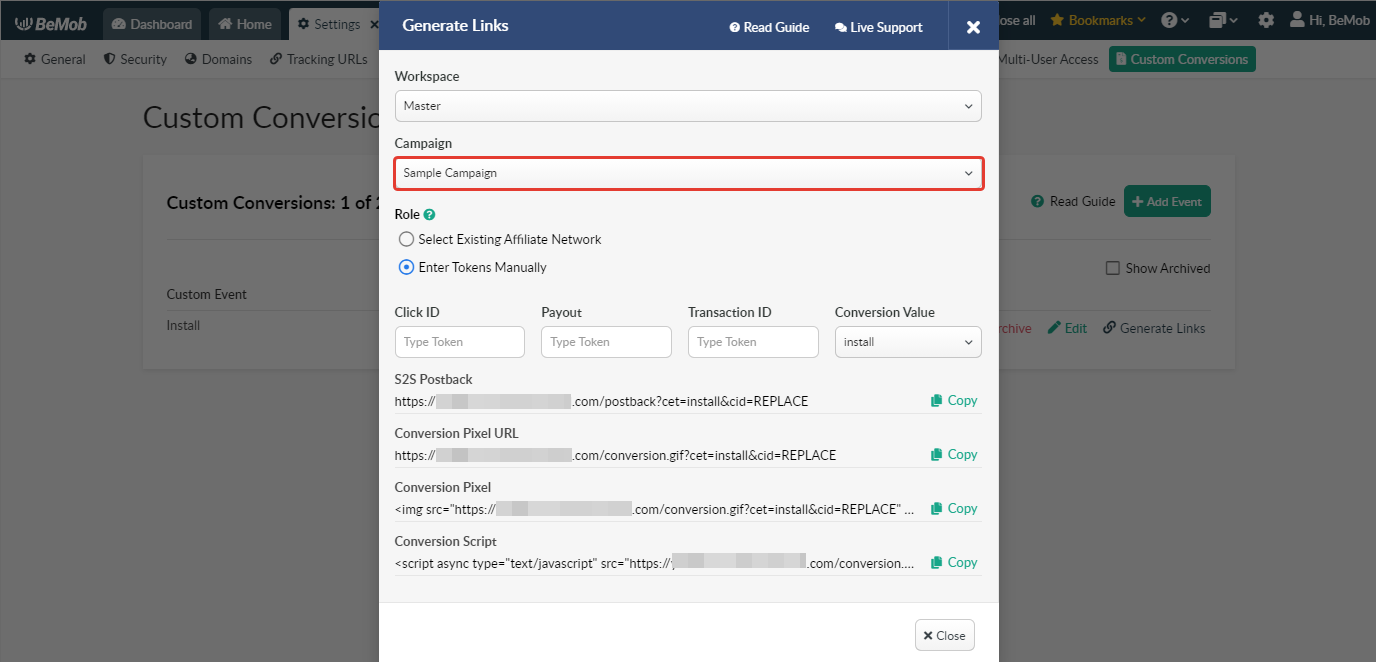
Select a campaign you want to use Custom Conversion Event option for.
- Role
Roles identify how the links for the conversions event tracking will be configured. There are two options of setting up the links for custom conversion events.
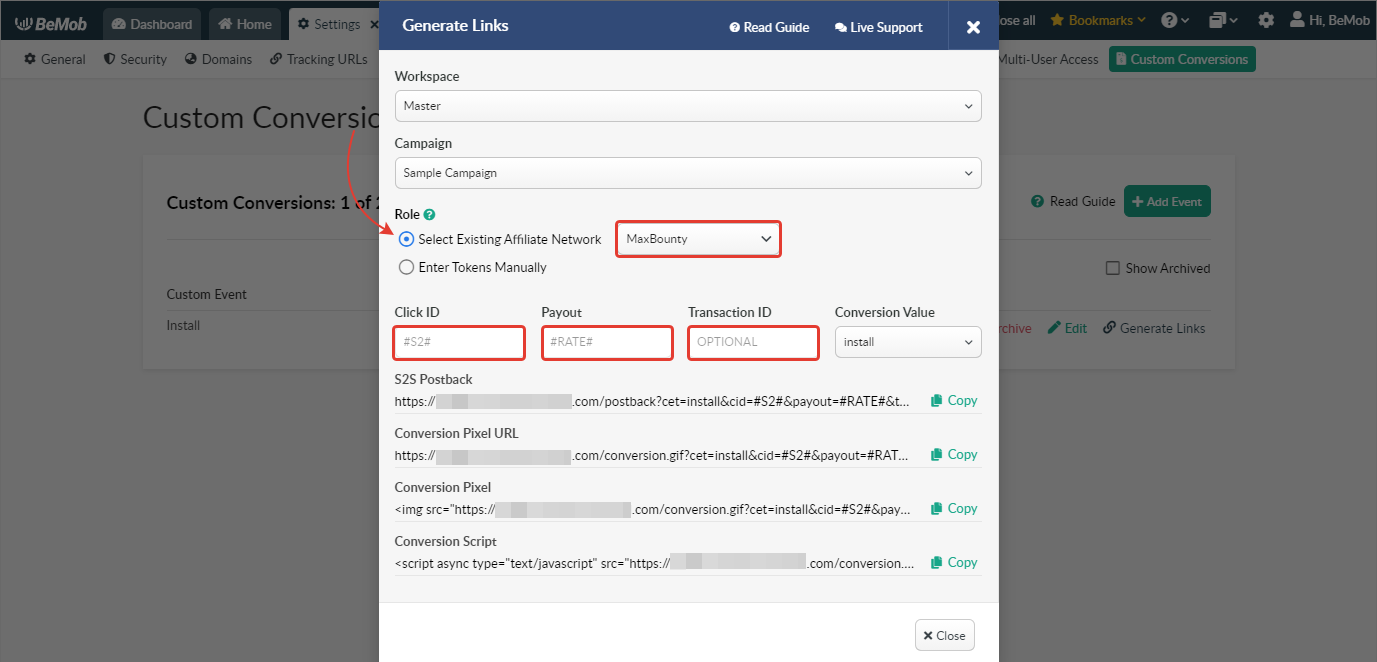
- Select Existing Affiliate Network
You can create the postback URL or pixel with pre-configured paramaters for the network you have already added from the template in Affiliate Network settings.
Make sure the affiliate network you are willing to set up is loсated in the workspace selected in the first step.
Click on the list to select the required affiliate network to use Custom Conversion Event option for. All tokens supported by this affiliate network will be automatically added into the corresponding fields.
- Enter Tokens Manually
This option should be selected if you have no pre-configured affiliate network. In this case you will need to specify all the tokens supported with your affiliate network manually.

The value for cet parameter should be selected in Conversion Value drop-down menu.
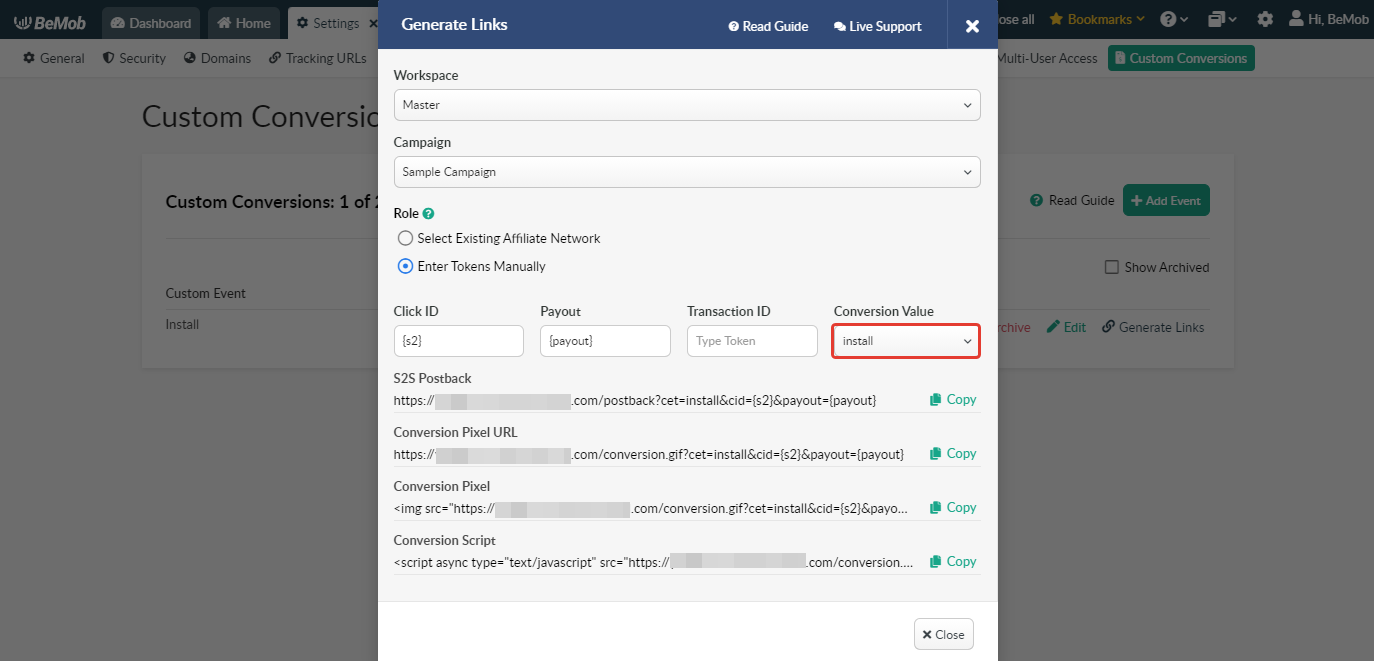
All specified tokens and conversion value will be automatically available in the postback links.
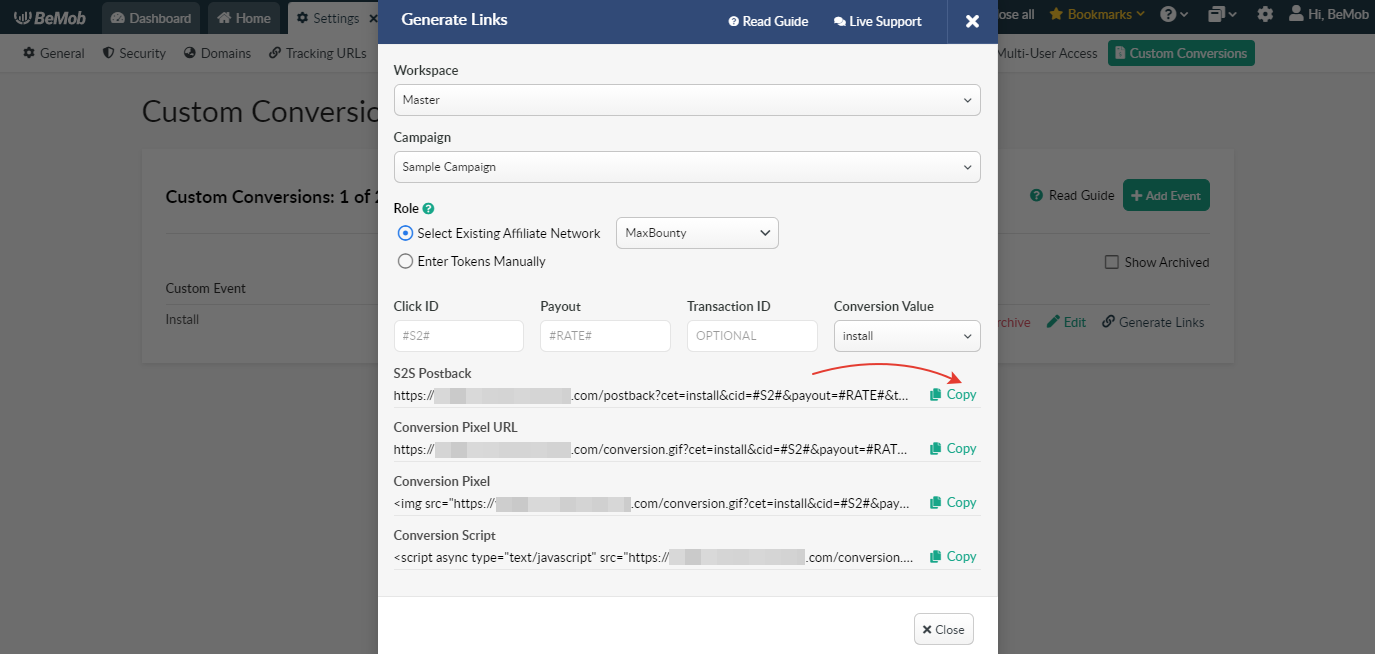
To copy Postback URL for conversions tracking press Copy button.
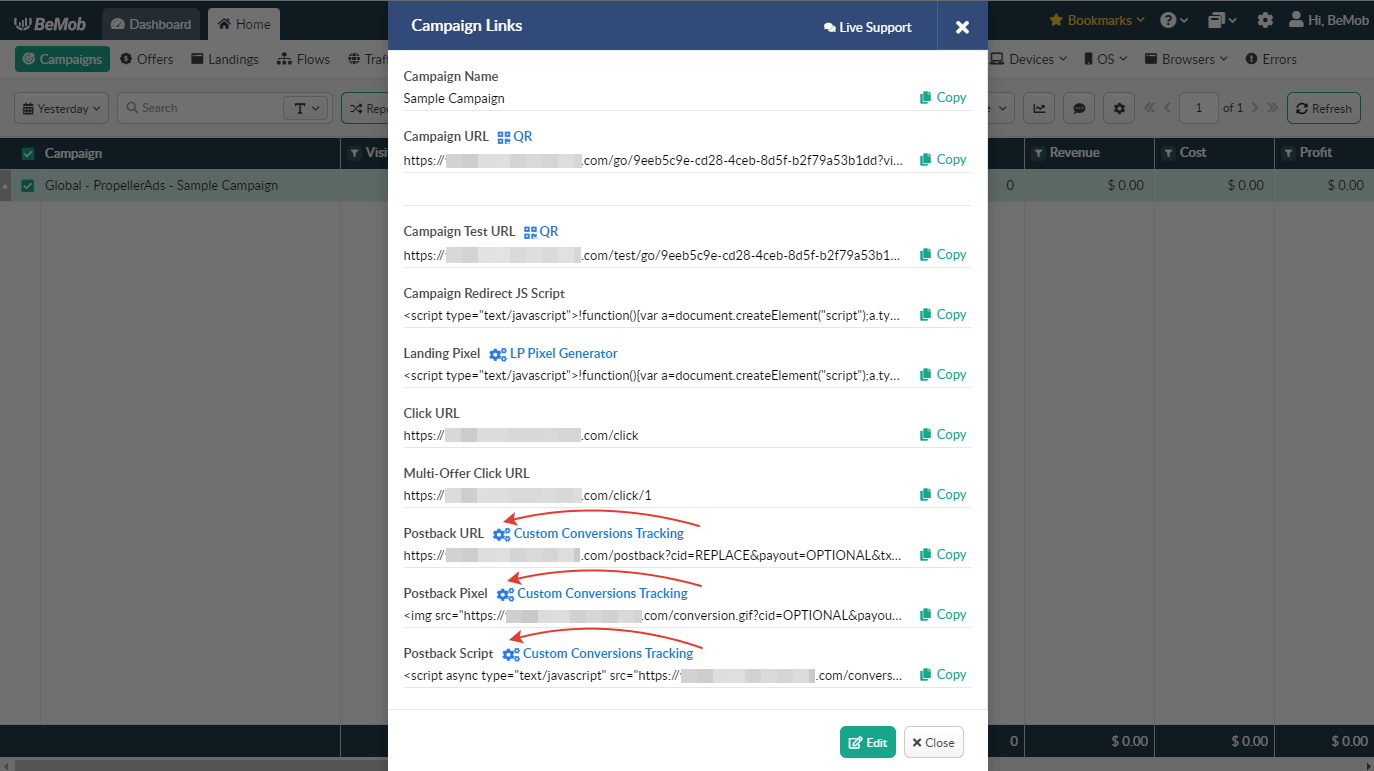
The tracking links for Custom Conversions can also be generated from the Campaign Links window.
Custom Conversions Tracking button will redirect you to Custom Conversions section.
¶ Additional Info
- Uploading Custom Conversions Manually
If it is required to upload custom conversion manually the order of uploaded conversion details will be the following: click ID;payout;transaction ID;;custom conversion value.
e.g. BuVsxm8W4aCX6NdKeKSPz3;3.5;ee56789ru;;install
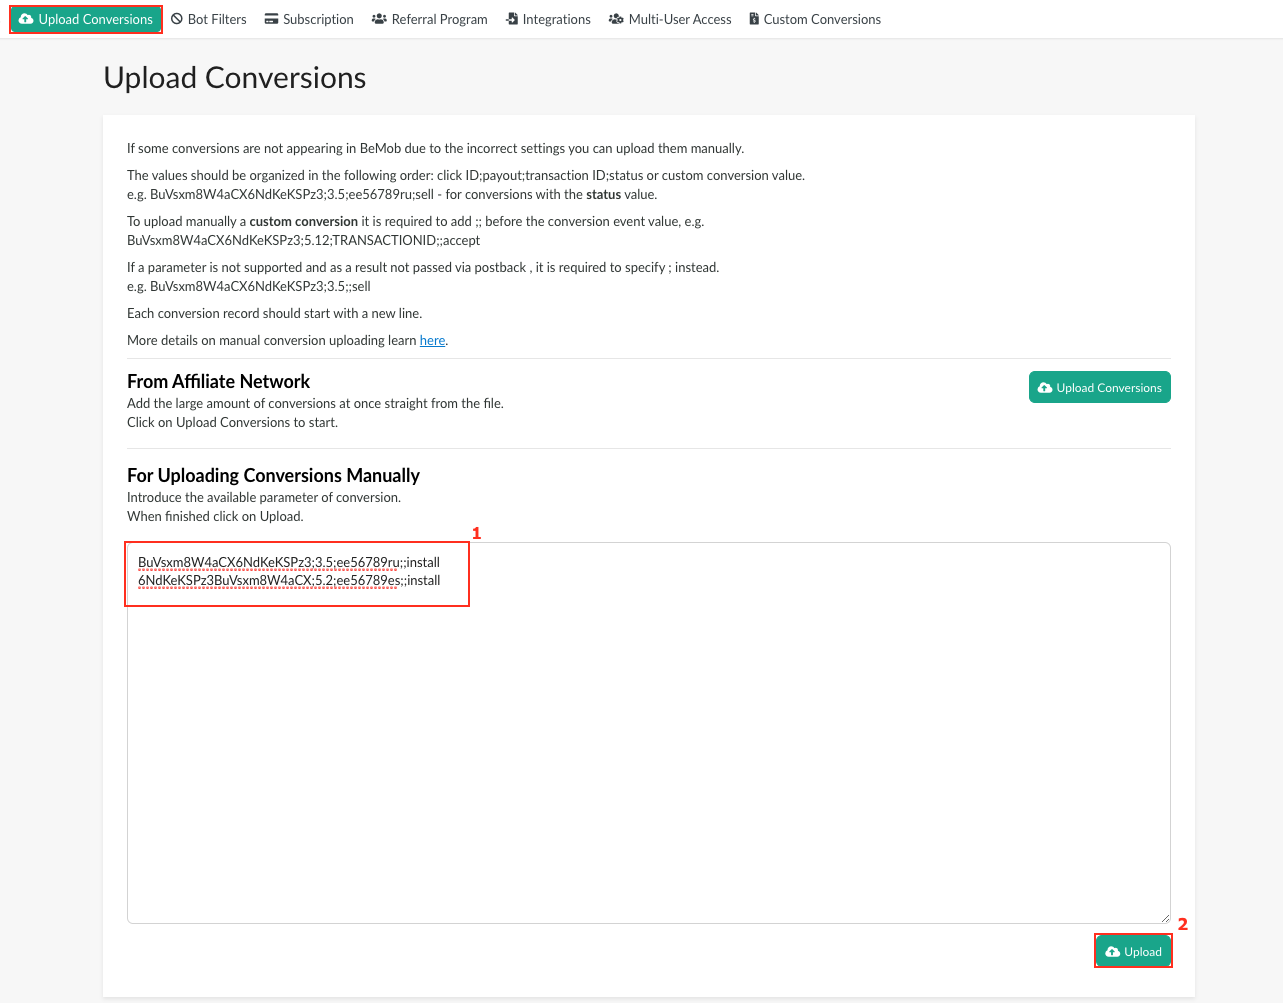
If there is no transaction ID passed for the conversion the record should be specified the following way:
e.g. BuVsxm8W4aCX6NdKeKSPz3;3.5;;;install
- Custom Сonversions Tracking Via Pixel
If it is not possible to track custom conversions via Postback URL, you can use Conversion Pixel which is provided in 3 forms: URL, pixel and script.
This method of tracking is cookie-based. When using it BeMob click ID is stored in the cookie which is sent for each campaign visit.
To use the conversions pixel with the pre-configured value of custom conversion it is required to click on Copy next to Conversion Pixel or Conversion Script from Generate Links window.
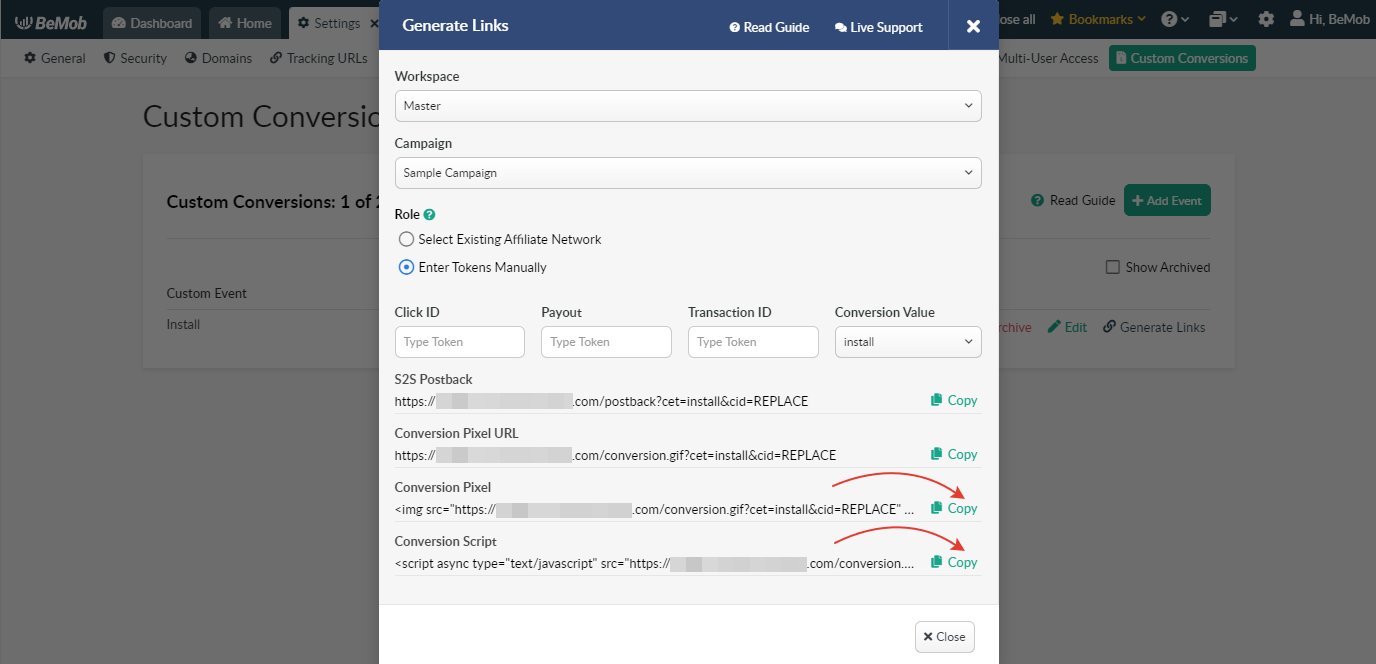
The click ID token is not obligatory in Conversion Pixel or Conversion Script since click ID is extracted from the cookies. Payout and transaction ID values should be introduced manually.
e.g. &payout=2&txid=123456
Conversion Pixel or Conversion Script should be set inside the code of thank you page that follows your offer.
- Archive / Restore / Edit
Since it is possible to create up to 20 custom conversion events, it is required to archive the events names which are no longer required.
Once the event is archived the column for this custom conversion event along with Event Revenue column will not be available in Columns Settings.
Press Archive button to move the required custom conversion to archive.
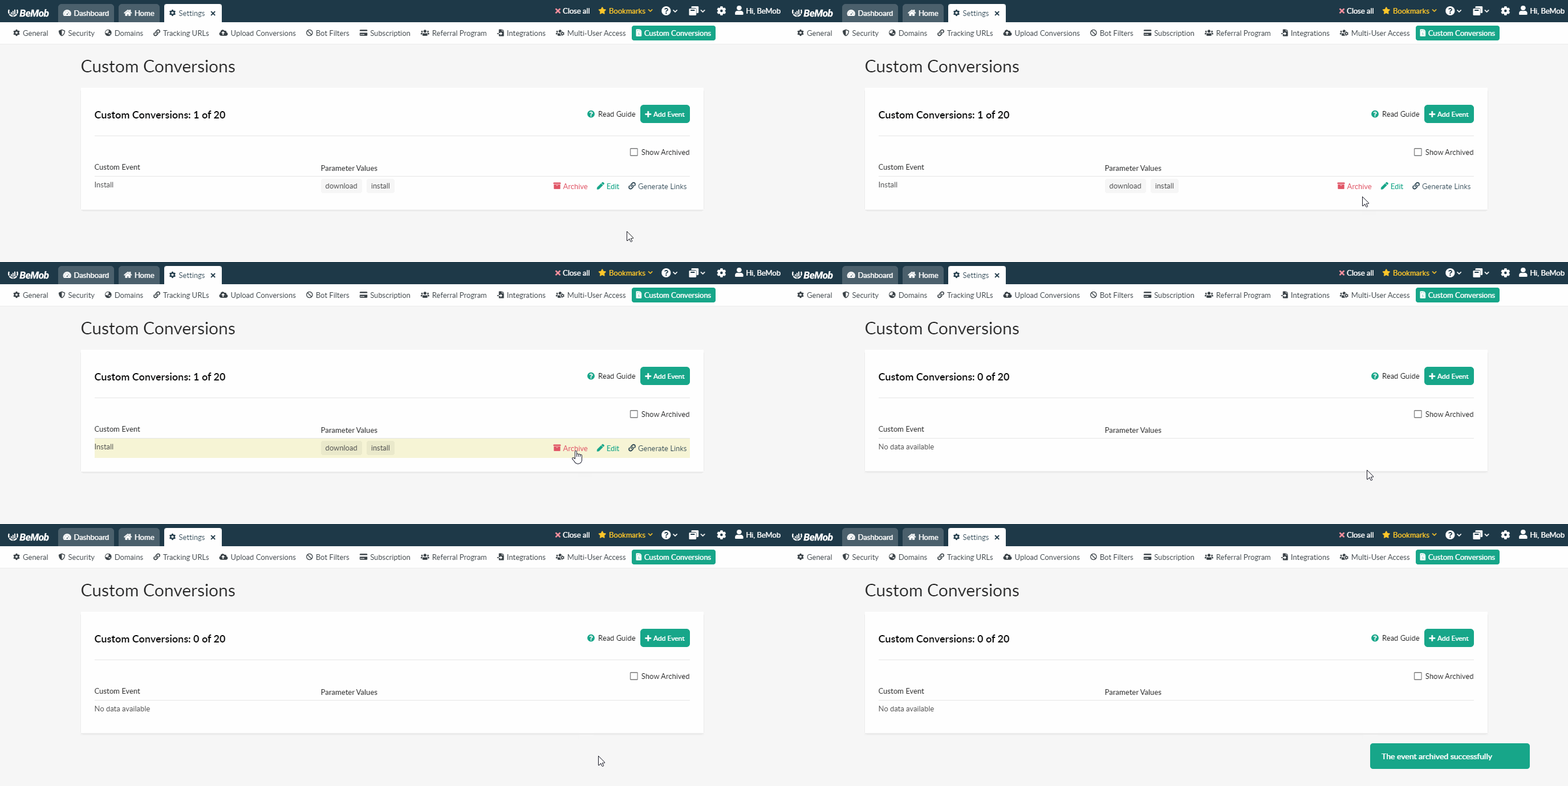
To see the list of archived custom conversions it is required to mark Show Archived checkbox.
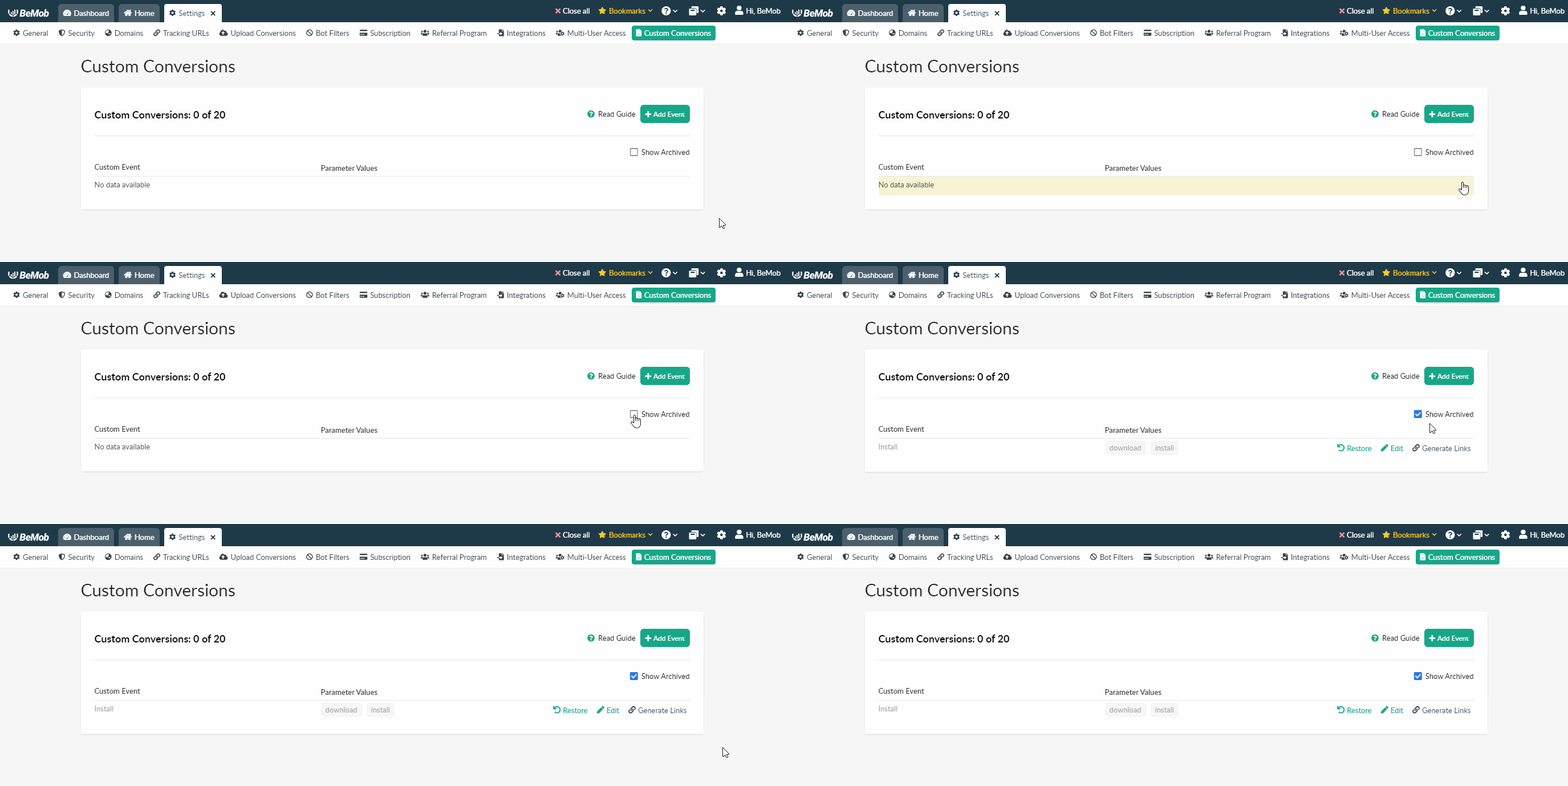
Press Restore button to move the required custom conversion to the list of active custom conversions.
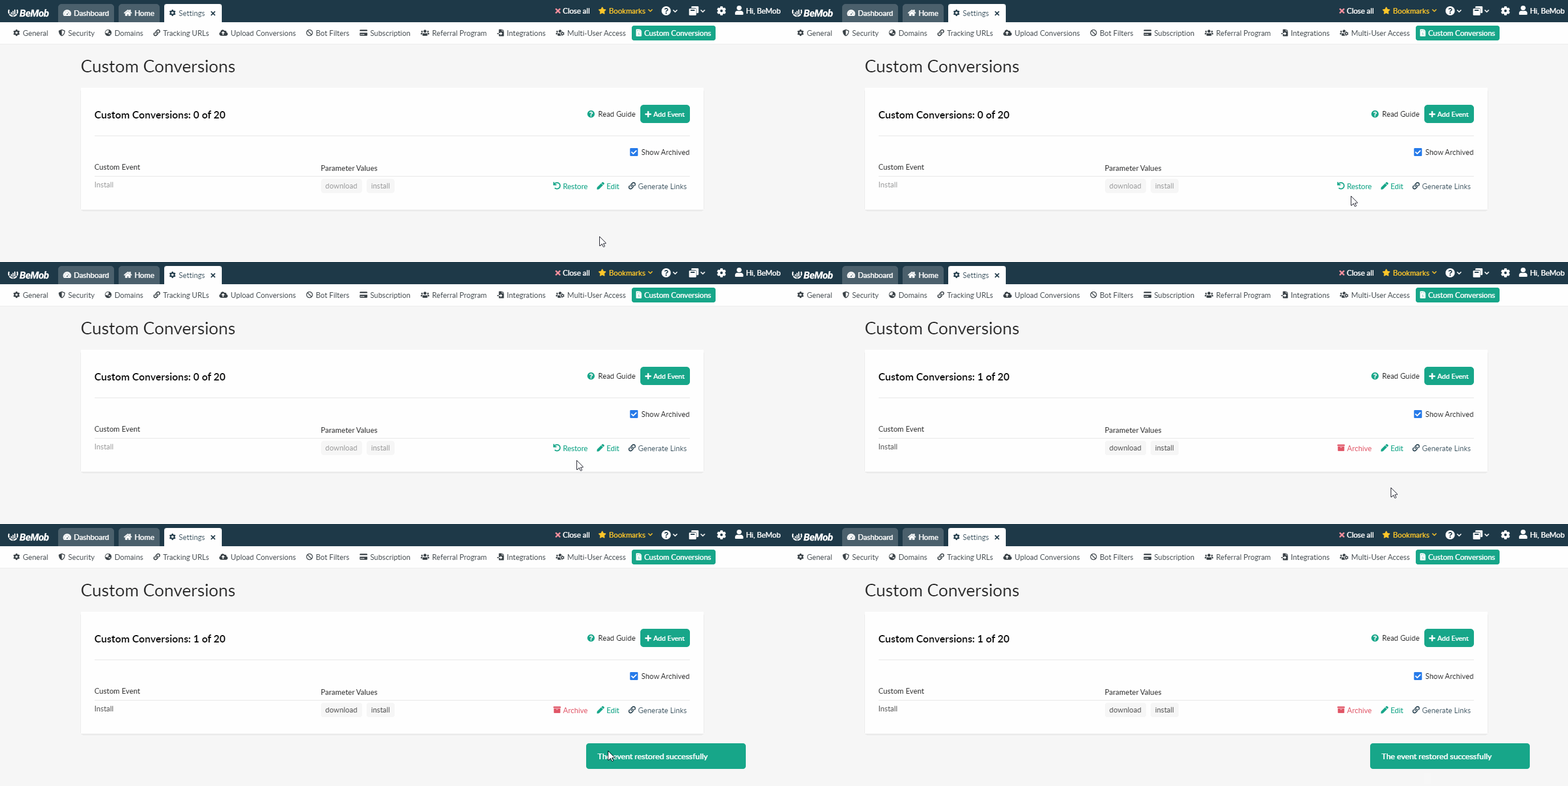
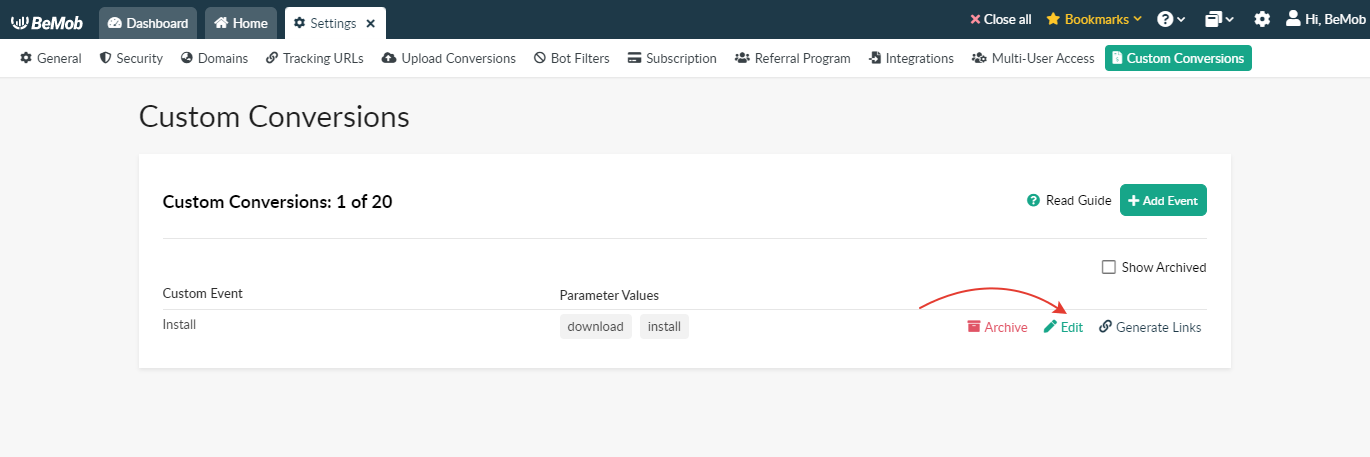
It is also possible to Edit the required custom conversion event.
Each custom conversion should be a unique value.
For instance, if you have set up the conversion with value sell and then moved it into archive, you will not be able to create a new custom conversion with the sell value.
In this case it is required to adjust the vlue of archived conversion - simply change the value from sell to sell1.
After that you will be able to specify the new conversion value as sell.
If you have any questions or need the assistance with the settings, contact our support team through the live chat or at support@bemob.com