If you want to set up the source before we add it in our templates, you will need to perform all the configuration manually.
For this go to the Traffic Sources tab, and then click on New.

The traffic source settings consist of 2 parts:
¶ Traffic Source Details
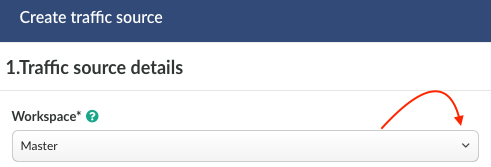
1. Workspace (optional)
Select the workspace from the drop-down menu that the traffic source will be assigned to.
Workspaces help to separate all the working processes into areas. Along with the Users Management this option allows to organize and manage the campaigns and elements smartly.
By default all the elements go to Master WS. Leave the default selection if you have no other preconfigured custom workspaces and move on to other settings.
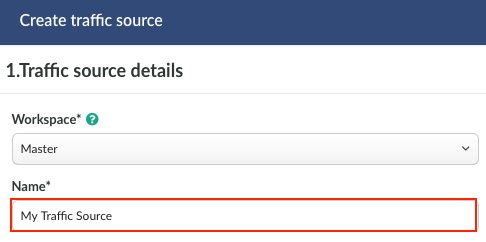
2. Name (obligatory)
Specify a name of your traffic source. It can be any value not longer than 255 alpha-numeric characters.
3. Tags (optional)
This is option is not obligatory. It is used to organize the elements by tag name.
👩🏫 Learn more about tags in our dedictaed guide.
4. Postback (optional)
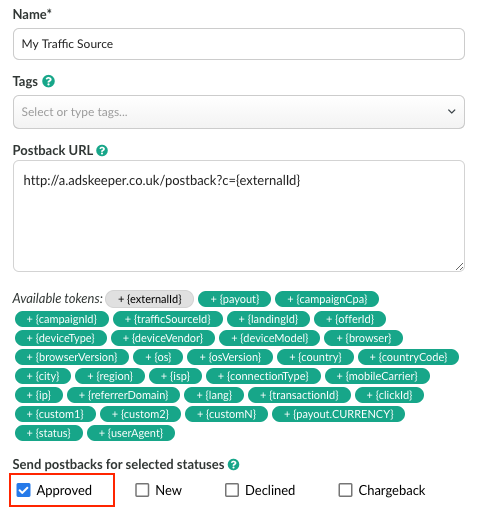
Specify the postback URL.
Postback URL is a dedicated link which is used for conversions data passing to your traffic source. Copy the postback link from your traffic source account and place the URL field on the side of BeMob.
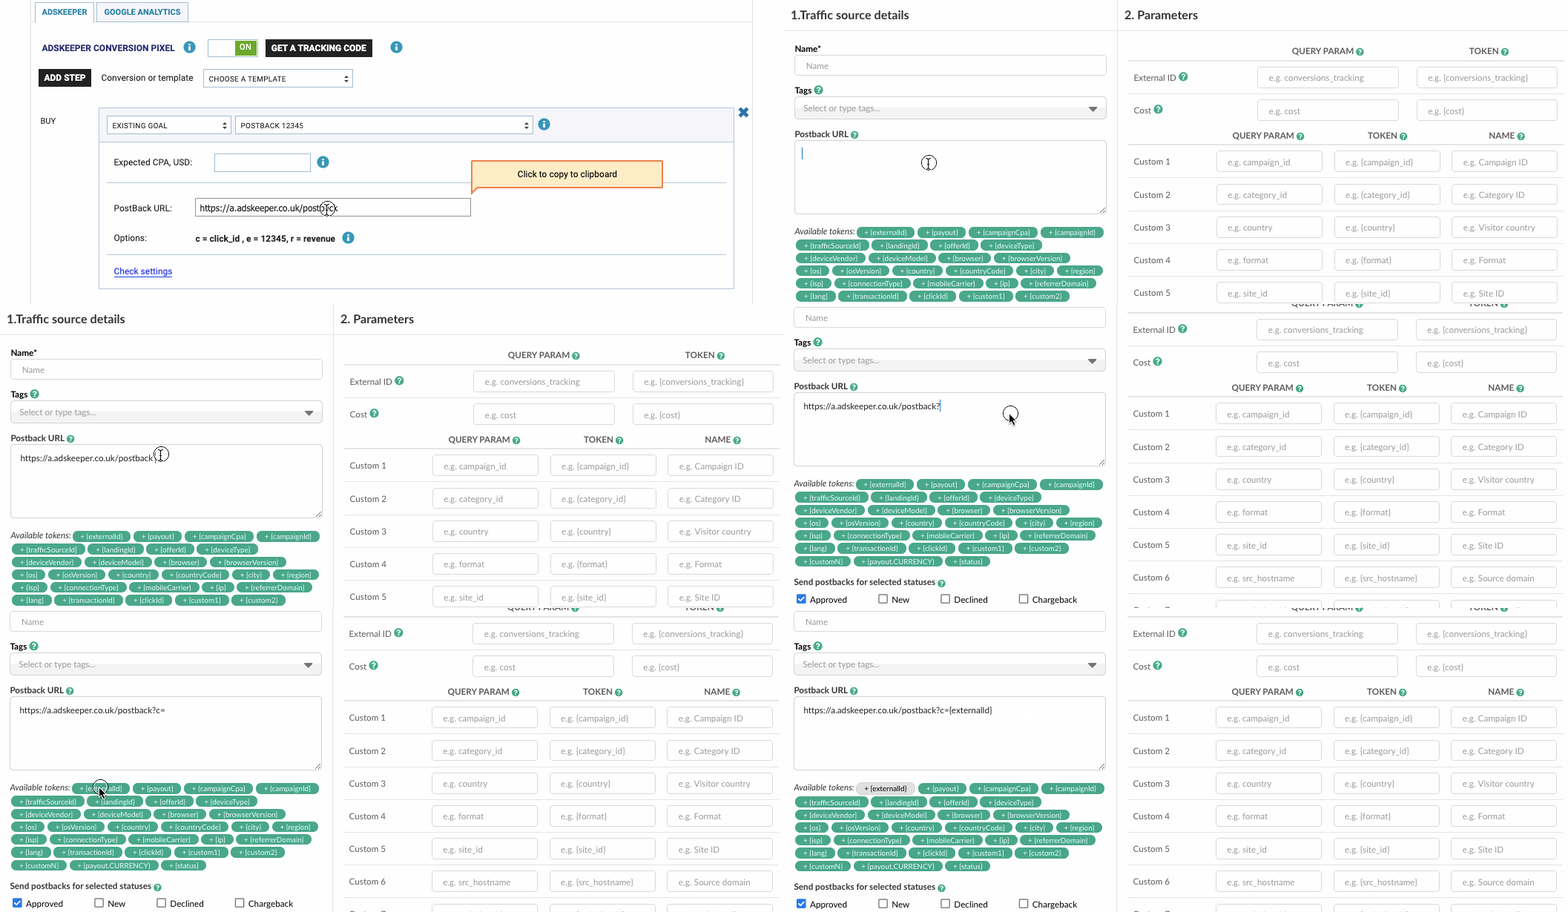
The most important data passed via postback is the click ID of conversion.
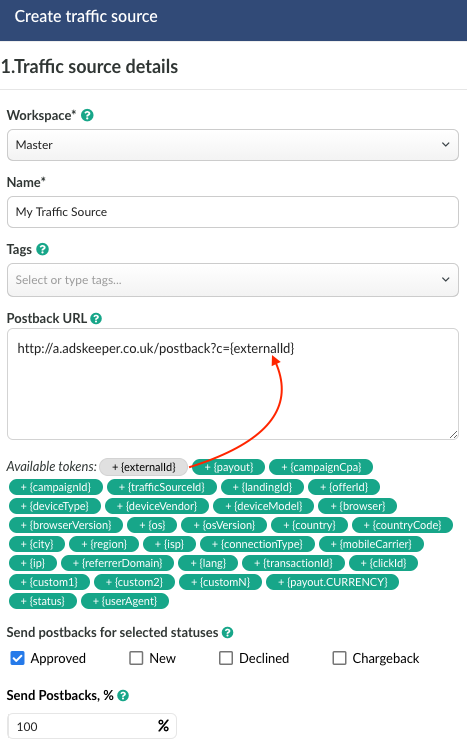
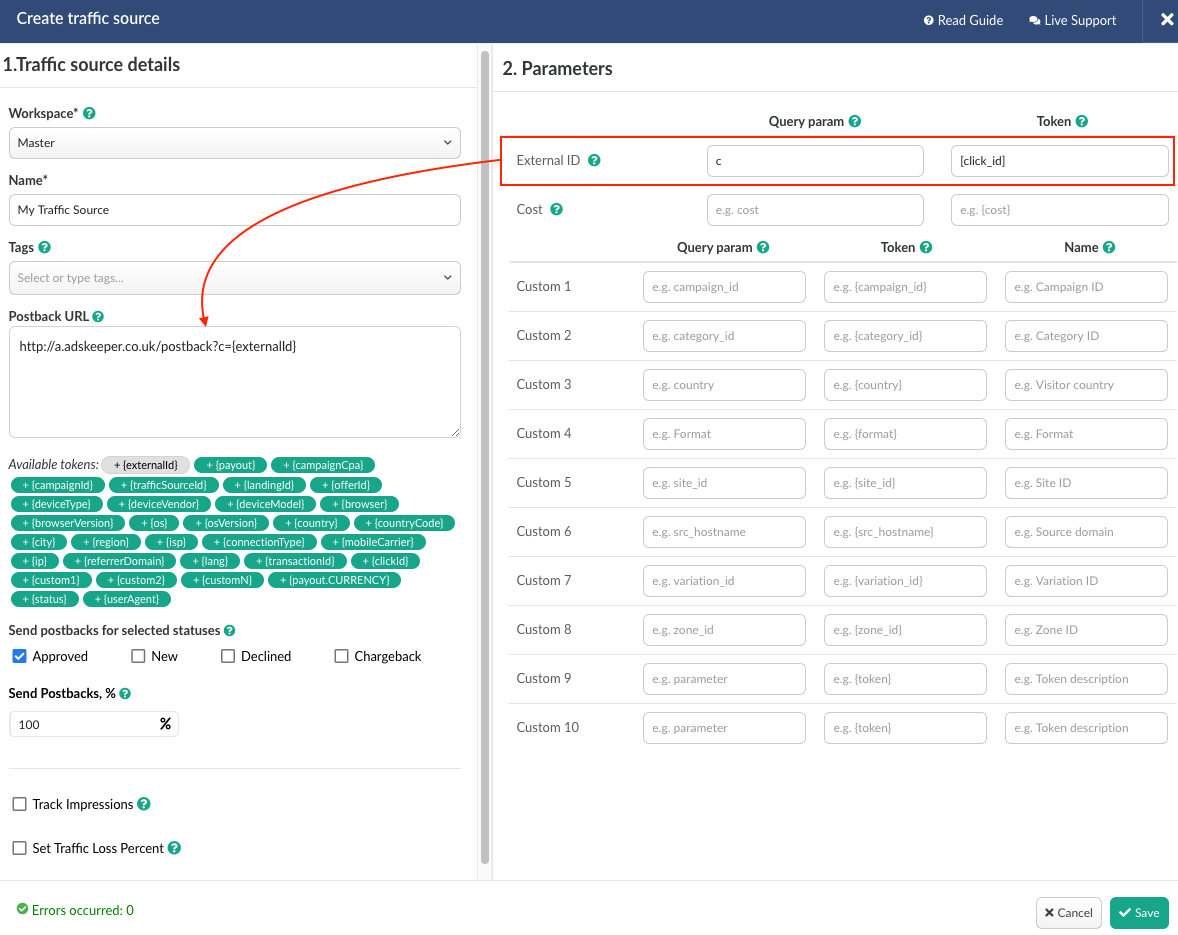
This click ID is passed to the side of traffic source via {externalId} token.
The token should be added at the end of your postback link in the format &c={externalId},
where c is a parameter of your source that is used to accept click ID of conversions and {externalId} is BeMob token that will pass the click ID of the conversion to the side of traffic source.
If your traffic source doesn't support the postback tracking, you can skip this step and move on to Parameters settings.
5. Statuses (optional)
By default, the option of sending conversions with Approved status is enabled in the source settings.
Even if you don't need to pass the conversions statuses data to the traffic source, you should make sure that Approved is always selected. Otherwise no conversions will be passed to the traffic source.
6. Percentage of Traffic Loss (optional)
An additional option that allows you to adjust the cost of traffic by the percentage of its loss.
👉 Learn more about the settings in the dedicated guide.
7. Send Postbacks, % (optional)
This option is used to pass a specific percentage of conversions registered in your BeMob account to the side of your traffic source.
This option is helpful when it is required not to disclose the complete data on conversions to your traffic source.
👉 More details on this option find in this guide.
8. Impressions Tracking (optional)
Mark the checkbox with this option when it is required to track the impressions of ad banner along with campaign visits. You will need to specify the impression pixel generated by BeMob on the side of your traffic source.
This option only works if your traffic source allows you to track the impressions.
👉 See the complete guide to learn how to track impressions in your campaigns.
¶ Parameters
This section is required to specify the list of tokens supported with your traffic source to pass the site ID, banner ID, campaign ID etc from traffic source to the tracker.
The list of supported tokens is usually available on the side of source: in your ad dashboard or in the documentation. You can also contact the support of your source to request the list of tokens.
Parameters section consists of fields for Query Params, Tokens and Names.
In the Query Param field you will need to specify the parameter value that is used by your source to pass the data about site ID, banner ID, campaign ID of the visit on your ad campaign.
In Token field you should specify the dedicated token of your traffic source that will pass the site ID, banner ID, campaign ID of the visit on your ad campaign.
In Name field it is required to introduce the name of parameter which will be displayed in the report on corresponding parameter.
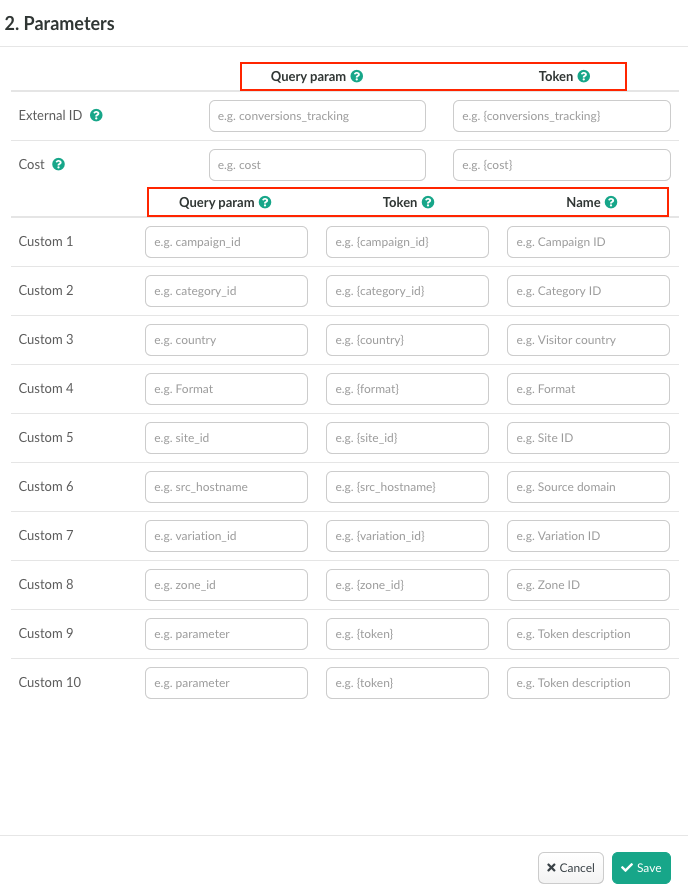
As soon as you start introducing the parameter value in Query Param field, the corresponding Token field will be autocompleted. This option is required to save your time on completing the fields.
As usual parameters and tokens of traffic sources match each other, but tokens contain curly brackets.
If your traffic source uses square brackets or any other symbols (e.g. <click_id>, [SITE_ID]) for tokens, you should ignore the BeMob autocompleted values.
For instance, your traffic is using site_id as a parameter and [SITE_ID] as token to pass the data on site ID of visit.
See below how the Parameters section should be completed in this case:
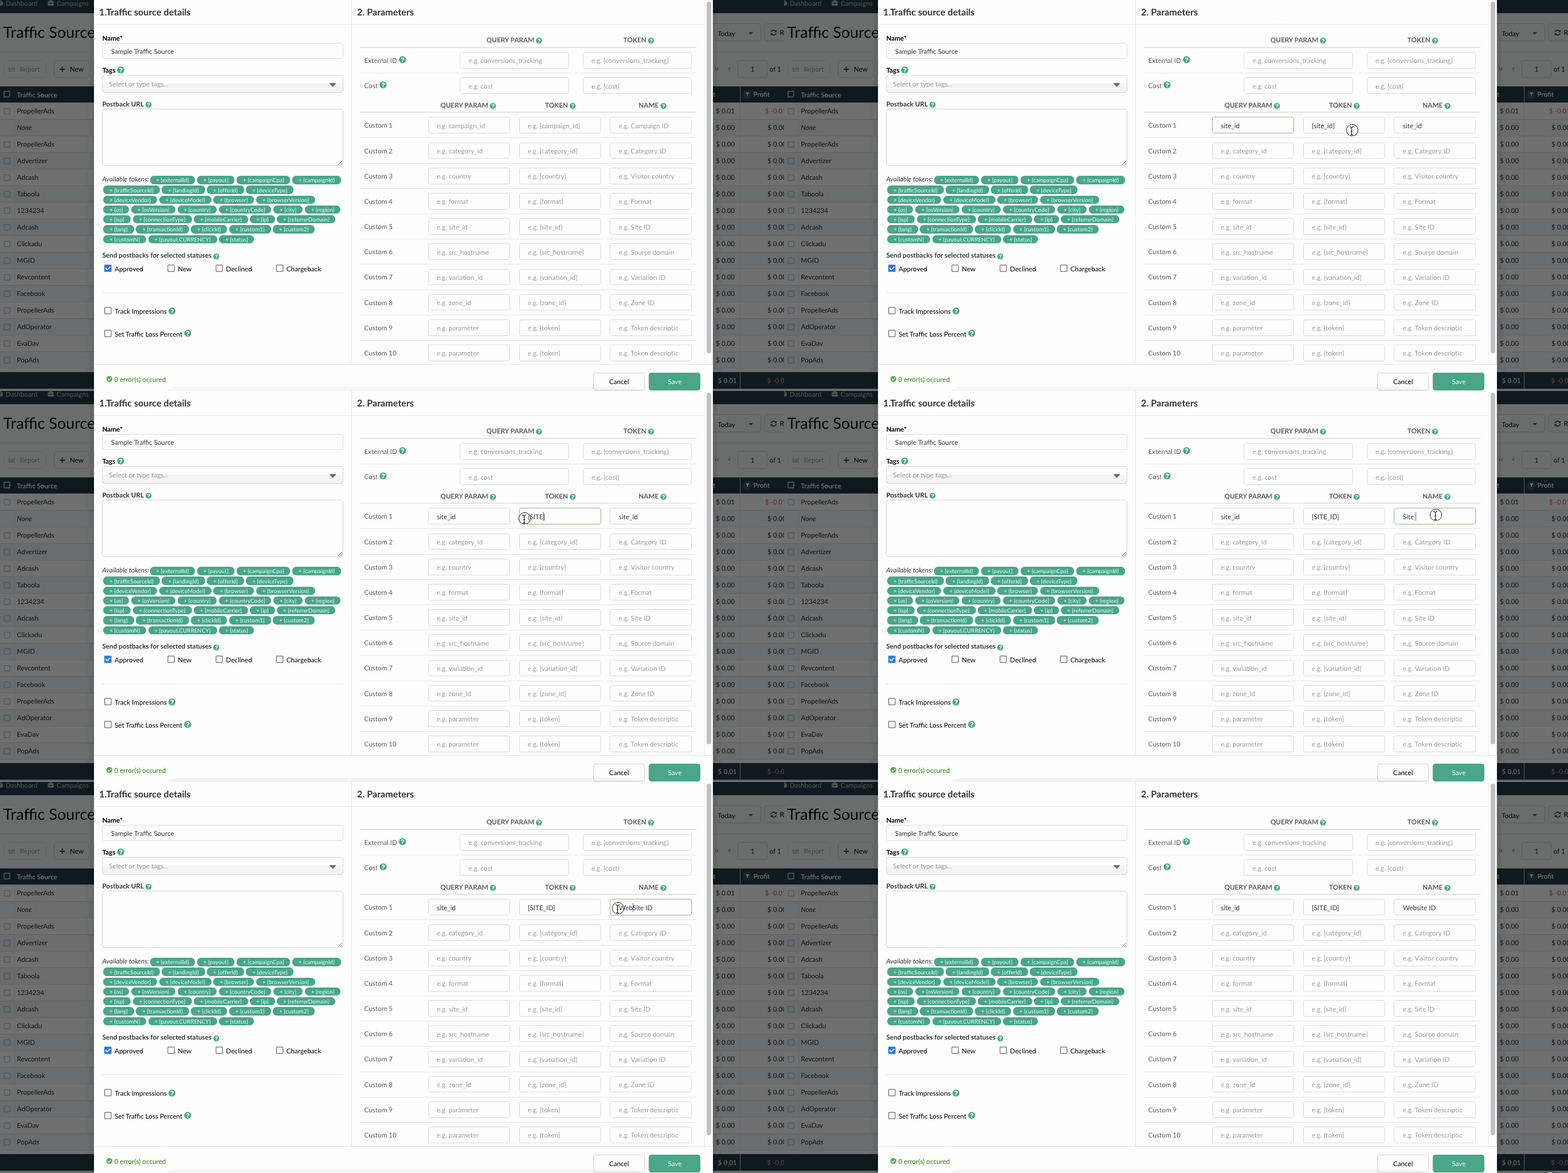
All the tokens and parameters specified in Parameters section will be added at the end of your campaign URL, Impression URL and Impression Pixel. Once you place the link on the side of traffic source and launch the campaign, the data on each visit will be passed to BeMob.
If it is required to send the conversions data to the traffic source via postback URL, make sure the parameter and token for the External ID fields are completed with corresponding values.
If the Cost field is empty, the data about traffic cost will not be passed in the campaign link. You should not select Auto cost model in Campaign settings.
The corresponding token to track cost data should be provided by your traffic source.
After all the settings are completed, click on Save.
The source will be saved for further campaign settings.
These guides may be useful to know more about traffic source settings:
➡️ How to Track Zone IDs, Campaign IDs etc
➡️ Why the Postback Is Required
If you have any questions or need the assistance with the settings, contact our support team through the live chat or at support@bemob.com