¶ About Presets
A preset is a template with preselected columns which allows you to view the relevant data.
The feature will be of help if you regularly modify the column arrangement for your reports. Presets enable you to concentrate solely on the metrics you require, saving valuable time in your report-related tasks.
Presets eliminate the need to add or remove columns each time. Simply tailor and save your preferred column set, then conveniently select it when necessary.
Let’s take a closer look at what the presets are all about.
¶ General Preset
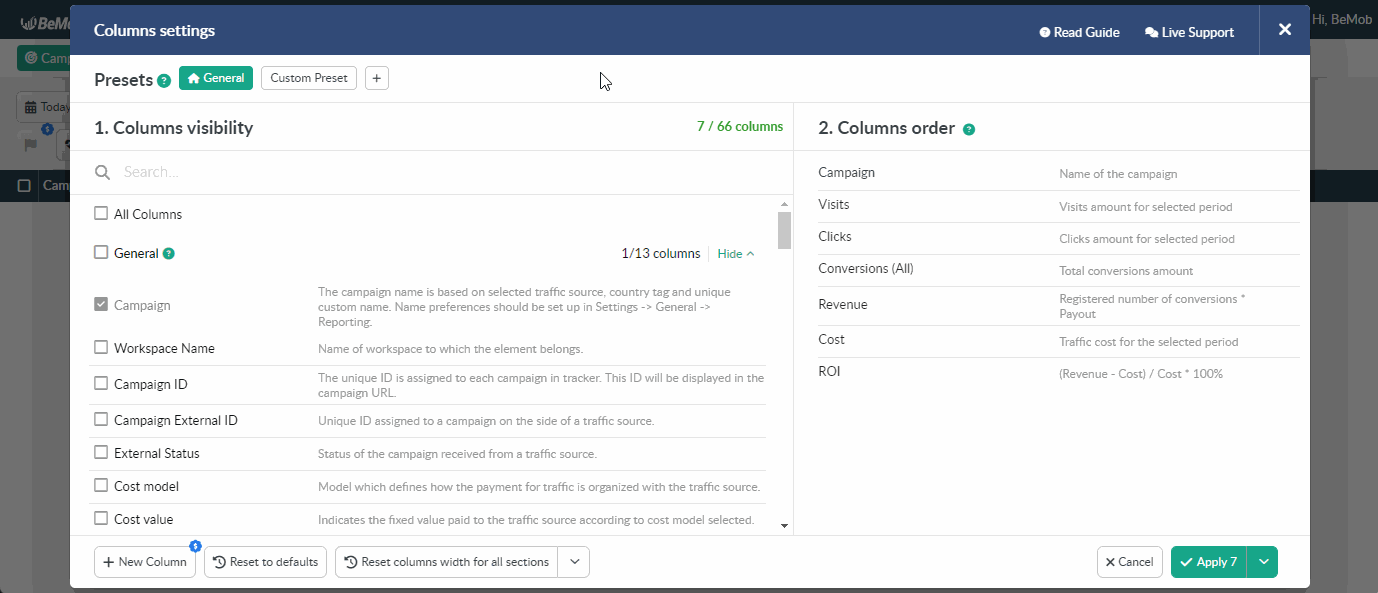
Once you register with BeMob, the General preset is automatically created for your account.
General preset contains the set of default system columns which are mostly used with our clients.
Even though it is a system preset, General is flexible meaning that you can change the set and order for this preset:
- To remove or add a column — click on the checkbox next to the name.

- To rearrange the order of the columns — drag the required column up or down.
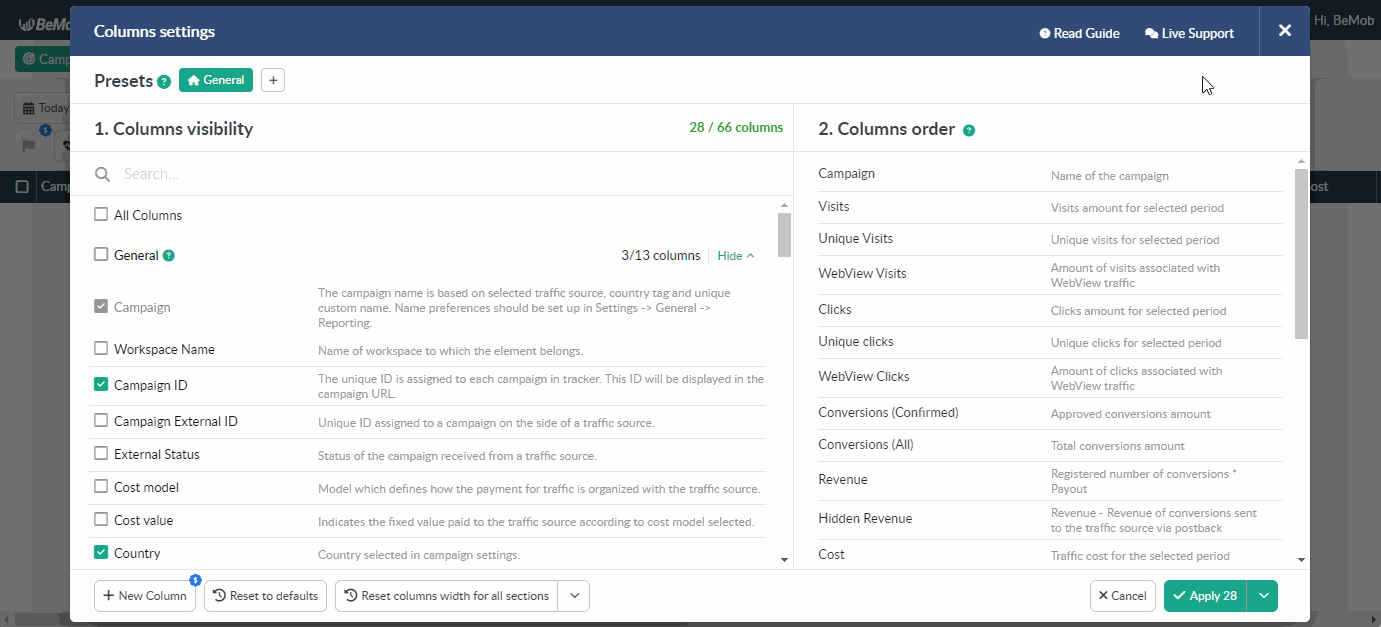
- To return the default state for the General preset — click on Reset to defaults.
🔎 More info about the Columns Settings can be found in our dedicated guide.
This preset cannot be deleted or renamed.
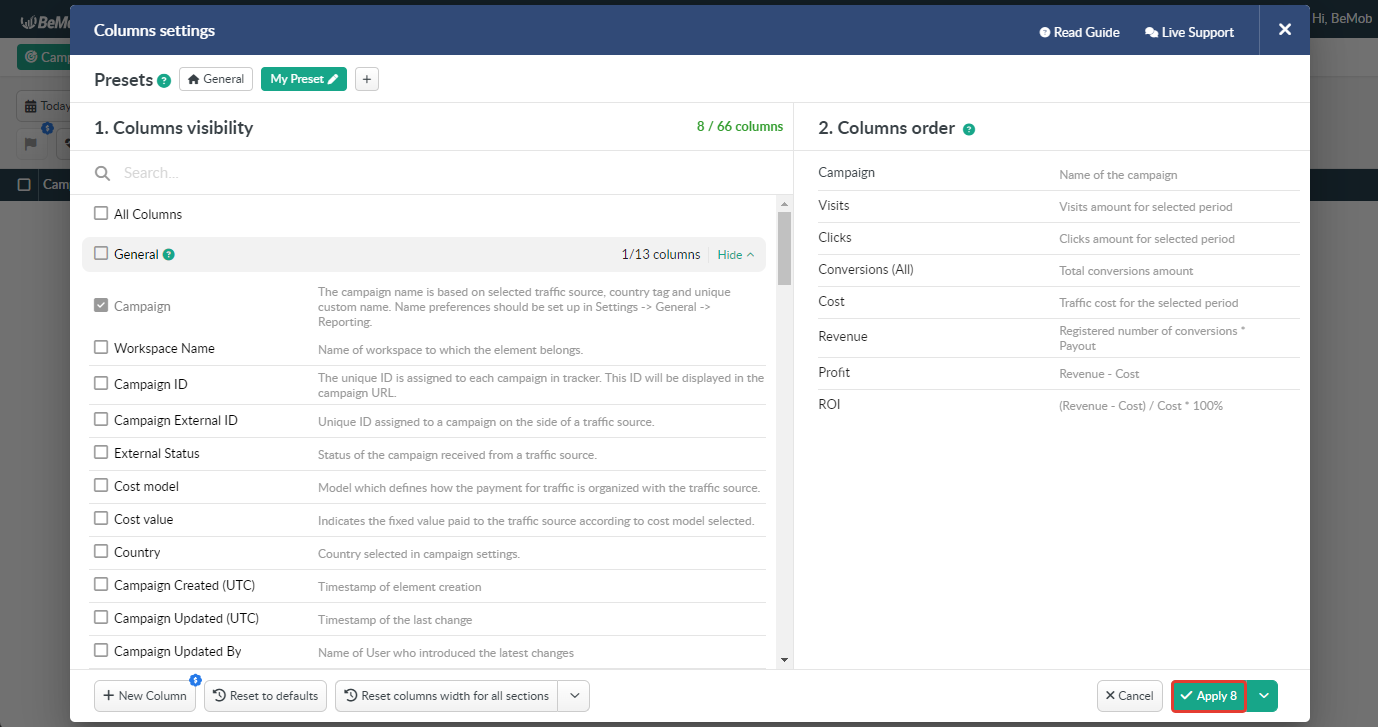
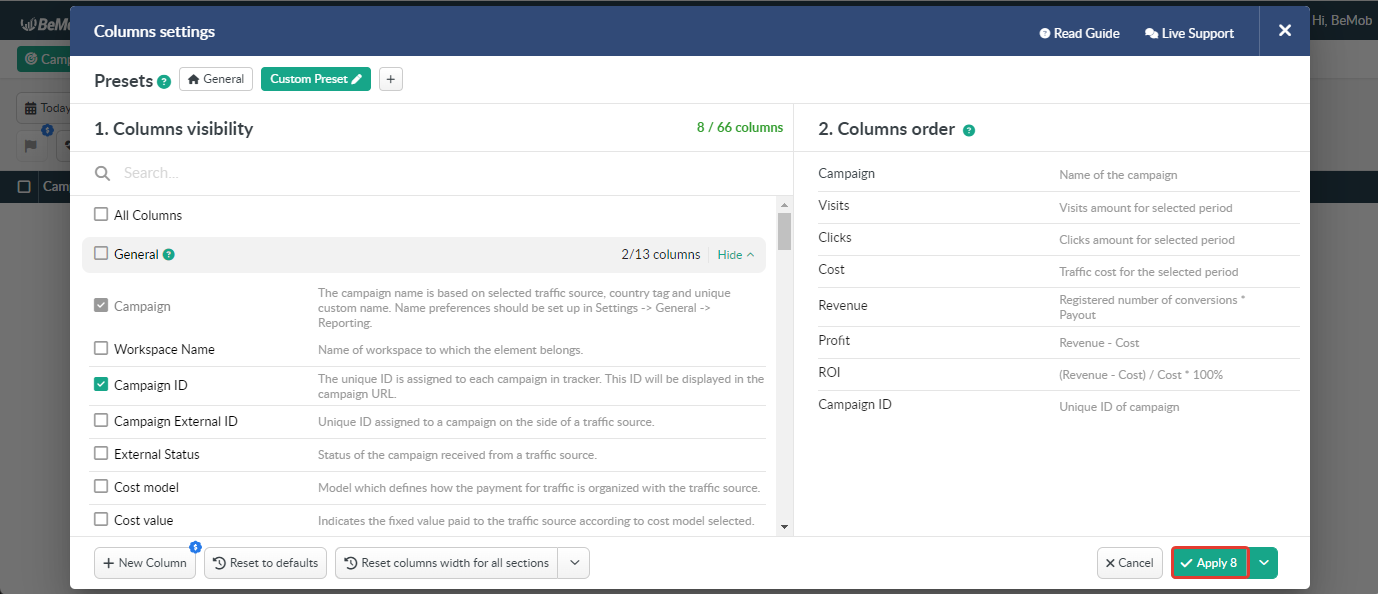
¶ Custom Preset
This type of preset is created from the columns you only wish to see for the particular report.
Once created, the custom preset will consists of the column with the report name.
For example, if a custom preset is created for the Campaigns report, the only column in the preset will be the Campaign Name.
Once you decide to switch the tab to Offers, the columns preset will be applicable to this report, but the name column will be displayed for Offers.

You can perform the following actions with the columns of the custom preset: removing and adding columns, order changing.
The custom preset itself can be renamed or deleted.
Presets can be created for the following reports: Campaigns, Offers, Landings, Flows, Traffic Sources, Affiliate Networks, Conversions, Postbacks, Countries, ISP, Devices, OS, Browsers, Errors and all their categories.
All drill-down reports have a General Preset only.
¶ Preset Creation
To create a preset, it is required to follow the steps below:
- click 👁 icon on the right side of the panel;
- press + button in the Columns settings window;
- specify a preset name;
A preset name should have the max 255 length.
- press Save button.
After a custom preset is created, you have the option to include the required columns in it.
To select the required column tick its name on the left side of the Columns settings window. The column name will appear on the right side of the settings window immediately.
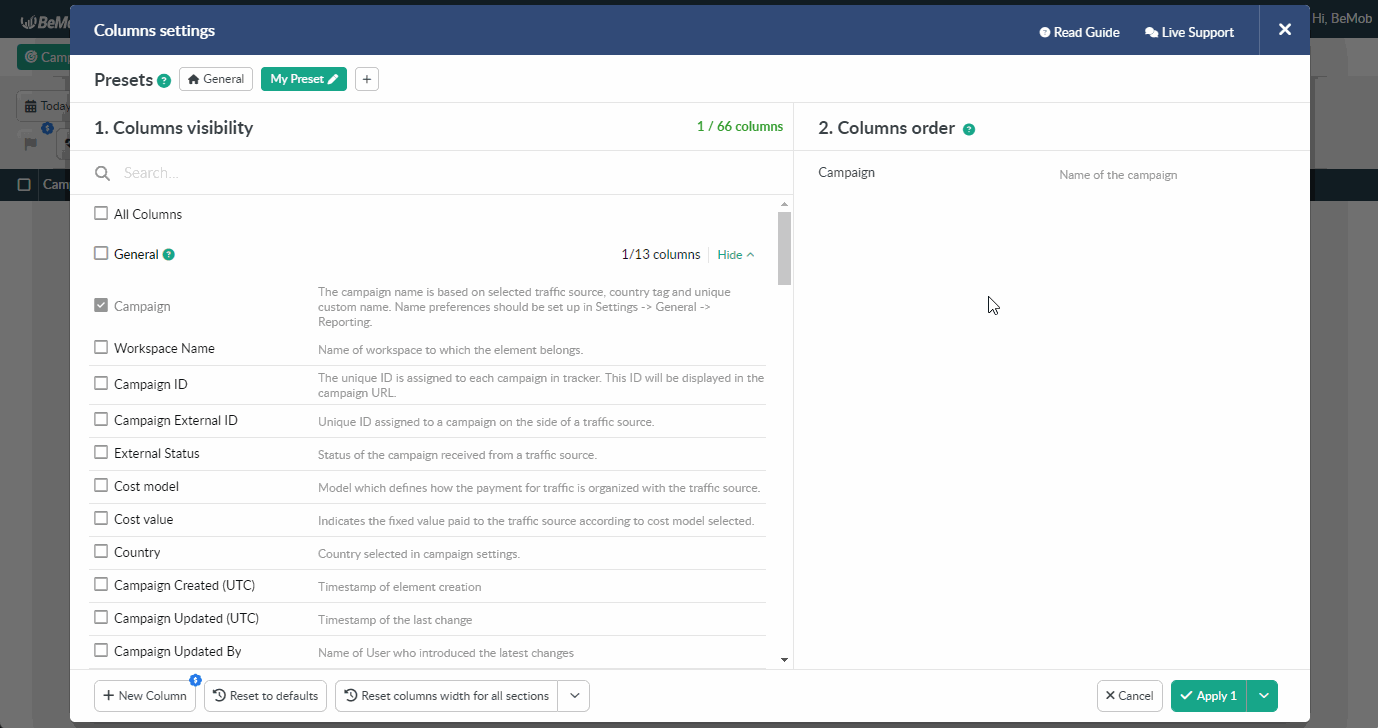
Press Apply button to store the list of columns selected for your custom preset.
🔎 More info about the Columns Settings can be found in our dedicated guide.
A preset can't be created inside a drill-down report.
¶ Presets Managing
The following actions are applicable to the presets: editing, deleting and switching between them.
¶ Preset Editing
A preset name can be edited by clicking ✏️ next to it. To store a new preset name press Save button.

If you wish to remove / add some columns, untick / tick their names on the left side of the Columns settings window.
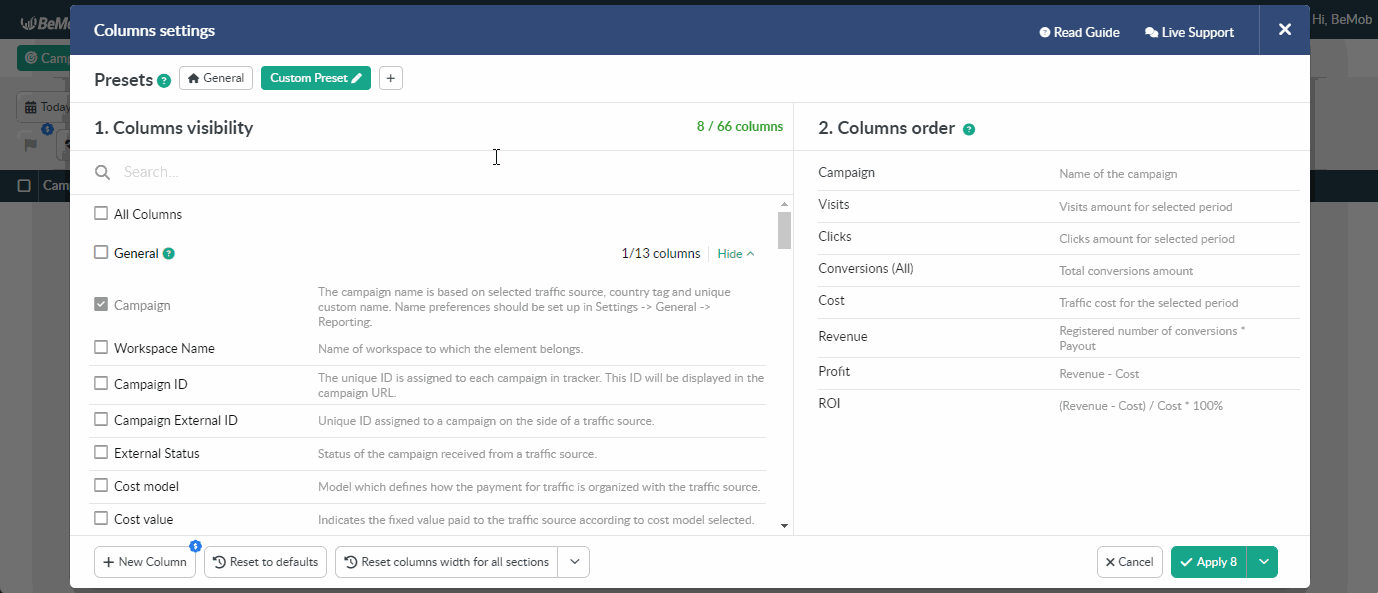
Press Apply button to store the list of columns selected for your custom preset.
¶ Preset Deleting
To remove a preset from the list of available preset it's required to click its name and press Delete button.
¶ Shifting between Presets
To see which preset is used now click V next to the 👁 icon and expand the list of available presets.
The preset which is currently selected for the reports will be highlighted with green.

To switch a preset select the required one from the list. The changes will be automatically applied in a second.
It's not possible to switch between presets inside a drill-down report.
The list of columns selected for a certain preset will be changed according to the report you're currently viewing.
For instance, the Campaigns report contains the following list of columns: Campaign, Visits, Conversions (All), Cost, Revenue, Profit, ROI.
If you access the Traffic Sources report using the same preset, the list of columns will be changed to the following: Traffic Source, Visits, Conversions (All), Cost, Revenue, Profit, ROI.

¶ Cost and Availability
The General Preset is available for every BeMob user for free.
When it comes to creating a custom preset, the availability of this option depends on your pricing plan.
If the Presets feature is not included in your plan, you can purchase it as an addon to your current plan. An upgrade to a higher pricing plan will not be needed in this case.
🔑 To find out which features are already included in your pricing plan, go to the Settings / Plans Description tab.
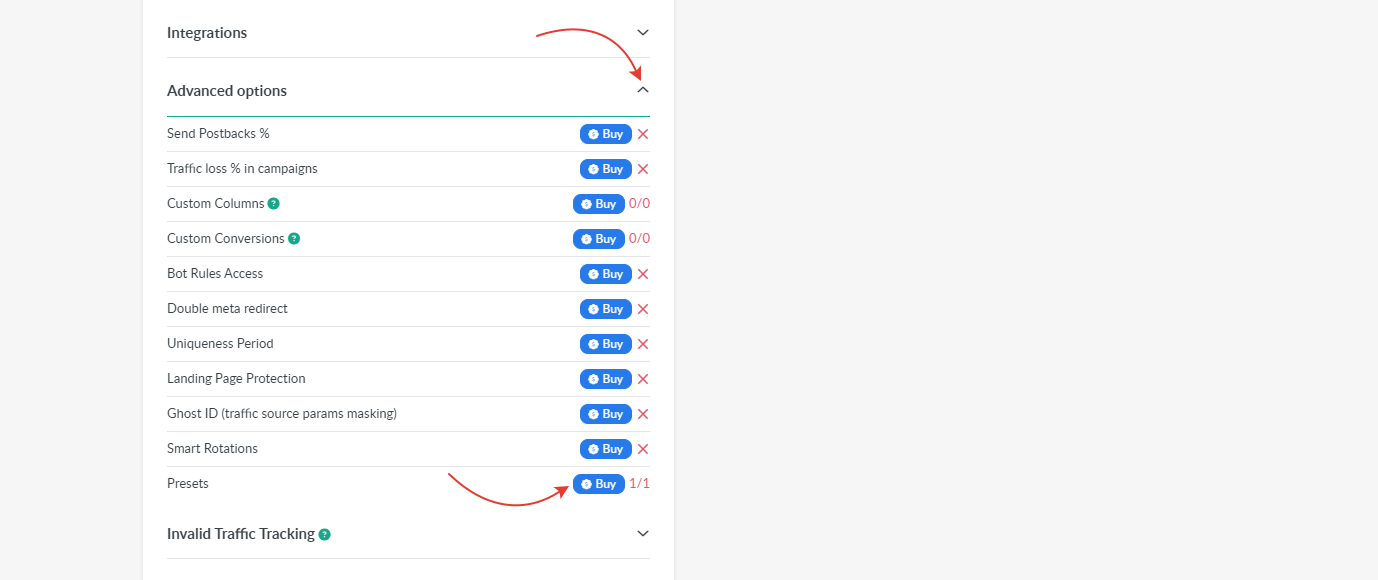
¶ Buying
To purchase the Presets addon, access the Subscription tab. The required addon will be available in the Advanced options section.
Click on Buy button next to the Presets addon.
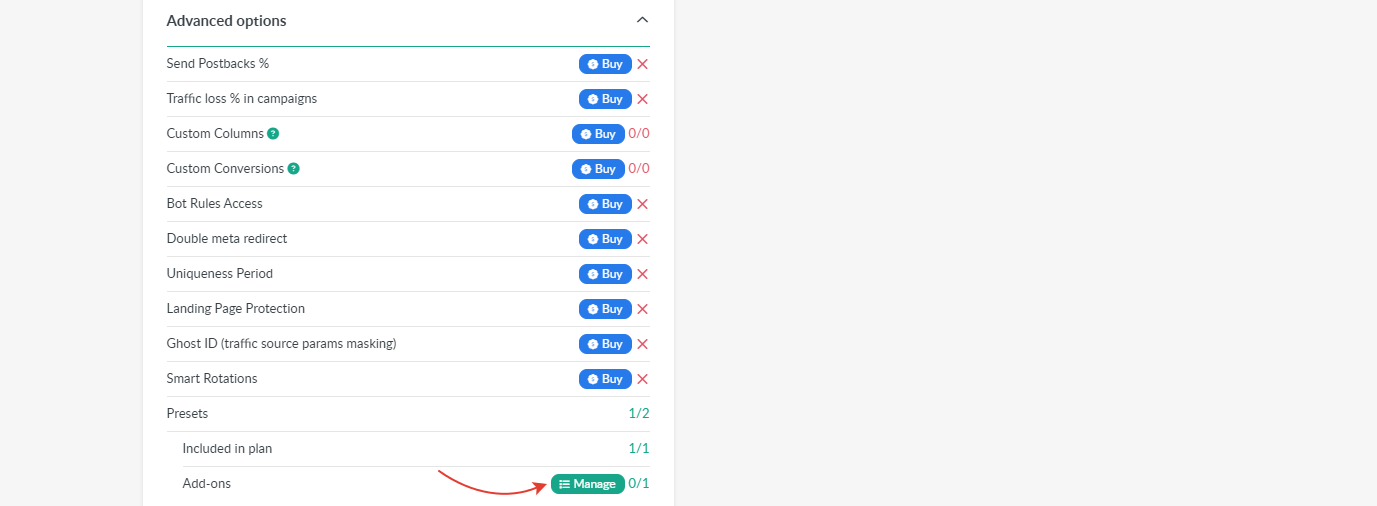
It's possible to purchase and create up to 4 custom presets.
In terms of the Multi-User Access option each teammate (an account owner, a user, an admin) can create up to 4 custom presets.
¶ Switching Off
If you want to disable the Presets option for your account, click on Manage button.
In the appeared window, specify the amount of presets you want to cancel and press Switch Off Add-on button.
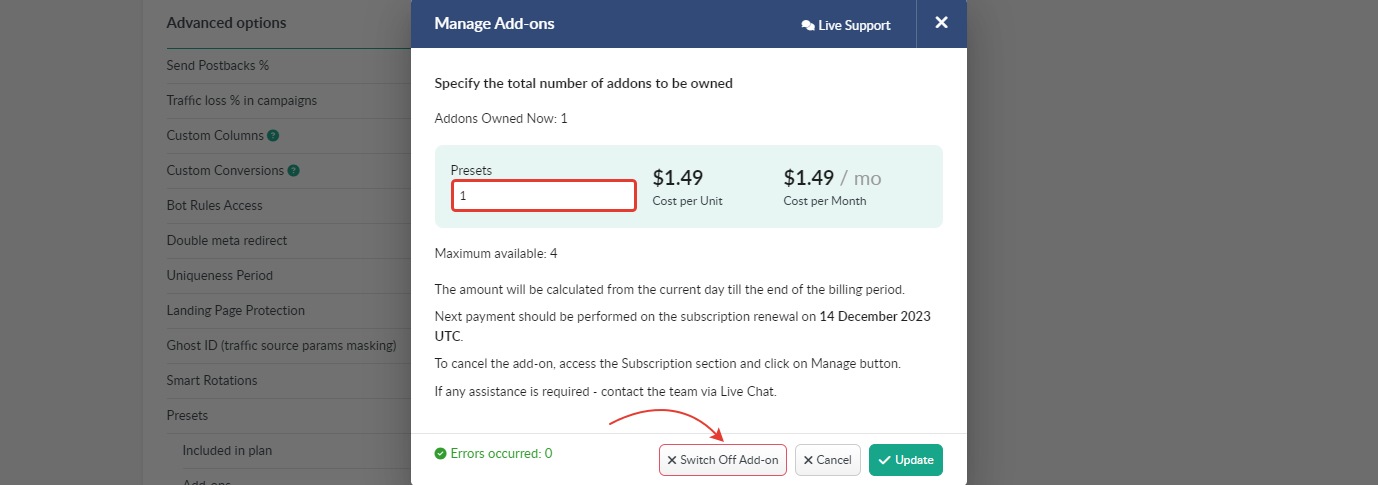
The remnant amount from the initially paid will be added to your account balance with BeMob and used for future purchases.
🔑 Learn more about BeMob subscription management in this guide.
If you have any questions or need the assistance with the settings, contact our support team through the live chat or at support@bemob.com