
¶ Before You Start
Make sure you have your ClickAdilla account active before creating a campaign on the side of BeMob.
¶ BeMob Settings
As ClickAdilla is already listed in BeMob templates all the required fields will be completed automatically when this traffic source is selected.
To add ClickAdilla from templates:
- Press Traffic Sources.
- Click on New from Template.
- Type ClickAdilla into the search bar.
- Select ClickAdilla.
- Click on Next.
You can select any of ClickAdilla templates according to the type of campaign you are going to run.
If you are an experienced BeMob user or have tracking background, you can replace 'token=REPLACE' with valid value provided on the side of ClickAdilla and click Save button to store the traffic source for your future campaign.
However if you are at the stage of getting familiar with BeMob or even tracking in general, we strongly recommend to read this guide till the end.
The traffic source template consists of two sections: Traffic Source Details with postback settings and Parameters.
¶ Postback Settings
Setting up a postback between tracker and traffic source is extremely important if you require to pass the conversions data to your traffic source.
The ClickAdilla postback URL for Popunder/Banner campaign on the side of BeMob is:
https://tracking.clickadilla.com/in/postbacks/?token=REPLACE&campaign_id={custom7}&payout={payout}&click_id={externalId}
For Native Ad campaign:
https://tracking.clickadilla.com/in/postbacks/?token=REPLACE&campaign_id={custom3}&payout={payout}&click_id={externalId}
For Push Notifications campaign:
https://tracking.clickadilla.com/in/postbacks/?token=REPLACE&campaign_id={campaignId}&payout={payout}&click_id={externalId}
Always make sure the {externalId} token is available in the postback URL as this token is required to pass the ID of conversion from BeMob to ClickAdilla.
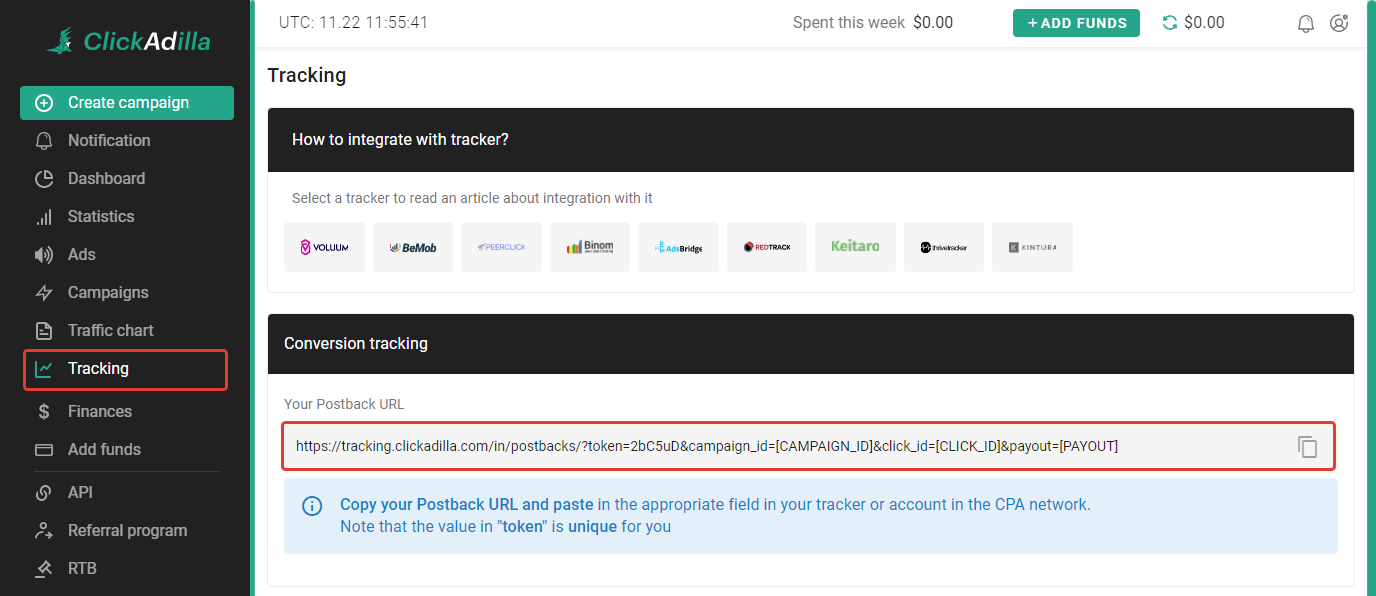
It is required to replace 'token=REPLACE' with valid value which is available on the side of ClickAdilla.
For this access Tracking section on ClickAdilla panel and copy the given Postback URL.
On the side of BeMob Approved status should be selected to pass conversions data to the side of ClickAdilla.

¶ Parameters
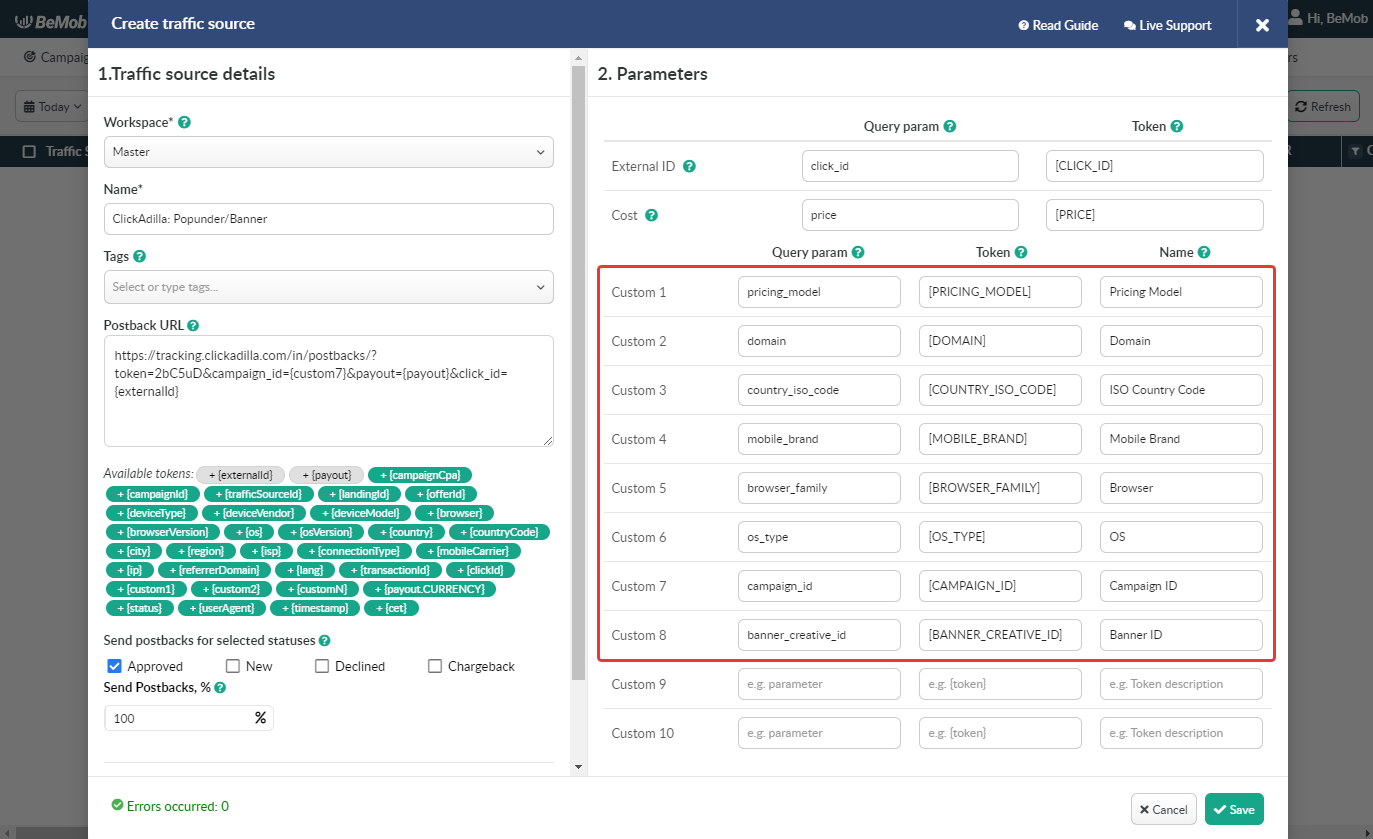
The list of parameters and tokens supported with ClickAdilla are already preconfigured in the template.
We have three ClickAdilla templates with the parameters set for each type of campaign: Native Ad, Popunder/Banner, Push Notifications.
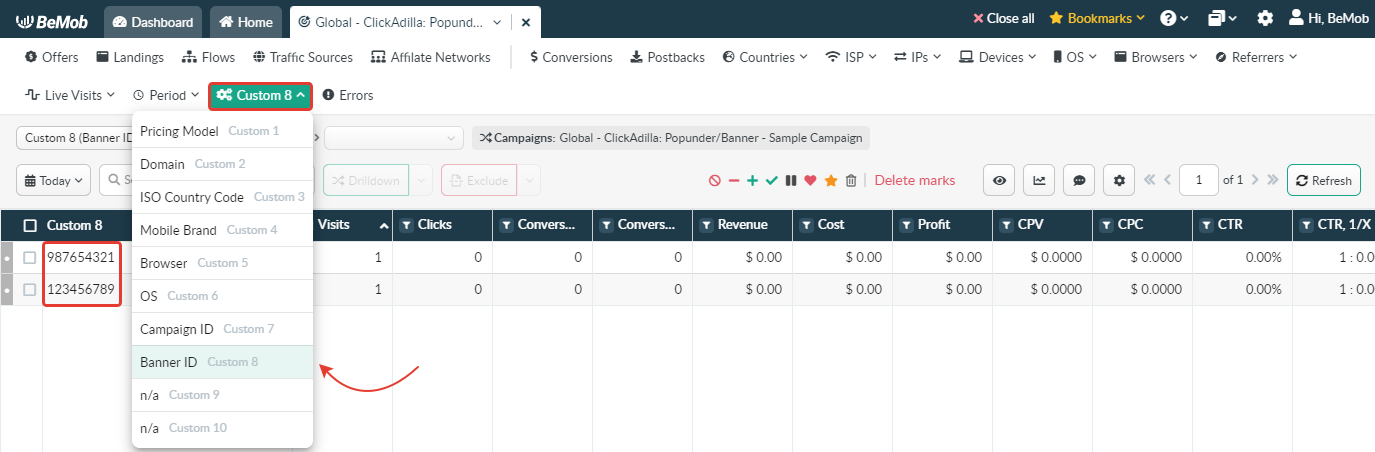
These parameters and tokens are required to transfer the additional details on traffic to your report in tracker, e.g. banner IDs, campaign IDs, creative IDs etc.
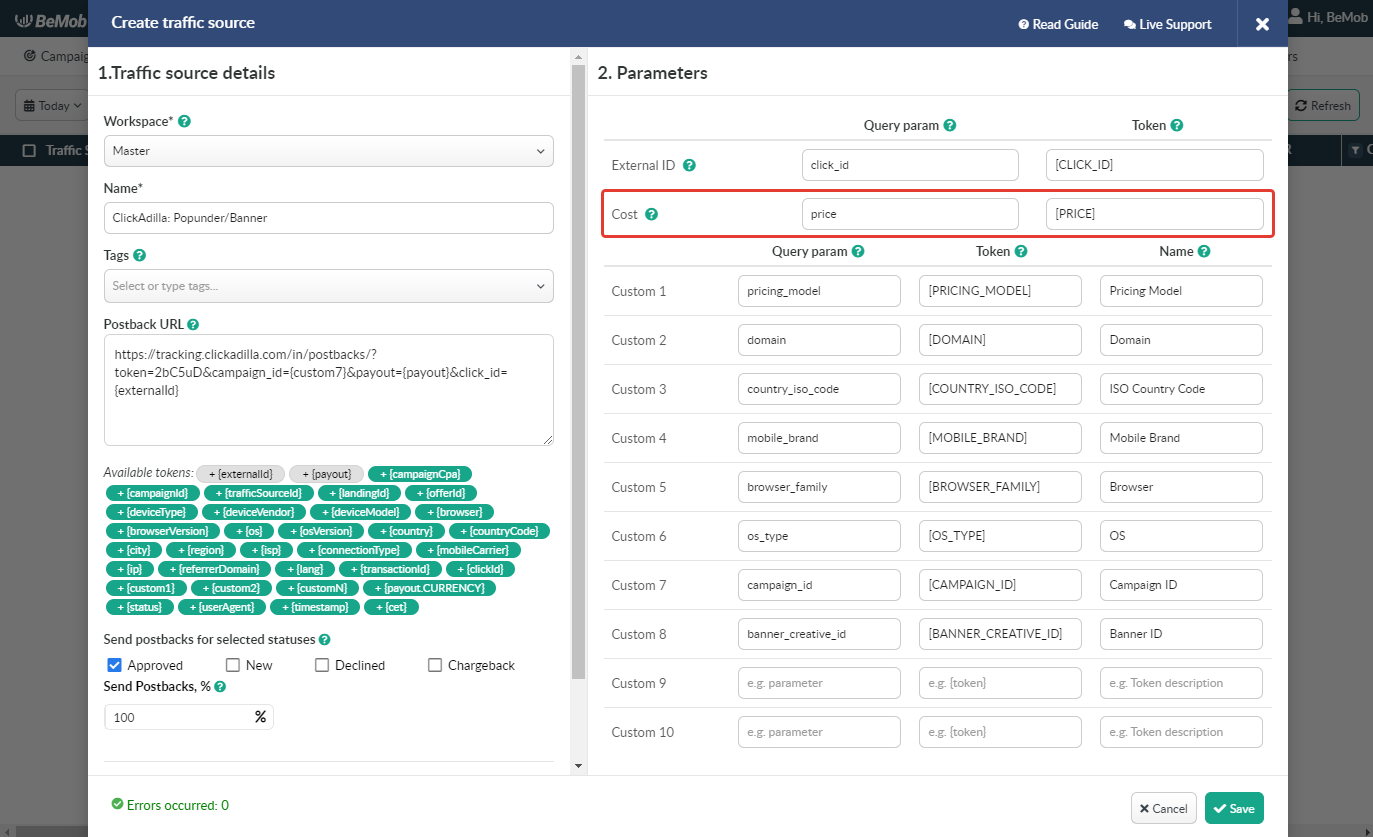
If you pass the data on conversions to the ClickAdilla side, make sure that External ID field is completed.

If you wish to receive the cost data automatically from ClickAdilla, it is required to assure that cost token is available in the template.
All the tokens available with traffic source settings will be automatically added at the end of Campaign URL once you select ClickAdilla in campaign settings.
The data will be available in report on Custom parameters and can be used for further optimization and targeting of your campaigns.
Press Save to store the traffic source settings for your future campaign.
¶ Campaign Settings
After ClickAdilla is added from the templates, the campaign can be created in tracker.
- Press Campaigns tab.
- Click New.

- Select the workspace.
Workspaces help to separate all the working processes into areas in BeMob.
If you are not using the Workspaces option just leave Master as default selection and move on to other settings.
🔎 Get to know Workspaces better
- Specify the unique name of campaign.
- Select ClickAdilla as Traffic Source.
- Select the cost model according to the type of campaign you are going to run on the side of ClickAdilla.
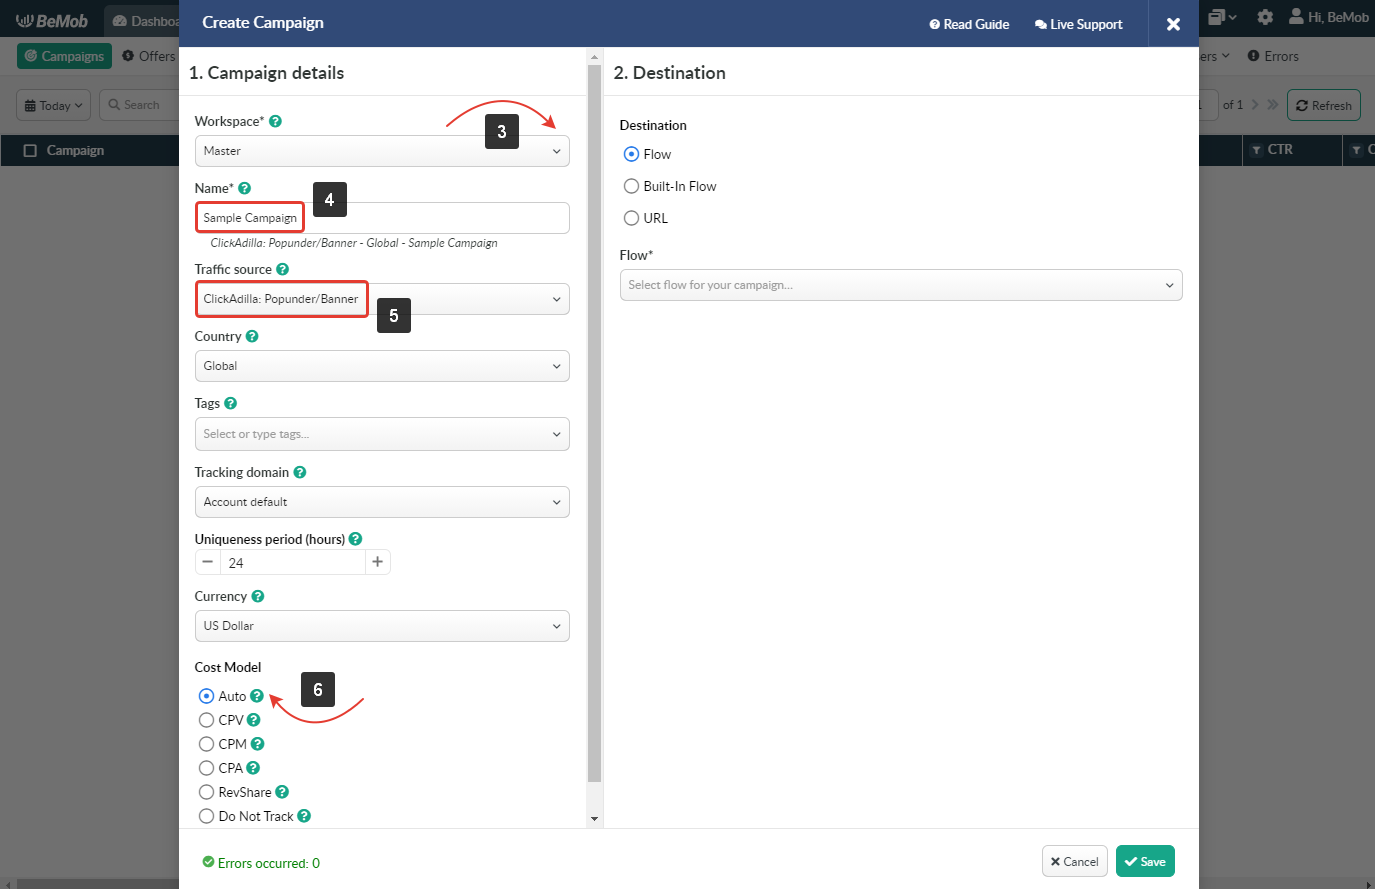
- In Destination section it is required to select one of three options.
Flow can be selected if you have a preconfigured list of offers and landing pages configured in the rule-based paths.
Built-in Flow should be selected if the endpoint of traffic is an offer link with landing page.
If the traffic is forwarded straight to the offer, it is required to switch off the landing page in Built-in Flow settings.
Select URL if the traffic is forwarded to a single destination URL e.g. your website with no offer and landing page created beforehand.
- Press Save to store the campaign settings.
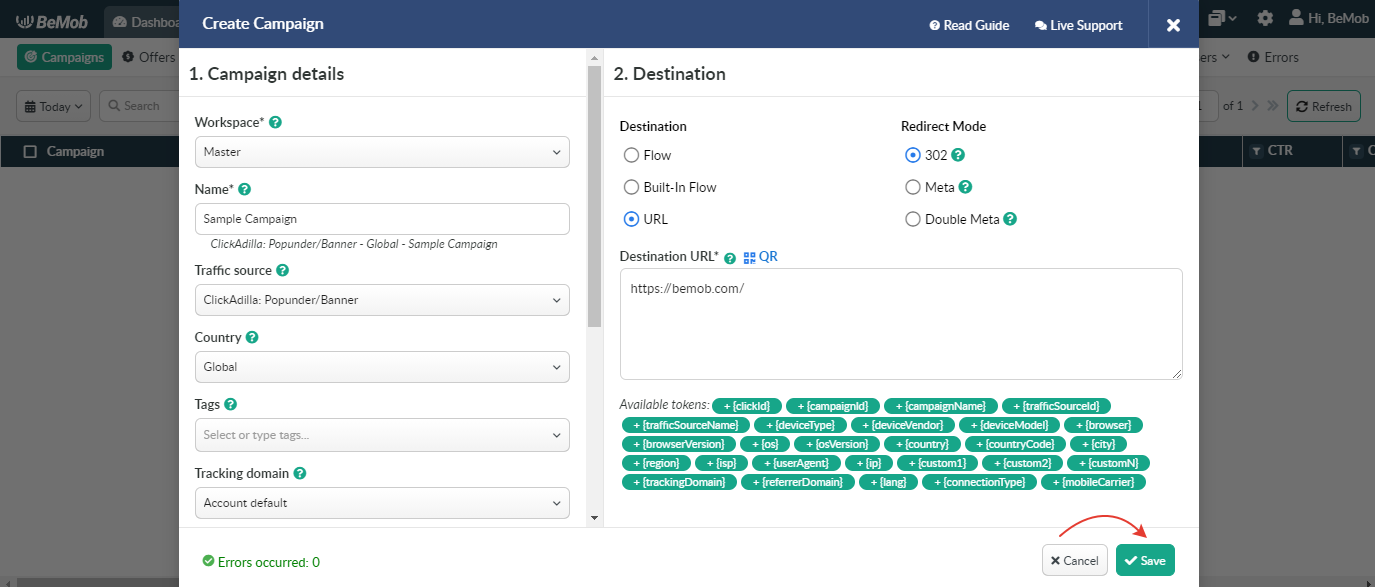
- The window with the campaign links will appear.
The link you should place on the side of ClickAdilla is Campaign URL.

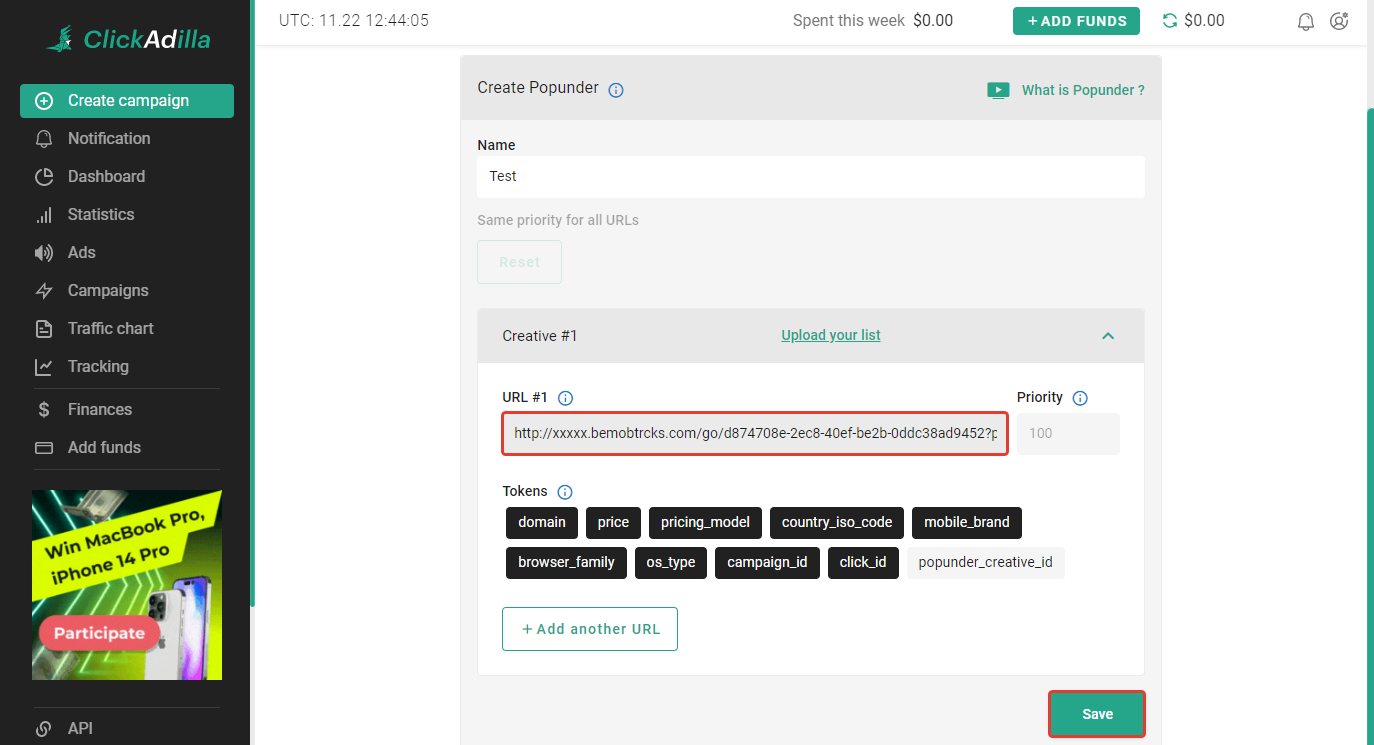
- Log into your ClickAdilla account and access Ads section.
Select the required type of campaign and press Create button.

- Add Campaign URL to URL field while creating the required ad and press Save button.
-
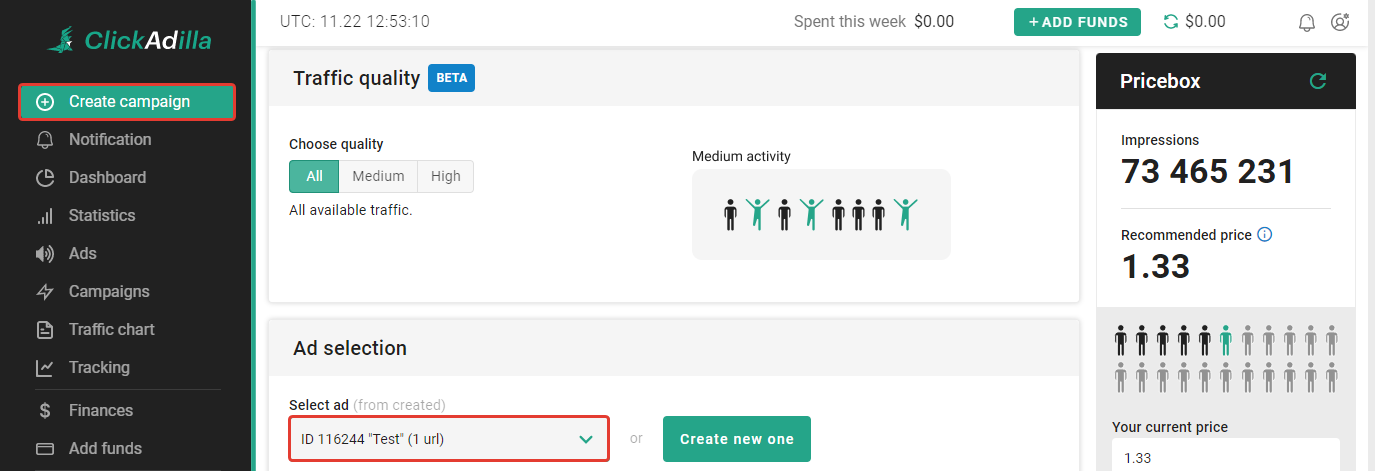
Press Create Campaign button to create a campaign.
-
Fill the required fields and select your Ad from the list.
After your campaign is approved on the side of ClickAdilla, you can start driving traffic to your campaign and track all the data with BeMob.
If you have any questions or need the assistance with the settings, contact our support team through the live chat or at support@bemob.com