The integration between TrafficJunky and BeMob allows for automatic traffic cost collection, eliminating the need for manual updates.
This guide describes the steps which will help you to set the API integration with TrafficJunky.
Before you start make sure that you have:
— active BeMob account.
— active TrafficJunky account.
¶ TrafficJunky API Token Settings
To get TrafficJunky API Token:
- Go to My Profile settings.
- Access Account tab.
- Press Generate New Token button.
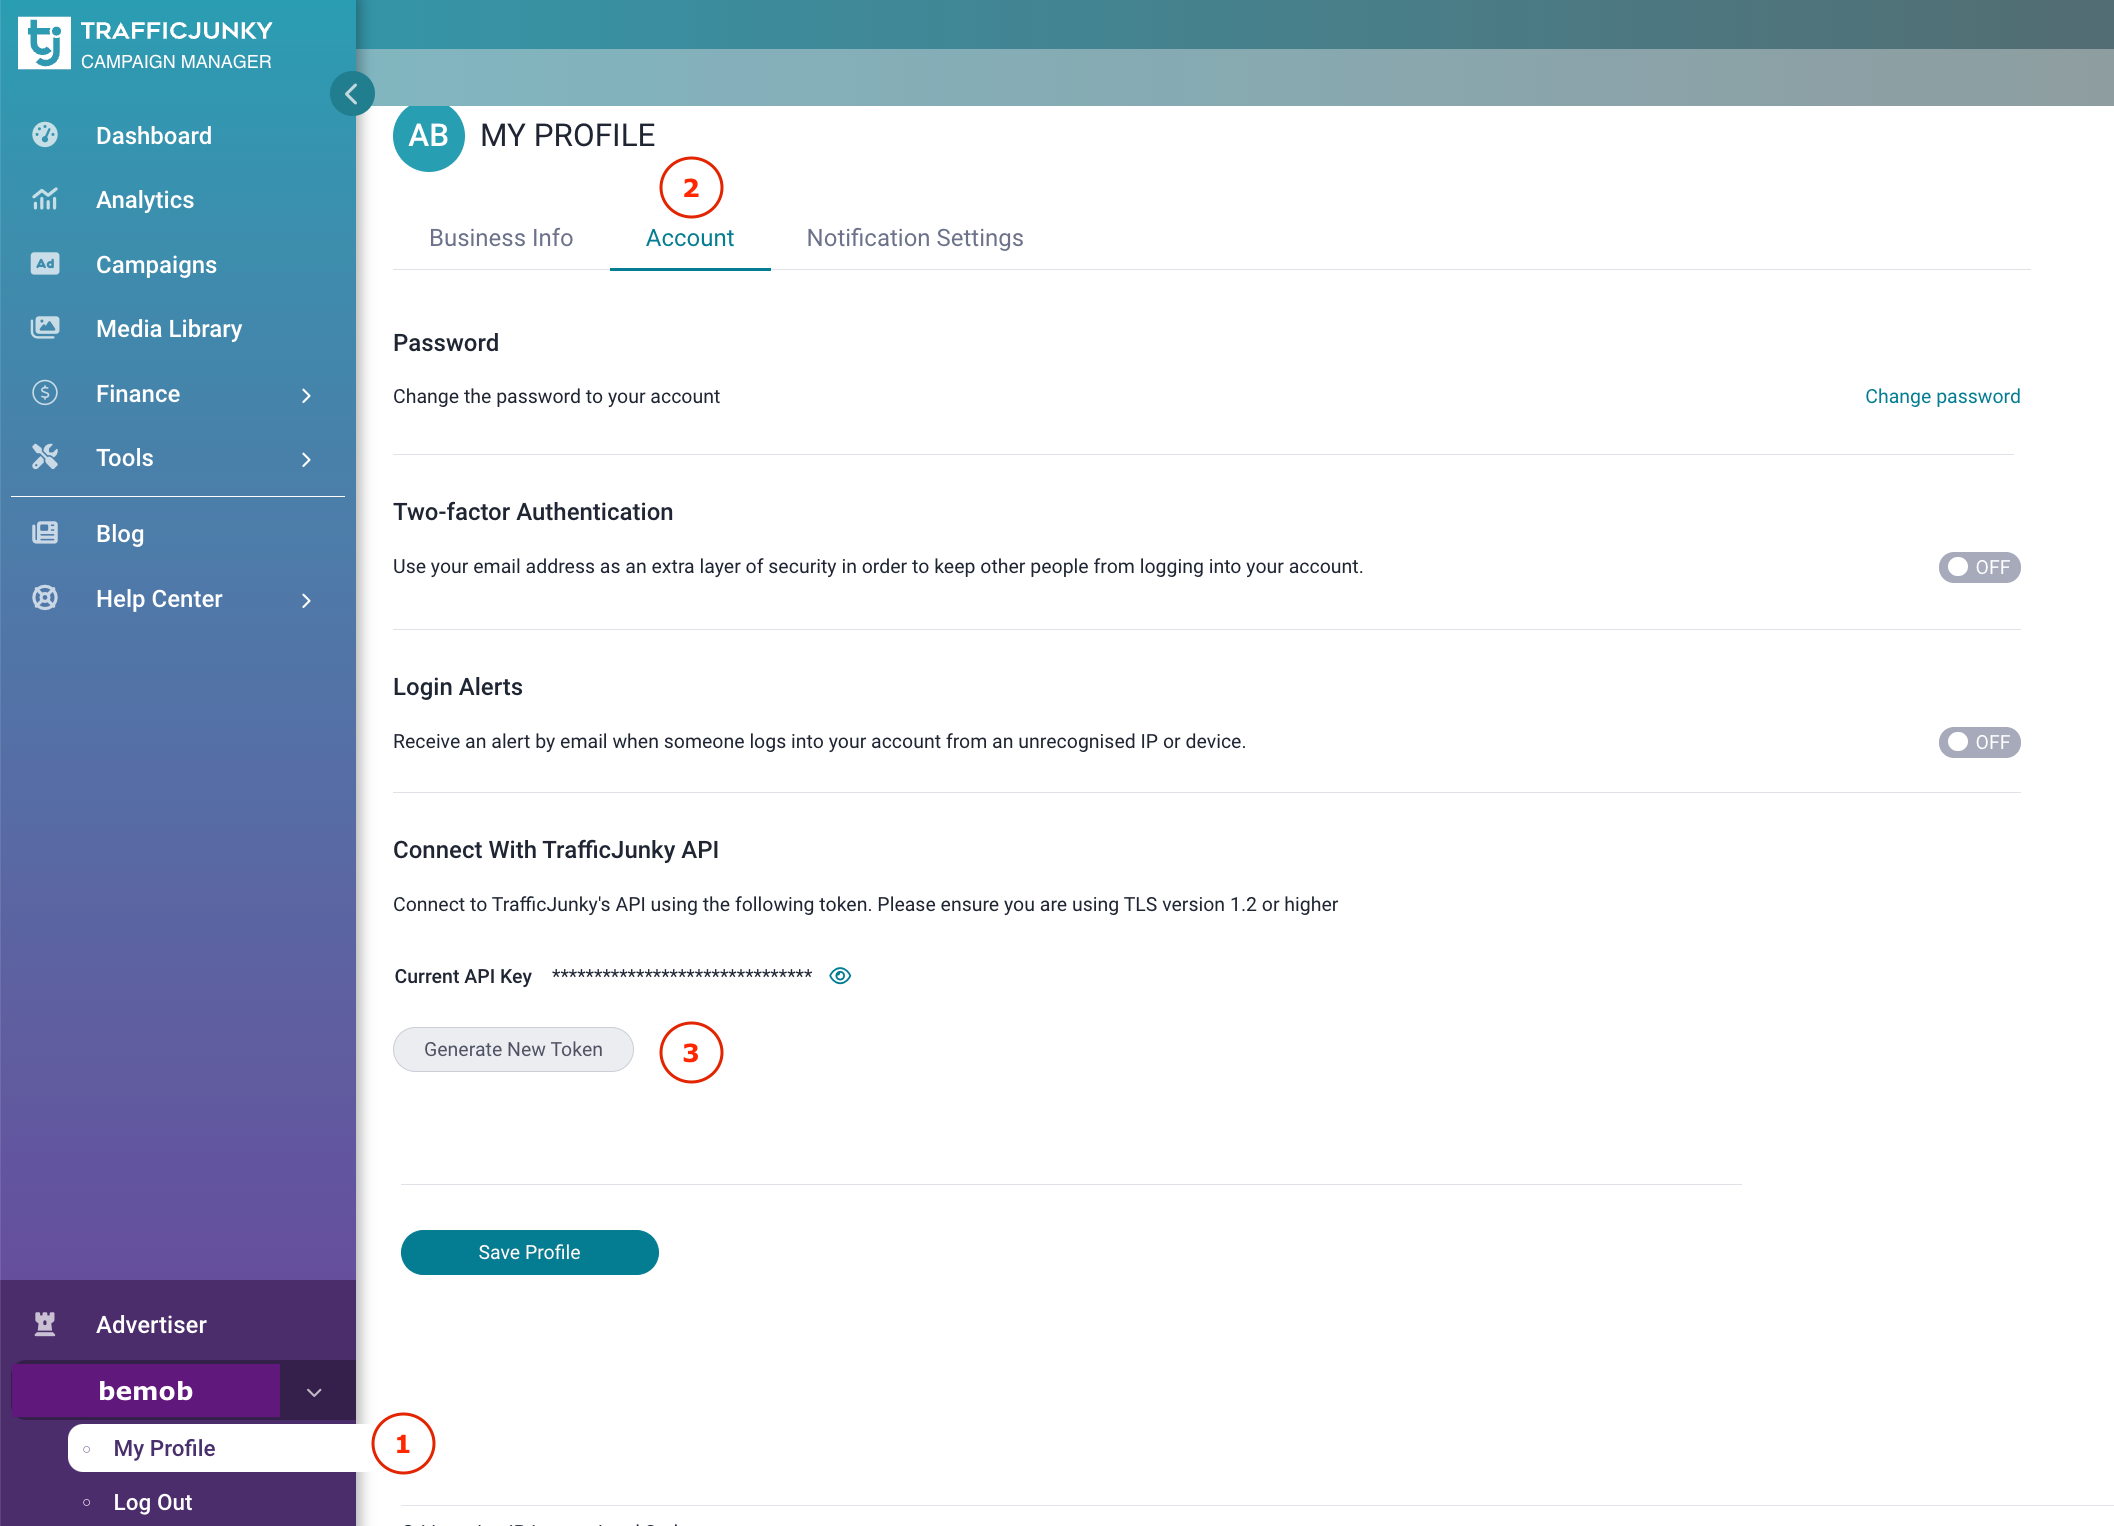
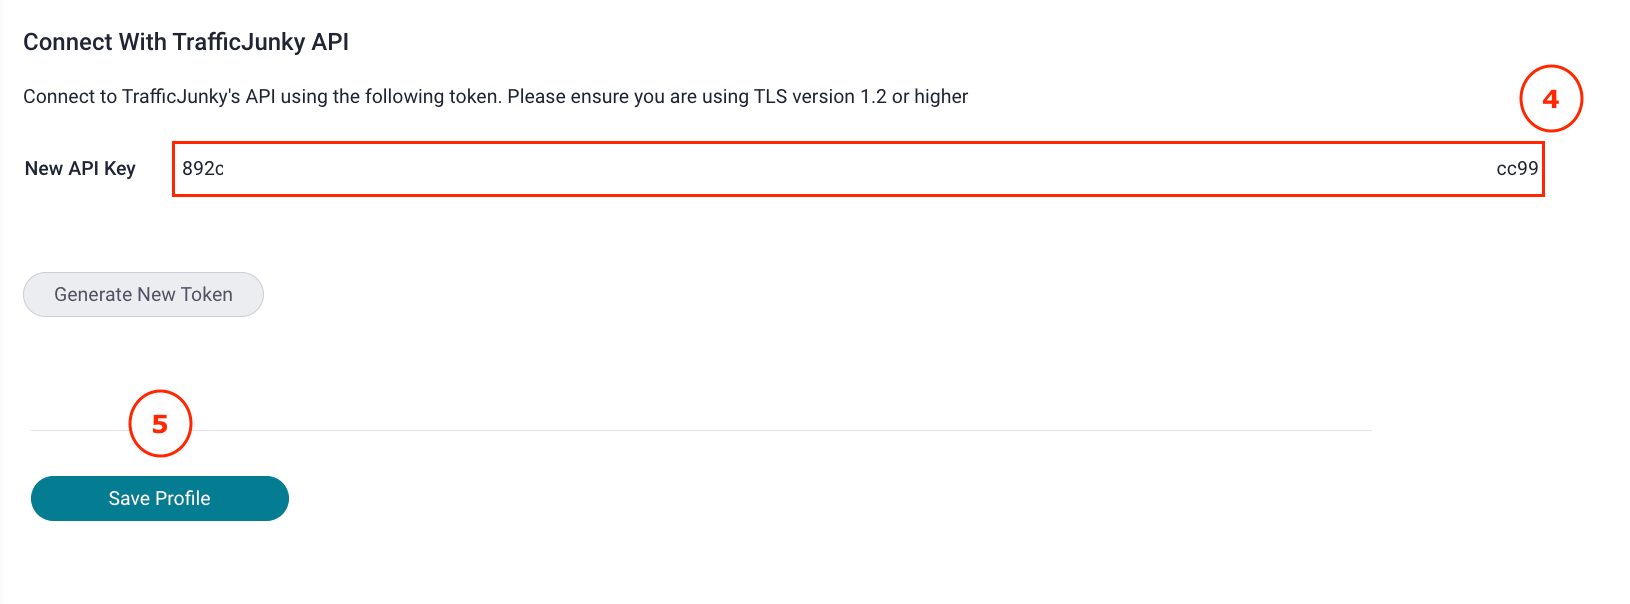
4. Copy the generated API Key.
5. Press Save Profile button.
¶ BeMob Integration Settings
After TrafficJunky API token is successfully copied it is required to continue the integration in your BeMob account.
1. Go to Settings of your BeMob account.
2. Access Integrations section.
3. Click on Add Integration button.

4. Select TrafficJunky from the list and click on Next button.
🟢 To enable the TrafficJunky integration, please ensure it is purchased as an additional add-on if it is not included in your plan. To purchase, click the TrafficJunky icon and proceed with the invoice payment.
Once payment is complete, the integration will become available for configuration.

5. Specify custom Integration Name.
6. Paste API Token from your TrafficJunky account.
7. Click on Create Integration button.
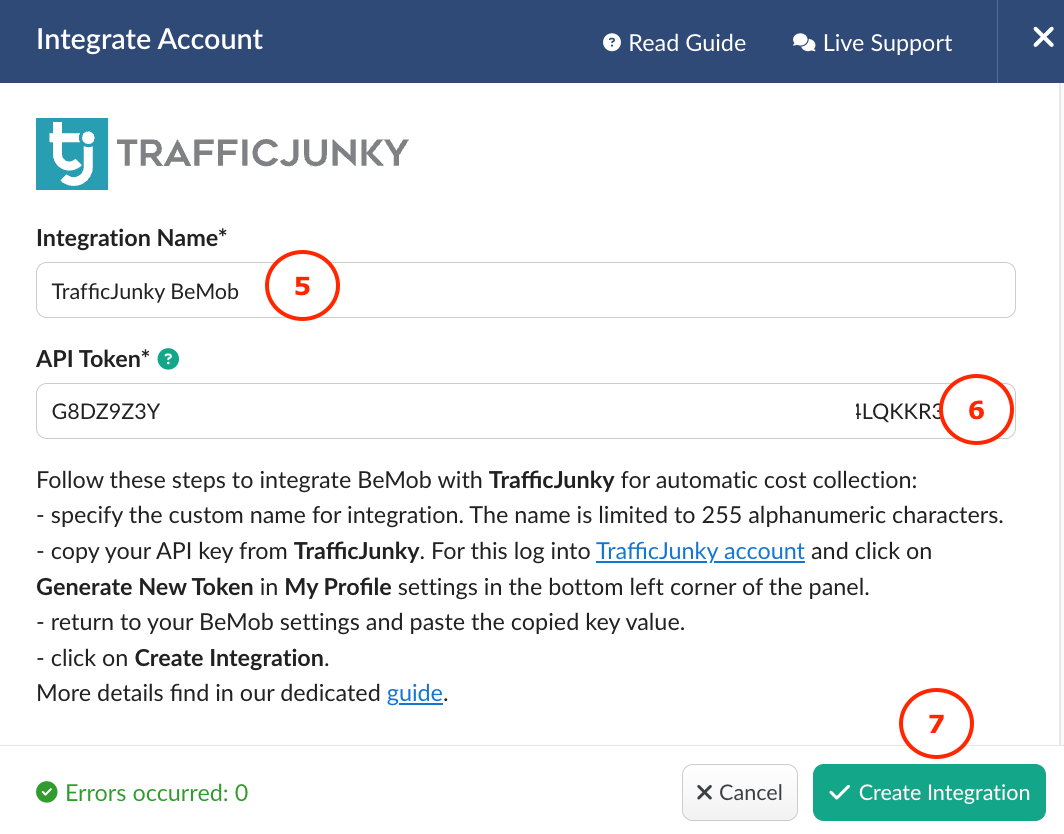
🔴 If you are using invalid API token, the integration will not be created.
If the key is valid and successfully accepted by BeMob, a corresponding record will appear in the Integration section, displaying the integration as active.

The integration can be edited or deleted if it is required.
🔴 If you delete the integrated traffic source the cost passing via API for all the associated campaigns will be stopped. However the previously received data will be kept.

¶ TrafficJunky As Traffic Source
After you successfully created the integration with TrafficJunky in Settings, it is required to select this integration on the level of TrafficJunky as traffic source on the side of BeMob.
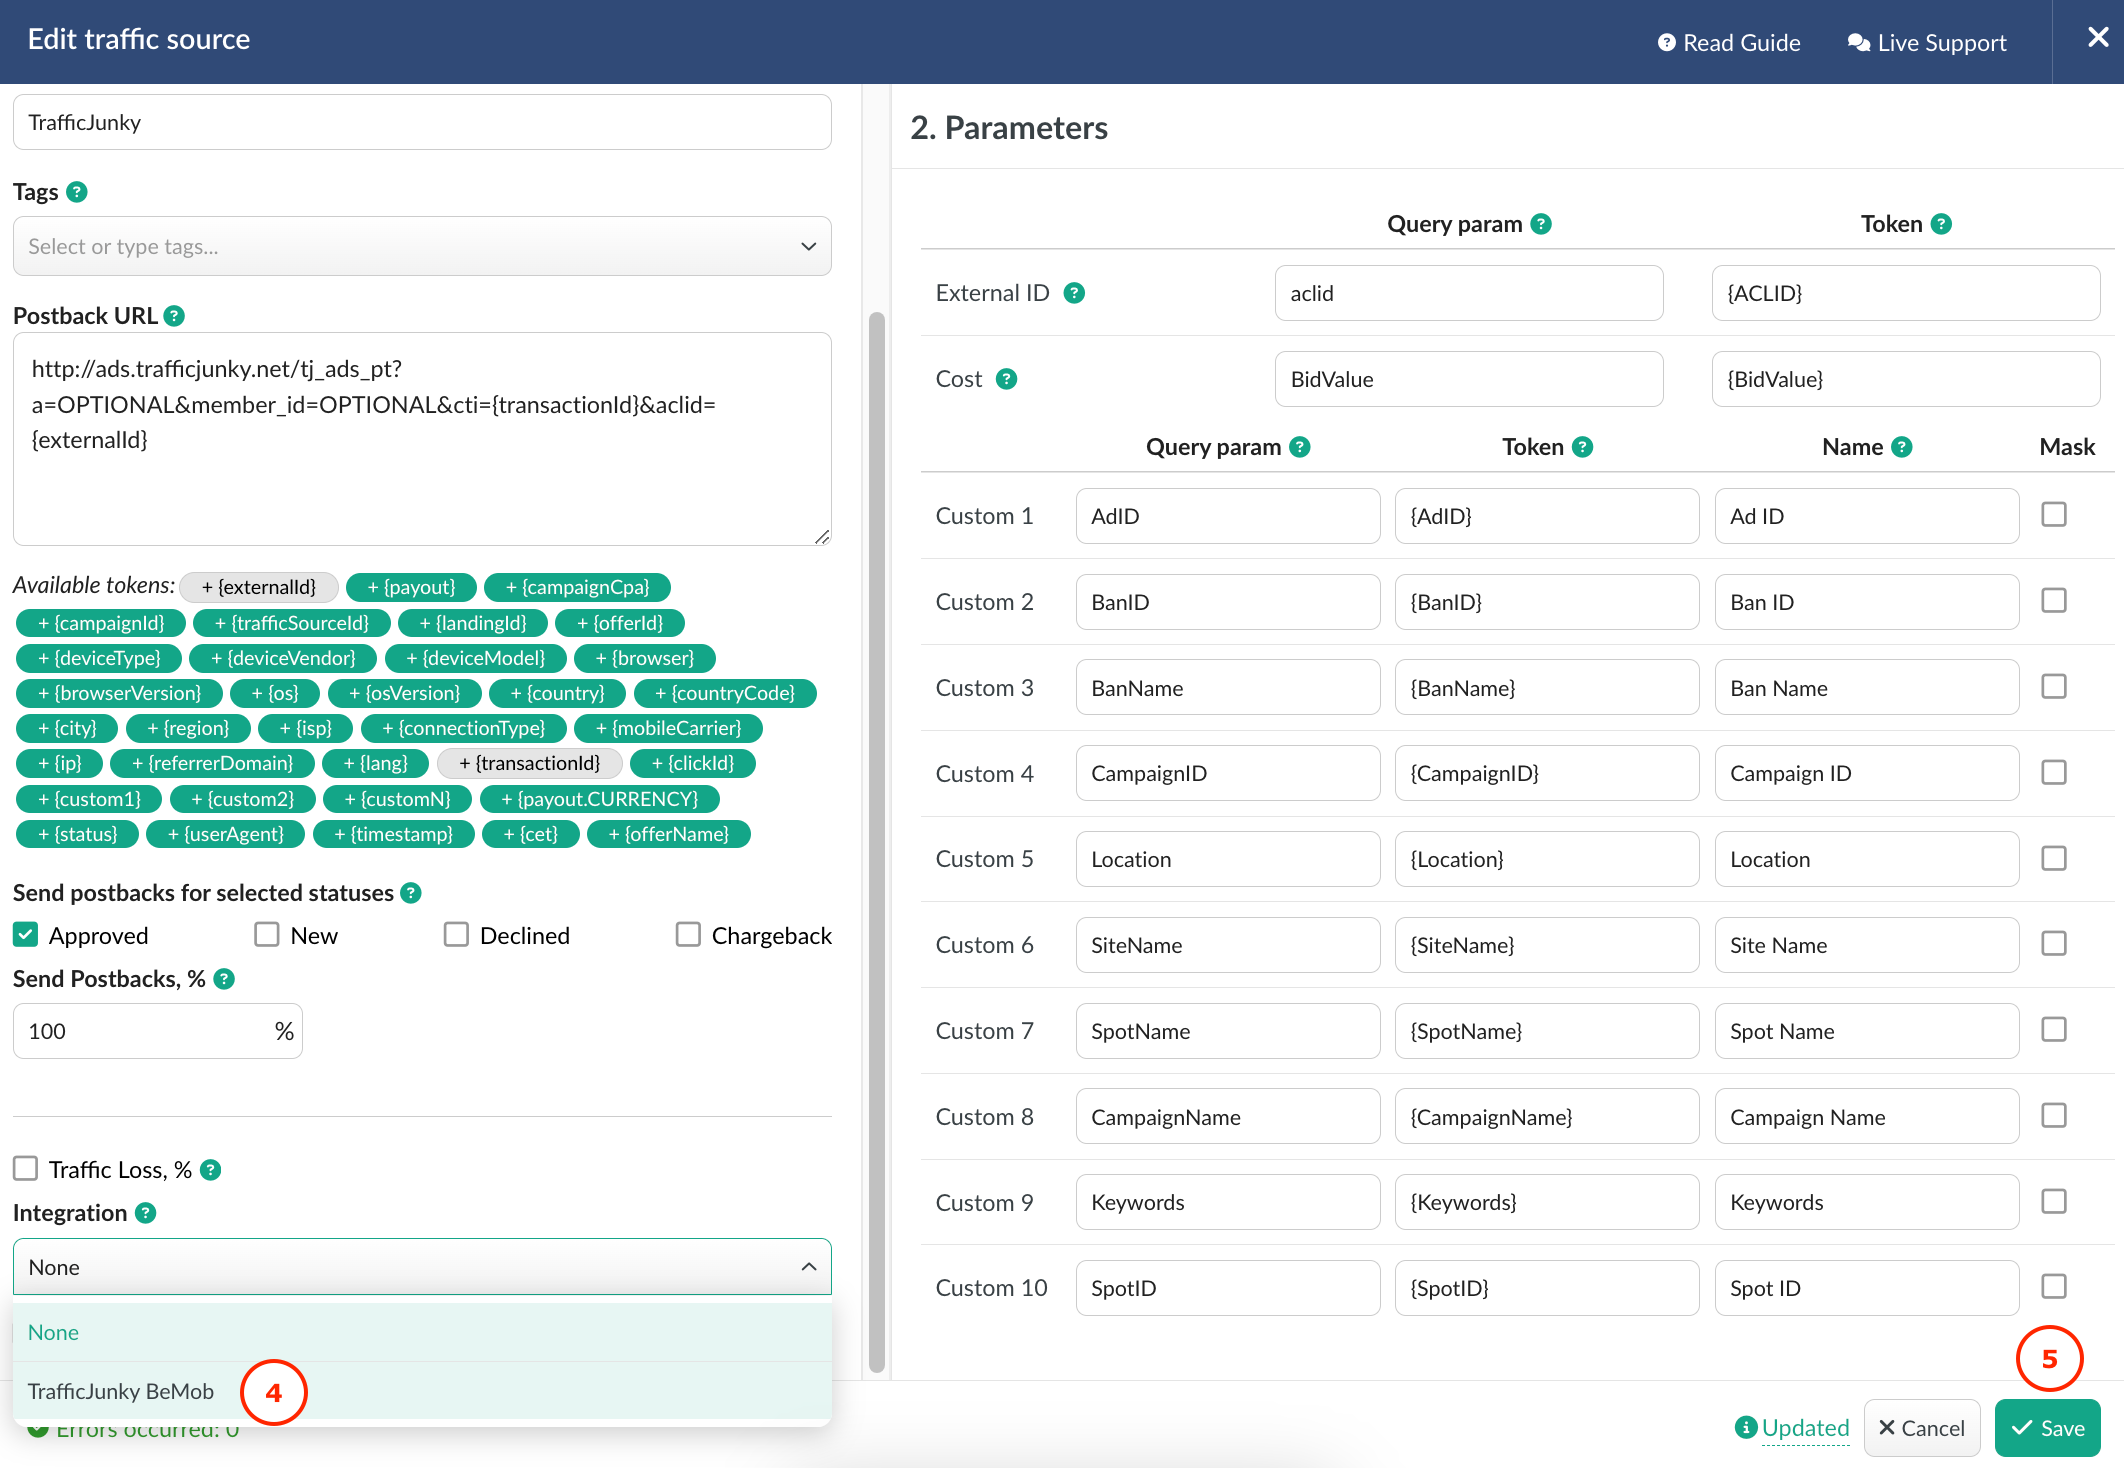
If you have already configured TrafficJunky for your campaigns and wish to set the auto-cost collection for them, it is required to follow these steps:
1. Go to Traffic Sources tab.
2. Select TrafficJunky.
3. Click on Edit.
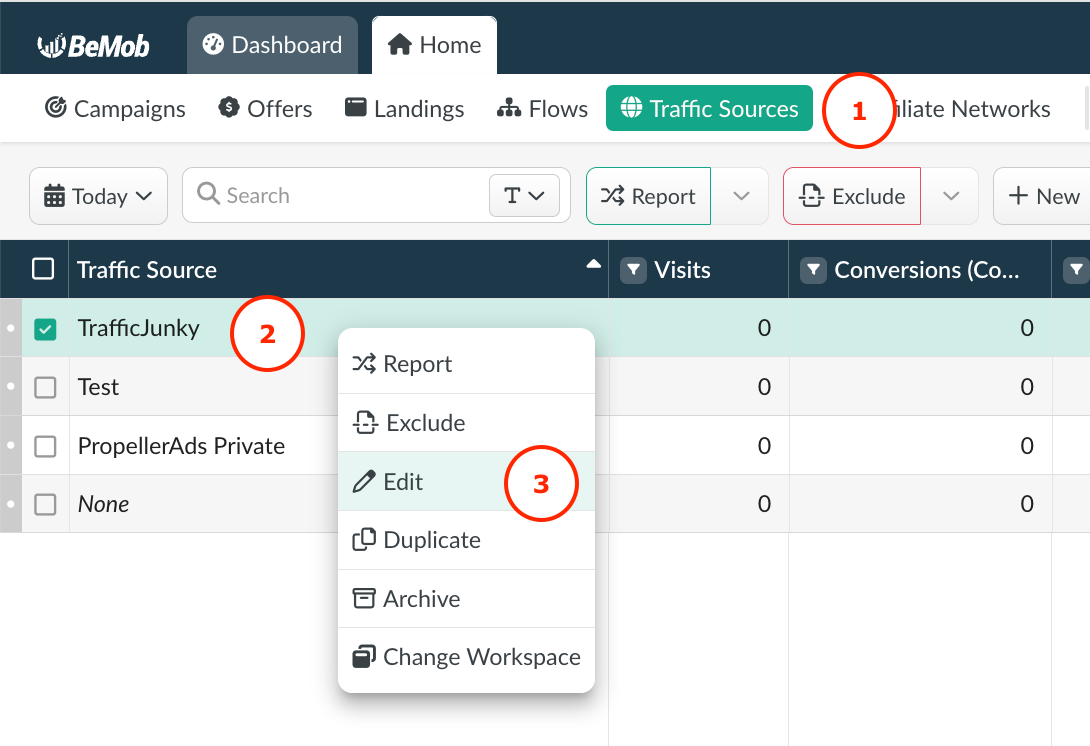
4. Select the integration name that corresponds to TrafficJunky from the list of available integrations.
5. Click on Save button.
If TrafficJunky has not been previously set up, you will need to create it firstly.
1. Go to the Traffic Sources tab.
2. Click on New From Template.
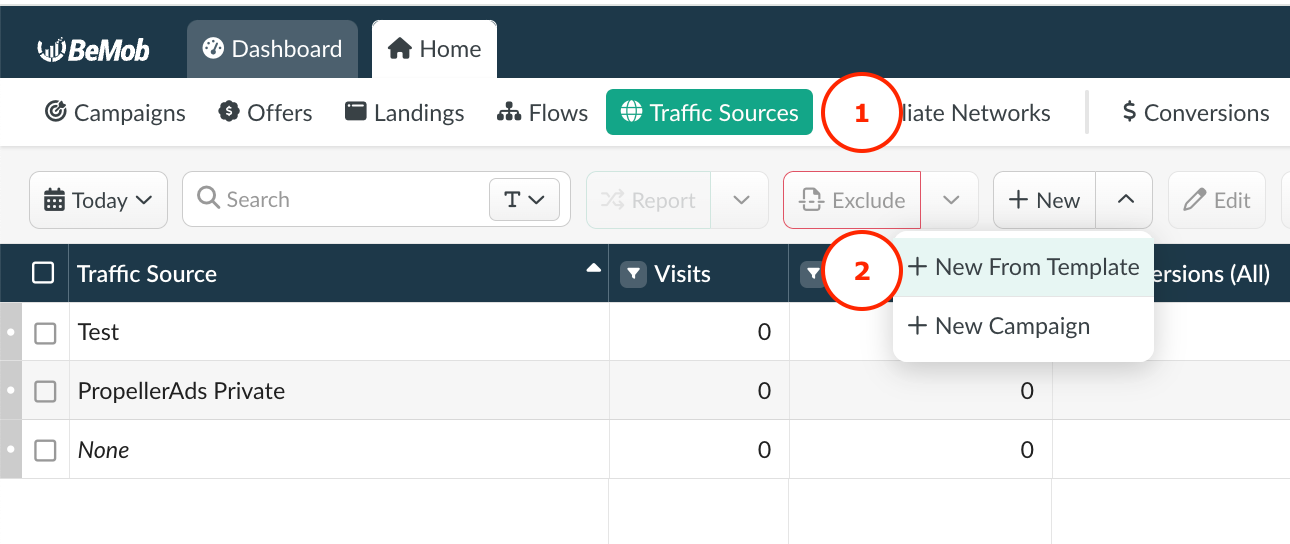
3. Select TrafficJunky.
4. Click on Next and scroll down to select the corresponding integration.

5. Select the integration name that corresponds to TrafficJunky from the list of available integrations.
6. Click on Save button.

After linking the integration in settings to the TrafficJunky template, proceed to the Campaigns settings within BeMob.
Place the campaign URL on the side of your TrafficJunky account.
Once traffic begins running to your ad campaign, cost data will be automatically sent to BeMob and displayed in the Cost column within your BeMob reports.

🔴 Every day at midnight, BeMob synchronizes all data for the past three days. This is necessary because cost data from the source sometimes appears with a delay, requiring an additional synchronization.
In other words, cost data may not be fully available at the end of the hour when the initial synchronization occurs. Therefore, we perform this additional synchronization at midnight to ensure data accuracy.
✍️ If you have any questions or need help with the settings contact our support team via live chat or at support@bemob.com